
Creating images used to be one of the slower parts of blogging for me.
You needed to find a suitable stock photo, resize it, add text, apply your branding, create different versions for social media, compress everything, and then upload it to WordPress.
AI image generators have changed that process considerably.
You can now describe the image you want and receive something original within minutes. Some tools can also edit existing images, create branded graphics, add readable text, produce different aspect ratios, or transform one idea into several variations.
That sounds ideal for a busy blogger.
But there is a catch.
An AI image tool only saves time when it helps you reach a usable result more quickly.
If you spend an hour rewriting prompts, correcting strange details, fixing inaccurate text, and generating version number 37, the technology has not really improved your workflow. It has simply given you a more entertaining way to procrastinate.
For bloggers, the best AI image generator is therefore not necessarily the one that creates the most artistic picture.
It is the one that helps you produce the images you genuinely need:
- Blog hero images
- Supporting article graphics
- Pinterest Pins
- Facebook and Instagram posts
- Infographics
- Product mockups
- Lead magnet covers
- Comparison graphics
- Branded illustrations
Ideally, it should do that without adding another expensive subscription or complicated platform to your week.
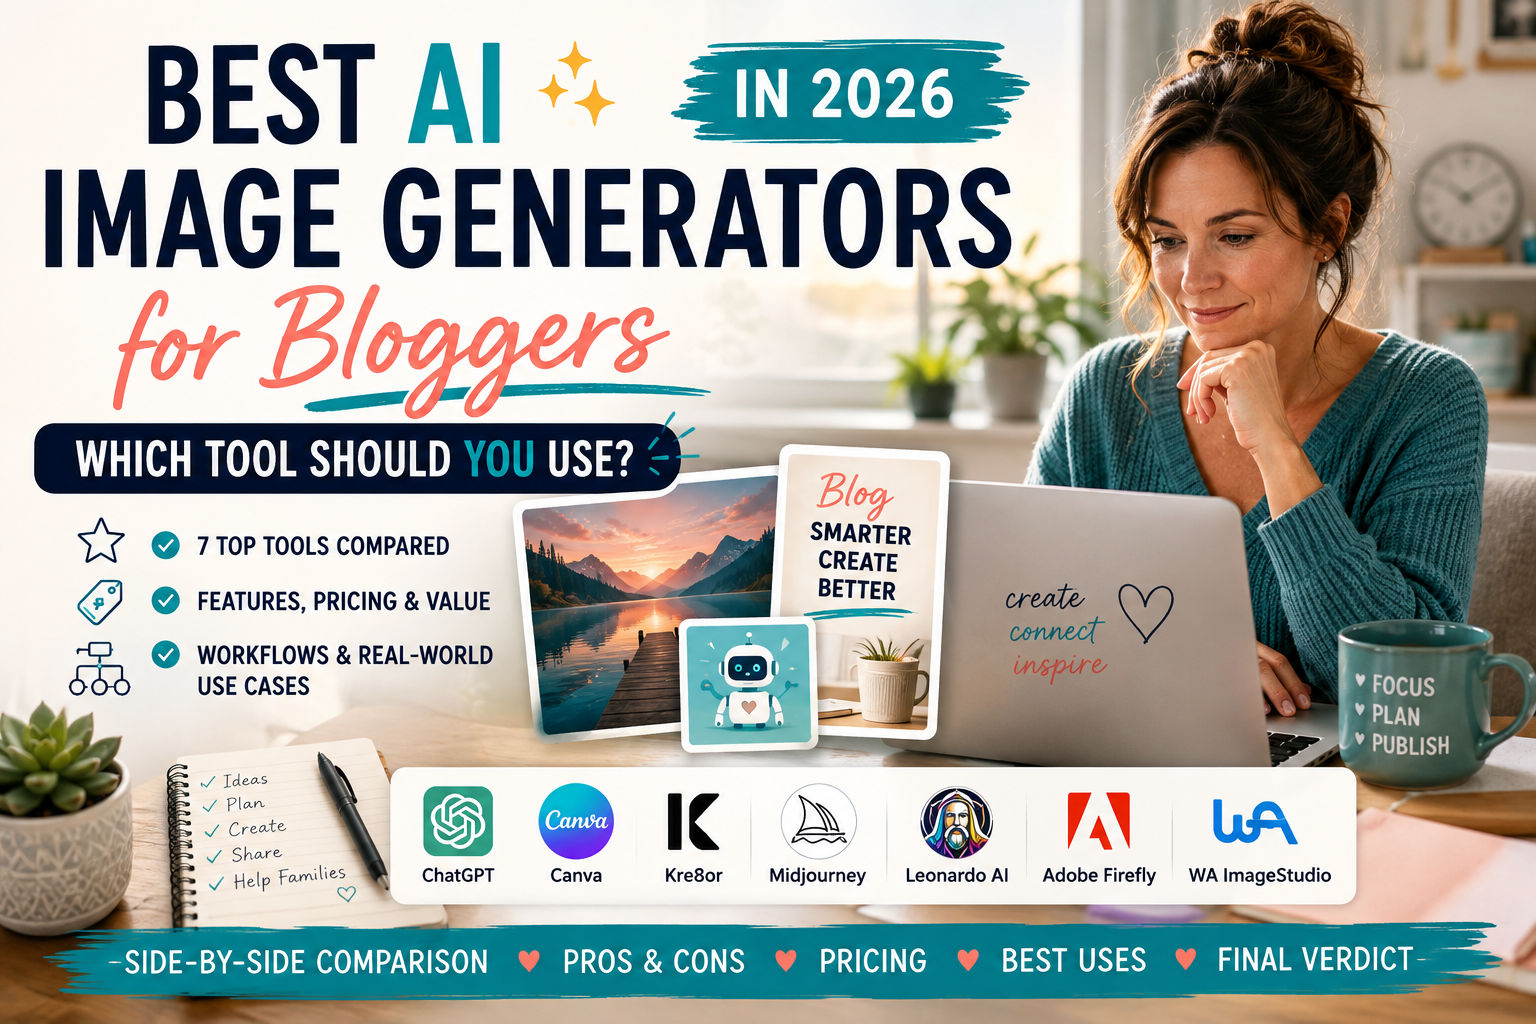
In this guide, I am comparing the AI image tools that appear most relevant to bloggers in 2026, including Kre8or, ChatGPT, Canva, Midjourney, Leonardo AI, Adobe Firefly, and Wealthy Affiliate’s ImageStudio.
I will look beyond image quality and consider how each option fits into a real blogging workflow—particularly for busy parents who do not have hours to experiment with every new AI tool that appears.
Some of these platforms are tools I use or have tested personally. Others are included through detailed research so that the guide covers the strongest options available. I will make that distinction clear throughout rather than pretending that every recommendation is based on identical hands-on experience.
Quick Answer: What Is the Best AI Image Generator for Bloggers?
There is no single winner for every blogger because these tools solve slightly different problems.
Based on my testing and research so far:
- Kre8or is my current best overall choice for a dedicated blogger-friendly image workflow.
- ChatGPT is the best option for combining planning, prompt development, image creation, and conversational editing.
- Canva remains the best tool for finishing branded graphics and creating accurate social-media layouts.
- Midjourney is one of the strongest choices for highly artistic and visually distinctive images.
- Leonardo AI is better suited to creators who want more control and experimentation.
- Adobe Firefly makes the most sense for bloggers already working within Adobe’s creative ecosystem.
- ImageStudio is a convenient starting point for Wealthy Affiliate members who want image generation built into their existing platform.
ChatGPT’s image tools can generate and edit visuals through natural-language conversation, work from uploaded images, iterate on composition, and handle text-based designs more effectively than earlier generations.
Canva combines AI image creation with editable layouts, templates, brand tools, and its wider design editor. That makes it particularly useful when the image itself is only one part of the finished graphic.
Midjourney continues to operate through paid subscription tiers and is aimed more squarely at image generation than general blogging or design workflow management.
My simplest way to explain the difference is:
ChatGPT helps me think through the image. Kre8or helps me create and explore it. Canva helps me finish and publish it.
You may not need all three.
A new blogger can achieve plenty with ChatGPT and Canva – or even Canva alone. A blogger publishing consistently across a website, Pinterest, and Facebook may eventually find that a dedicated image platform such as Kre8or earns its place.
The right answer depends on what stage your blog has reached, which is why I will also include a dedicated section later in this guide:
Which AI Image Tool Fits Your Blogging Stage?
Before reaching that decision, though, we need to establish what actually makes an AI image generator useful for bloggers.
How I Chose the Best AI Image Generators for Bloggers
Most AI image generator comparisons concentrate heavily on visual quality.
That matters, of course.
Nobody wants to publish a hero image featuring six fingers, a floating coffee cup, or a laptop keyboard apparently designed by someone who has only heard computers described over the telephone.
However, attractive images are only one part of the decision.
I assessed each tool using the following criteria.
1. Image Quality
Can it produce professional-looking images that are good enough to represent a credible blog?
I looked at:
- Realism
- Composition
- Lighting
- Detail
- Visual consistency
- Prompt accuracy
- Obvious AI mistakes
A beautiful image that ignores half the prompt is not necessarily a useful one.
2. Ease of Use
Busy bloggers do not need another tool that requires a week of tutorials before anything useful happens.
I considered:
- How easy it is to begin
- Whether the interface feels intuitive
- How quickly you can move from idea to image
- Whether beginners can achieve reasonable results
- How easy it is to correct or regenerate an image
3. Prompting and Creative Support
Some platforms expect you to arrive with a perfectly constructed prompt.
Others help you develop the idea through conversation, presets, styles, examples, community inspiration, or remixing tools.
This matters because many bloggers know what their article is about but do not automatically know how to translate that topic into a detailed visual brief.
4. Text Accuracy
Bloggers often need images containing words:
- Pinterest Pin titles
- Facebook graphics
- Infographic labels
- Product mockups
- Lead magnet covers
- Comparison charts
AI image generators have historically struggled with text. Newer image systems have improved considerably, but dense layouts and smaller wording can still require checking and correction. OpenAI, for example, now specifically highlights improved text rendering and support for posters, labels, headlines, infographics, and other structured designs within ChatGPT Images.
For important graphics, I still prefer to check every word and often finish the design in Canva.
5. Editing and Refinement
The first image is not always the final image.
I looked at whether each tool allows you to:
- Request changes conversationally
- Edit one part of an image
- Upload reference images
- Extend or reframe a composition
- Create variations
- Remix an existing visual
- Maintain a consistent subject or style
This is one area where a conversational tool such as ChatGPT can be especially convenient because you can continue refining the same idea through follow-up instructions.
6. Blogging Formats
A tool may create beautiful square artwork but still be awkward for everyday blogging.
I considered how well each platform supports:
- Wide blog hero images
- Portrait Pinterest graphics
- Square Facebook and Instagram images
- Infographics
- Device mockups
- Transparent-background elements
- Supporting illustrations
- Branded content series
Flexible aspect ratios and easy resizing can save a substantial amount of additional design work.
7. Export and Publishing Workflow
Creating the image is not the end of the job.
It still needs to be:
- Downloaded
- Named
- Potentially resized
- Compressed
- Converted into a suitable format
- Branded
- Uploaded to WordPress
- Reused across social platforms
A platform that produces a strong image but creates extra work at every later stage may not be the most efficient option.
Kre8or’s ability to export directly as WEBP was therefore a meaningful advantage during my testing because WEBP is already well suited to web publishing.
8. Value for Money
AI subscriptions have a sneaky habit of multiplying.
One platform helps with writing. Another makes images. Another edits video. Another schedules social posts. Before long, your supposedly flexible little blog has developed the monthly overheads of a small television studio.
I therefore considered:
- Free access
- Monthly price
- Annual price
- Credit limits
- Generation limits
- What else is included
- Whether the tool replaces anything you already pay for
- Whether a typical blogger will use it frequently enough
The important question is not simply:
Is this affordable?
It is:
Will this save enough time or improve enough content to justify another subscription?
9. Suitability for Beginners and Busy Parents
Finally, I considered whether each platform makes sense for the Flex For Families audience.
That means asking:
- Can it be learned in small blocks of time?
- Does it reduce work rather than create more?
- Is the pricing reasonable for a developing blog?
- Does it help someone publish consistently?
- Is it useful before the blog is earning money?
- Will a beginner actually use the extra features?
A technically powerful platform can still be the wrong recommendation when someone is publishing their first ten articles and trying to keep costs under control.
A Note About Testing and Rankings
This guide combines hands-on experience with research.
I currently use ChatGPT and Canva as part of my content workflow, and I purchased a Kre8or Spark annual membership so that I could test its image generation, Remix feature, community, challenges, credits, and exports properly.
Where I have not yet tested a platform to the same depth, I will say so.
That means these rankings are not presented as laboratory results or universal facts. They reflect how useful each tool appears for the practical work bloggers need to complete.
I will also update this guide as I gain more direct experience and as the platforms change.
That last point matters because AI image tools are developing ridiculously quickly.
Features, models, limits, interfaces, and pricing can all change. ChatGPT, for example, received another major image-generation update in April 2026, while Canva continues to expand the AI tools integrated into its wider visual-design platform.
So rather than asking which tool wins forever, this guide asks a more useful question:
Which AI image generator offers the best fit for a blogger’s workflow right now?
The Quick Decision
You do not need the most advanced AI image generator. You need the one that fits the work you are already trying to complete.
My current overall recommendation: Kre8or is the strongest dedicated option for bloggers who create images regularly. However, beginners may be better starting with tools they already have before paying for another subscription.
Family First. Flexibility Always.
Quick Note: I’m John Crossley, founder of Flex For Families. I review online business opportunities through the lens of family life, focusing on costs, time commitments, risks, and whether they genuinely help parents create more flexibility.
1. Kre8or: Best Overall AI Image Generator for Bloggers
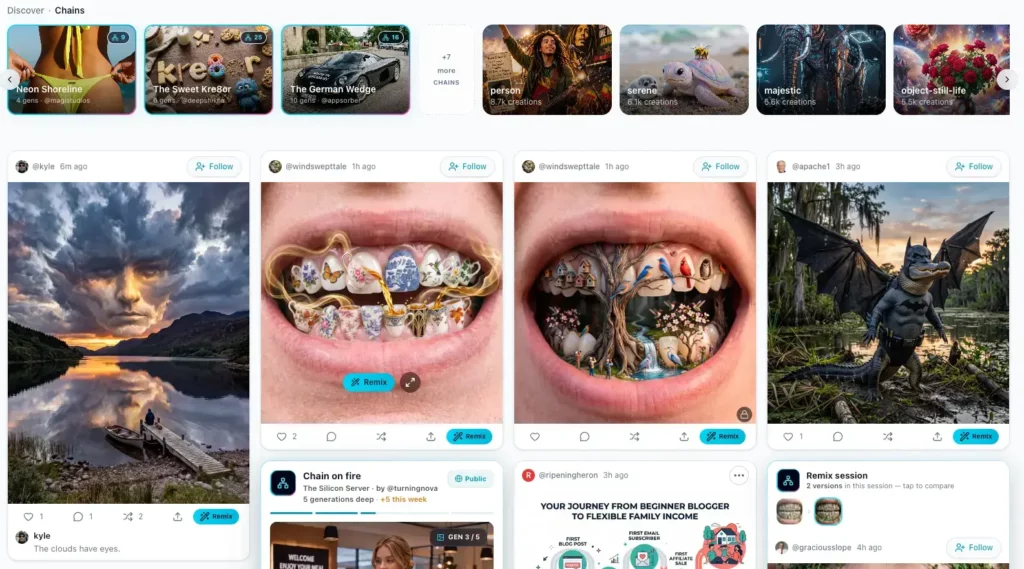
My Verdict
Kre8or is my current choice as the best overall dedicated AI image generator for bloggers.
That wording is important.
It does not replace everything ChatGPT can do, and it does not give you the same detailed layout control as Canva. Instead, Kre8or sits between those tools as a platform focused specifically on creating, exploring, remixing, and exporting AI-generated visuals.
After purchasing the annual Spark membership and using Kre8or for genuine Flex For Families projects, I found it capable of producing high-quality images without making the creation process feel unnecessarily technical.
I used it to experiment with:
- Blog hero images
- Pinterest concepts
- Facebook graphics
- Infographics
- Product mockups
- Device mockups
- Branded blogging scenes
- Creative vehicle concepts
- Remix transformations
- Images containing text
The results were not perfect every time—no AI image generator manages that—but the quality was strong enough to make Kre8or feel like a practical blogging tool rather than a novelty.
What Is Kre8or?
Kre8or is a dedicated AI image creation platform built around more than a blank prompt box.
You can describe the visual you want, select the preferred format, generate different options, explore work created by other members, take part in community challenges, and use Remix to develop new ideas from existing images.
That broader creative environment is one of the main reasons Kre8or stands out.
When you open a completely blank image generator, the hardest part is often knowing what to ask for. Kre8or’s community, challenges, styles, and Remix feature provide starting points when your own creativity has temporarily wandered off to make a cup of tea.
For bloggers, that can be genuinely useful.
You may know that an article needs a supporting graphic without having a fully formed visual concept. Seeing how other people have approached a theme can help you decide on the composition, style, lighting, mood, or format you want.
Why Kre8or Is My Best Overall Pick
Kre8or wins this category because it balances several things bloggers need reasonably well.
It offers:
- Strong image quality
- A beginner-friendly creation process
- Multiple image formats
- Creative inspiration
- Remix functionality
- Community features
- Direct WEBP exports
- Enough flexibility for blog and social-media use
Some competing tools may beat it in individual areas.
Midjourney may be the stronger choice for highly artistic work. ChatGPT offers a more natural conversational planning process. Canva provides more precise control over finished layouts and text.
However, Kre8or brings together the most useful parts of a dedicated image workflow without requiring the blogger to become an advanced digital artist.
That makes it a strong middle ground.
Kre8or Image Quality
Image quality was one of the strongest parts of my testing.
With a detailed prompt, Kre8or could produce polished visuals with:
- Convincing lighting
- Strong compositions
- Clear focal points
- Professional colour balance
- Realistic settings
- Attractive illustrative styles
It performed particularly well when I gave it clear instructions about:
- Who or what should appear
- The setting
- The mood
- The colour palette
- The image format
- The intended purpose
- What it should avoid
That final point matters.
AI image prompts often improve when you specify not only what you want but also what you do not want. For Flex For Families, I regularly ask tools to avoid robots, neon technology effects, luxury-office clichés, piles of money, unrealistic influencer imagery, and cluttered backgrounds.
Without those instructions, AI has a remarkable ability to conclude that every article about blogging requires a glowing robot hovering behind a MacBook.
Kre8or generally followed detailed visual direction well, although the occasional strange hand, awkward object, or misspelled word can still appear.
Every image therefore needs checking before publication.
Is Kre8or Easy to Use?
Kre8or is approachable enough for beginners.
You do not need design experience or specialist knowledge to create your first image. The basic process is straightforward:
- Decide what you want to create.
- Write or paste your prompt.
- Choose the image format or available settings.
- Generate the image.
- Review the results.
- Refine, Remix, or export the best option.
The harder skill is not operating the platform.
It is learning to communicate your idea clearly.
A short prompt such as:
Parent blogger working from home
may produce an acceptable image, but it leaves most creative decisions to the AI.
A more useful prompt explains the person, environment, lighting, composition, brand colours, emotional tone, image purpose, and unwanted elements.
Kre8or can make image creation faster, but it cannot read the half-developed idea still floating around inside your head. The quality of the instruction continues to influence the quality of the result.
Kre8or Remix
Remix is one of Kre8or’s most interesting features.
Rather than beginning every creation from scratch, you can use an existing image as inspiration and transform it into something new.
That could mean changing:
- The visual style
- The setting
- The subject
- The mood
- The format
- The creative concept
For example, a standard portrait could become a magazine-cover concept, a realistic scene could be reinterpreted as an illustration, or an existing composition could inspire a branded version for your own niche.
This makes Remix valuable for bloggers who struggle with the blank-page stage of image creation.
It is also useful for experimentation. You can take an idea that is nearly right and explore a different direction without rebuilding the entire concept yourself.
However, Remix should be treated as inspiration rather than a shortcut for copying another creator’s work.
Your finished image should suit your own article, audience, branding, and purpose.
Community and Challenges
Kre8or’s community gives it a different feel from a purely functional image-generation tool.
You can view images created by other members, discover styles and prompt ideas, and take part in creative challenges.
This may sound secondary to the core image generator, but it can help users develop their prompting skills.
By looking at successful creations, you begin to notice:
- How prompts describe lighting
- How compositions are structured
- Which styles produce certain results
- How much detail strong prompts contain
- How one concept can be interpreted in several ways
The challenges also encourage you to create something outside your normal blogging routine.
I entered one during my testing, and although a community challenge is not essential to publishing a blog post, it gave me another way to explore the platform and see what it could do.
The potential downside is distraction.
The community can inspire your next image, but it can also become another place to browse when you were supposed to be finishing Wednesday’s article.
As with most AI tools, the trick is to use the creative features without allowing experimentation to take over the entire workflow.
Kre8or for Blog Images
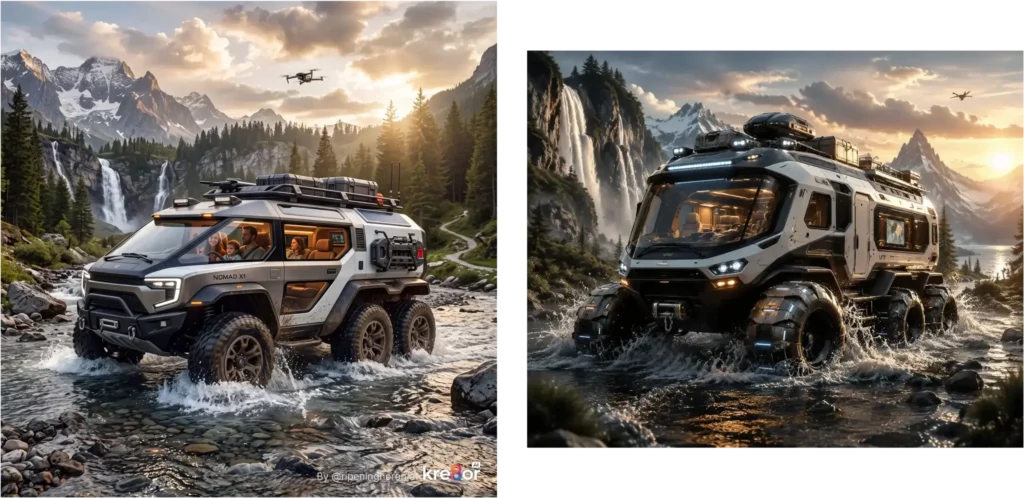
Kre8or works well for original blog visuals such as:
- Hero images
- Section graphics
- Concept illustrations
- Realistic lifestyle scenes
- Product-style mockups
- Device displays
- Supporting visual explanations
For Flex For Families, I particularly value being able to describe the exact kind of parent-blogging scene I need rather than searching through generic stock photographs.
I can specify:
- A dad rather than a mum
- A realistic family home
- A warm and lived-in workspace
- Teal and coral brand accents
- A cup of tea
- A notebook
- Subtle signs of family life
- A calm, practical mood
That gives the image a better chance of matching the article and the wider brand.
It also makes it easier to avoid seeing the same smiling laptop user that appears on another 400 blogging websites.
Kre8or for Pinterest and Social Media
Kre8or can generate visual concepts in portrait and square formats, making it useful for Pinterest, Facebook, and Instagram.
However, there is an important distinction between creating the main visual and finishing the final social graphic.
Kre8or may successfully produce:
- The background scene
- The central subject
- The composition
- The branded colour palette
- A simple headline
- A complete poster-style design
But I would still check all generated text carefully.
For social graphics where the wording must be completely accurate, Canva remains my preferred finishing tool. I can place the Kre8or-generated image into a branded template, add the final headline manually, position the logo correctly, and create alternative sizes.
That workflow may involve two tools, but it often produces a more dependable result:
Kre8or creates the original visual. Canva gives me final control.
WEBP Export
The ability to export an image directly as WEBP is a small feature that makes practical sense for bloggers.
WEBP files can provide good image quality at a lower file size than older formats in many situations, which makes them useful for web publishing.
Without direct WEBP export, you may need to:
- Download the image as PNG or JPEG.
- Open another tool.
- Convert the file.
- Compress it.
- Download it again.
- Upload the final version to WordPress.
None of those steps is especially difficult, but repeated across hundreds of images, they become another bit of friction.
Kre8or’s export option reduces that process.
I would still check the final file dimensions and size before uploading it, because choosing WEBP does not automatically guarantee that every image is perfectly optimised.
Kre8or Pricing and Credits
Kre8or uses a credit-based model, with paid membership options providing a set allowance for image creation.
Credit systems are worth paying attention to because the real value depends on how quickly you use them.
A blogger who plans images carefully and publishes regularly may get good value from a paid membership.
Someone who repeatedly generates dozens of nearly identical versions may burn through credits without creating much usable content.
Before subscribing, I would ask:
- How many images do I genuinely create each month?
- Will I use Kre8or for both blog and social content?
- Am I already paying for another tool that can create acceptable images?
- Will the community and Remix features help my workflow?
- Is the blog earning enough to justify another annual cost?
- Am I buying this for a real need or because AI image generation is fun?
That last question is annoyingly important.
A creative platform can feel productive even when you are avoiding the less exciting work of writing, publishing, and promoting content.
What I Like About Kre8or
The main strengths are:
- Strong image quality
- Easy starting process
- Useful creative inspiration
- Remix functionality
- Community challenges
- Multiple blogging and social formats
- Direct WEBP exports
- Good potential for branded visual content
- More focused than a general-purpose AI tool
I also like that it encourages experimentation without feeling as technically intimidating as some advanced creative platforms.
What Could Be Better
Kre8or is not perfect.
The main limitations are:
- Image quality still depends heavily on the prompt
- Generated text must be checked
- AI mistakes can still appear
- Credits can encourage overthinking each generation
- A separate design tool may still be needed
- The community can become a distraction
- Another paid subscription will not make sense for every blogger
- It does not replace the wider planning ability of ChatGPT
- It does not offer Canva’s level of manual layout control
There is also a risk that users expect a dedicated image platform to remove the need for creative judgement.
It does not.
You still need to decide whether the image matches the article, reflects your brand, makes sense to the reader, and is worth publishing.
Who Is Kre8or Best For?
Kre8or is best suited to:
- Bloggers publishing consistently
- Bloggers who need several images each week
- Pinterest-focused content creators
- Affiliate marketers creating product and comparison visuals
- Bloggers who want original images instead of stock photos
- Creators interested in Remix and community inspiration
- People who value direct WEBP exports
- Bloggers prepared to learn better prompting
- Busy parents who want a repeatable image workflow
It becomes easier to justify when image creation is already a regular part of your publishing system.
Who Should Avoid Kre8or for Now?
Kre8or may not be necessary yet if you:
- Have only just started your blog
- Publish infrequently
- Already get everything you need from ChatGPT or Canva
- Rarely create original images
- Have not yet established your visual branding
- Are trying to keep startup costs as low as possible
- Tend to spend too long experimenting with AI tools
- Need precise design control more than image generation
A new blogger does not need to build the ultimate seven-platform creative workflow before publishing their first article.
Start with what you already have.
Add a dedicated tool when the volume of work or the limitations of your current setup make the benefit clear.
Kre8or Pros and Cons
Pros
- Strong-quality AI images
- Beginner-friendly workflow
- Useful Remix feature
- Active creative community
- Challenges and inspiration
- Suitable for several blogging formats
- Direct WEBP export
- Good fit for regular content creators
Cons
- Requires another subscription
- Credit limits may affect heavy users
- Text is not always dependable
- Results still need careful checking
- Does not replace Canva for precise design work
- May be unnecessary for occasional image creation
Kre8or Rating for Bloggers
| Category | Rating |
|---|---|
| Ease of Use | 4.5/5 |
| Image Quality | 4.5/5 |
| Prompting | 4/5 |
| Remix | 4.5/5 |
| Community | 4.5/5 |
| Export Options | 4.5/5 |
| Value for Money | 4/5 |
| Overall Early Rating | 4.4/5 |
This is an early rating based on my current hands-on experience with the Spark membership.
I will continue assessing whether Kre8or maintains that value as I use it for more blog posts, social graphics, infographics, and branded content.
Bottom Line
Kre8or is my best overall dedicated AI image generator for bloggers because it combines strong visual quality with an approachable workflow, creative inspiration, Remix, community features, and useful exports.
It is not an essential purchase for every new blogger.
However, for someone who is publishing consistently and regularly needs original blog and social-media images, Kre8or has the potential to save time and improve the visual quality of their content.
Affiliate note: My affiliate link is contained within the full Kre8or review rather than this comparison guide. That allows you to explore my detailed hands-on findings before deciding whether it is right for you.
2. ChatGPT: Best for Planning, Prompt Development and Conversational Image Creation
My Verdict
ChatGPT is my best choice for bloggers who want more than an image generator.
It can help you:
- Decide what image an article actually needs
- Turn a rough idea into a detailed prompt
- Create the image
- Review the result
- Request specific changes
- Adapt the concept for another format
- Develop captions, alt text, and supporting content
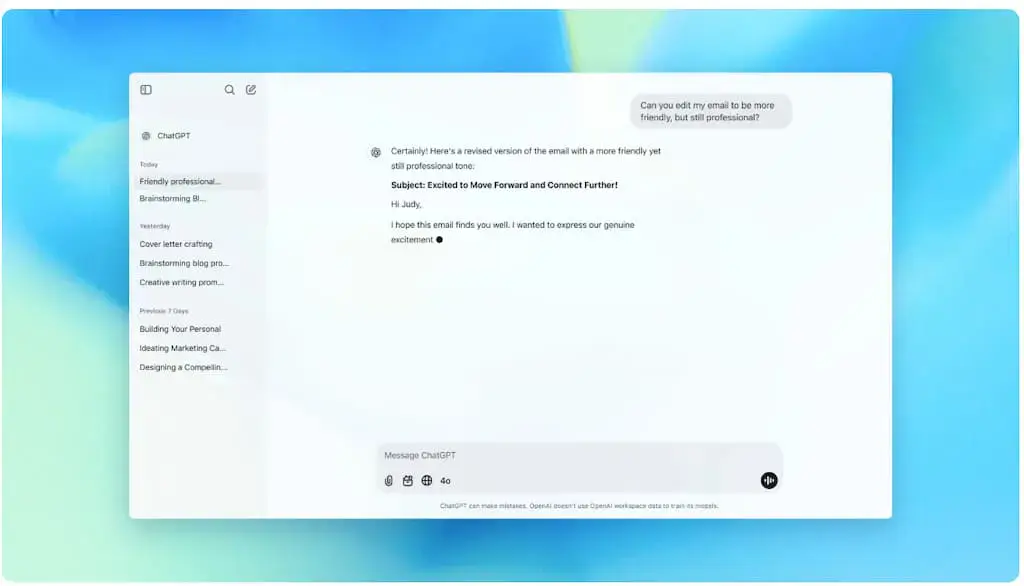
That makes ChatGPT less like a standalone image machine and more like a creative partner working across the whole content process.
For my own workflow, that distinction is important.
I rarely begin with a perfectly formed visual brief. I may know the article topic, the section where the image will appear, and the message I want it to support—but not exactly what the finished image should look like.
ChatGPT helps bridge that gap.
It can discuss the article, suggest several visual directions, develop the strongest concept, write a detailed prompt, and then create the image within the same conversation.
That is why it remains one of the most useful AI tools in my blogging toolkit, even when I sometimes use Kre8or for the final image generation.
Why ChatGPT Is Different From a Dedicated Image Generator
A dedicated image platform usually begins with a prompt box.
ChatGPT can begin much earlier.
You can give it:
- The blog post title
- The section you are illustrating
- Your target audience
- Your brand colours
- The mood you want
- The platform where the image will appear
- Examples of previous visuals
- A rough idea that is not yet fully developed
It can then help turn that information into a usable visual concept.
For example, instead of beginning with:
Create a parent blogger working from home.
You could ask ChatGPT:
I am writing a blog post about how long it takes to make money blogging. I need a realistic supporting image for busy parents that communicates slow but steady progress without using money clichés. What visual concepts could work?
ChatGPT can suggest several directions before any image is generated.
You might choose:
- A parent building a path one stepping stone at a time
- A plant growing beside a laptop over several stages
- A blogging progress timeline pinned above a home desk
- A parent completing small tasks during different parts of the day
Only then do you develop the final prompt.
That planning stage can prevent wasted generations because you have already thought through what the image is meant to communicate.
ChatGPT Images in 2026
ChatGPT’s current image tools can generate original visuals, edit uploaded images, preserve important details during revisions, render structured layouts, and create images in a wider variety of formats and styles than earlier versions.
OpenAI’s April 2026 Images 2.0 release highlighted improvements in instruction-following, editing, text rendering, multilingual content, realism, stylistic range, and complex layouts such as posters and infographics.
The image workflow is conversational.
You can create an image and then continue with instructions such as:
- Make the workspace feel warmer and more lived-in.
- Replace the businesswoman with a dad blogger.
- Change the accent colours to teal and coral.
- Remove the floating icons.
- Make the layout vertical for Pinterest.
- Keep the person the same but change the background.
- Leave more space at the top for a headline.
- Turn this realistic scene into an editorial illustration.
OpenAI also provides guidance on using uploaded references, adding titles and labels, and working with infographics or dense layouts.
That ability to refine an image through ordinary language is one of ChatGPT’s biggest strengths for beginners.
You do not need to understand complex editing terminology. You can simply explain what feels wrong.
ChatGPT for Developing Better Image Prompts
Prompt development is probably where ChatGPT adds the most value to my workflow.
A good image prompt often needs to define:
- The subject
- The setting
- The action
- The composition
- The camera angle
- The lighting
- The visual style
- The emotional tone
- The brand colours
- The aspect ratio
- The intended use
- The elements to avoid
Remembering all of that every time can become another task in itself.
Instead, I can explain what the image is for and ask ChatGPT to build a complete prompt.
For example:
Create a detailed image-generation prompt for a Flex For Families blog hero image. The article is about whether blogging can become passive income. It should feature a realistic dad blogger in a family home, use teal and coral accents, feel honest rather than aspirational, and avoid money, robots, luxury offices, and exaggerated success imagery.
ChatGPT can turn that into a much fuller creative brief.
I can then:
- Generate the image within ChatGPT
- Paste the prompt into Kre8or
- Adapt it for Canva
- Create separate Pinterest and Facebook versions
- Save it as a reusable brand template
This makes ChatGPT especially useful when working across several creative platforms.
ChatGPT for Blog Hero Images
ChatGPT works well for creating original hero-image concepts because it can use the context of the article.
If the blog post has already been developed in the conversation, I can ask for a hero image that reflects:
- The central promise
- The emotional tone
- The intended reader
- The article’s conclusion
- The Flex For Families brand
That is more useful than generating a generic image based only on the title.
For example, an article called Why Blogging Feels Slow at First could easily produce the usual image of a frustrated person staring at a laptop.
But that would only illustrate the problem.
A better visual might show a parent laying one small piece of a pathway at a time, with the completed route gradually appearing ahead. That communicates the article’s real message: progress is happening even when the final result is not visible yet.
ChatGPT is good at helping uncover that deeper concept.
ChatGPT for Pinterest Images
ChatGPT can create complete Pinterest-style graphics with:
- Portrait layouts
- Headlines
- Supporting text
- Branded colour palettes
- Lifestyle imagery
- Infographic structures
- Visual hierarchy
Its text rendering is considerably more capable than older AI image systems, and OpenAI specifically positions the current model for posters, labels, headlines, infographics, and other structured visual assets.
However, I would still inspect every word carefully.
Even strong image models can:
- Misspell a word
- Repeat a phrase
- Alter punctuation
- Distort smaller text
- Create inconsistent spacing
- Change wording during a later edit
For a Pinterest Pin where the title needs to be exactly right, I often prefer one of two approaches.
Option 1: Generate the full Pin in ChatGPT
This works when:
- The wording is short
- The layout is simple
- The text renders correctly
- I want a more creative poster-style design
Option 2: Generate the visual in ChatGPT and finish it in Canva
This works when:
- The headline is longer
- I need complete brand consistency
- I am creating several Pin variations
- I want precise control over font, spacing, logo placement, and alignment
The second option is usually the more dependable long-term workflow.
ChatGPT for Facebook and Social Graphics
ChatGPT is also useful for square social-media images.
It can take the same core concept and adapt it into:
- A Facebook square
- An Instagram post
- A quote graphic
- A simple educational graphic
- A promotional review image
- A before-and-after visual
- A humorous blogging scene
Because the conversation already contains the article context, it can also suggest what kind of social image would support each caption.
That means I do not have to begin every social asset from scratch.
For example, from one review article it could help create:
- A straightforward review graphic
- A problem-focused image
- A comparison graphic
- A workflow infographic
- A humorous post about endlessly regenerating images
- A quote-style takeaway
That variety is valuable because repeating the same hero image across every social post can quickly make a page feel automated.
ChatGPT for Infographics
Infographics are one of the areas where newer ChatGPT image generation has become much more useful.
You can provide:
- A process
- A list of stages
- A comparison
- A timeline
- A framework
- A decision tree
- A set of statistics
ChatGPT can then help structure the information visually before generating the design.
For example, the Busy Parent Blogger’s AI Image Workflow could be broken into:
- Define the purpose
- Build the prompt
- Generate the image
- Check the details
- Finish and publish
ChatGPT can help decide:
- Which steps need icons
- How the information should flow
- Which wording can be shortened
- Where the takeaway should appear
- Which layout suits Pinterest or a blog post
This is more valuable than simply telling an image generator to “make an infographic.”
Dense infographics still need careful checking, and smaller text may not always be dependable. OpenAI’s own image-generation guidance recommends clear prompting and iterative refinement for complex layouts.
For important educational graphics, I would usually treat the generated result as either:
- A finished design that needs proofreading
- A strong visual draft to rebuild or refine in Canva
Editing Existing Images With ChatGPT
ChatGPT is particularly convenient when an image is almost right.
You can upload or continue working with an existing visual and request targeted changes.
OpenAI describes its image tools as capable of editing images while preserving important details, allowing users to refine an existing result rather than regenerating everything from the beginning.
Useful blogging edits could include:
- Removing an unwanted object
- Replacing the background
- Changing clothing colours
- Adding more space for text
- Adjusting the image format
- Changing the person shown
- Cleaning up the composition
- Converting a photo-style image into an illustration
- Keeping the subject while adapting the scene
This conversational editing process is helpful when you do not want to learn a separate photo-editing platform for every small change.
However, very precise edits may still require several attempts, and every revised image should be checked for unintended changes elsewhere.
Using Reference Images and Brand Examples
Another advantage is the ability to provide visual references.
You can upload:
- Your logo
- A previous branded graphic
- A colour palette
- A product screenshot
- A device mockup
- A photograph
- A rough sketch
- A layout you want to emulate structurally
ChatGPT can use those materials to understand the intended direction.
That does not guarantee perfect brand consistency, but it gives the model more useful information than a text prompt alone.
For Flex For Families, reference images can help reinforce:
- Teal and coral colour use
- Warm family-home settings
- Realistic parent-blogging scenes
- Clean editorial layouts
- The balance between professional and approachable
- The avoidance of hype-heavy online-income imagery
The better the reference, the less work the AI has to do guessing what “on-brand” means.
ChatGPT’s Biggest Strength: Context
The most important advantage ChatGPT has over many image generators is context.
It can understand the wider task.
If we have just written an article together, ChatGPT already knows:
- The audience
- The key message
- The tone
- The section structure
- The most important takeaway
- Which clichés the article avoids
- How the content fits the wider site
That allows the image discussion to begin from the article itself rather than from an isolated prompt.
For busy bloggers, this can reduce the amount of explaining and copying between tools.
It also makes ChatGPT useful for much more than the final visual.
In the same conversation, it can help create:
- The image concept
- The generation prompt
- The alt text
- The caption
- The Pinterest title
- The Pinterest description
- The Facebook post
- The image filename
- The placement recommendation
That is a genuinely efficient workflow when used well.
ChatGPT’s Biggest Weakness: It Can Encourage Endless Refinement
Conversational editing is useful, but it can also make it very easy to keep tinkering.
You can always ask for:
- Another version
- A warmer version
- A cleaner version
- A more realistic version
- A less realistic version
- A new layout
- A slightly different expression
- One tiny adjustment that somehow changes six other things
Before long, the image has become a small creative saga.
This is not entirely the tool’s fault.
The problem is that AI makes experimentation cheap and immediate, so it becomes tempting to keep going after the image is already good enough.
For a busy parent blogger, I think a sensible rule is:
Decide what the image needs to achieve before generating it—and stop when it achieves that purpose.
The aim is not to produce the greatest AI image ever created.
The aim is to publish a useful article with a suitable visual.
ChatGPT Pricing and Access
ChatGPT offers free access, although free-tier image creation is subject to usage limits. Paid plans provide broader access and higher allowances, but limits can still vary by plan and demand.
This creates an important value advantage.
Many bloggers already use ChatGPT for:
- Content planning
- Research support
- Outlining
- Editing
- Idea development
- Social posts
- Email content
- Technical help
If image generation is included within a subscription you already use regularly, the additional cost of creating images may effectively be zero.
That makes ChatGPT particularly attractive for new bloggers who are not yet ready to pay for a separate image-generation platform.
A dedicated tool such as Kre8or needs to offer enough additional value to justify becoming another subscription.
What I Like About ChatGPT for Images
The main strengths are:
- Combines planning and image creation
- Excellent for developing detailed prompts
- Understands the wider article context
- Supports conversational refinement
- Can work with uploaded reference images
- Useful for hero images, social graphics, mockups, and infographics
- Improved text rendering
- Can create several visual directions from one idea
- Helps with captions, alt text, filenames, and supporting content
- May already be included in a subscription you use for other work
It is especially useful when the main challenge is not pressing the generate button but deciding what the image should communicate.
What Could Be Better
The main limitations are:
- Text still needs checking
- Small details can change during edits
- Precise revisions may take several attempts
- Output may need resizing or conversion
- It does not provide Canva’s manual layout control
- It lacks Kre8or’s dedicated creator community and Remix environment
- Generating multiple versions can become time-consuming
- Usage limits depend on the plan
- Strong results still require clear direction
- Brand consistency is not automatic
ChatGPT can simplify the creative process, but it does not remove the need for judgement, proofreading, or a defined workflow.
Who Is ChatGPT Best For?
ChatGPT is best suited to:
- New bloggers who want one versatile AI subscription
- Bloggers who need help developing visual ideas
- People who find image prompting difficult
- Bloggers already using ChatGPT for content creation
- Creators who prefer conversational editing
- Busy parents who want planning and creation in one place
- Bloggers making hero images, social graphics, and infographics
- People who want to adapt one concept across several formats
- Bloggers who do not yet need a dedicated image platform
It is probably the most sensible starting point for someone who already has access and wants to explore AI images without immediately adding another paid tool.
Who May Prefer Another Tool?
ChatGPT may not be the best primary choice if you:
- Want a dedicated image-focused community
- Prefer browsing visual styles and Remix ideas
- Need advanced artistic controls
- Create large volumes of images every week
- Want direct WEBP export
- Need precise drag-and-drop design control
- Primarily create template-based social graphics
- Already have a highly specialised creative workflow
In those cases, Kre8or, Canva, Midjourney, Leonardo AI, or Adobe Firefly may fit the work more naturally.
ChatGPT Pros and Cons
Pros
- Strong all-round creative assistant
- Excellent prompt-development support
- Conversational image editing
- Uses the wider content context
- Supports uploaded references
- Improved text and layout handling
- Useful across many blogging formats
- Good value when already used for other tasks
- Suitable for beginners
Cons
- Not a dedicated image platform
- Text and details still require checking
- Edits can unintentionally alter other elements
- No direct WEBP workflow
- Less manual design control than Canva
- No Kre8or-style creator community
- Easy to waste time refining endlessly
- Limits depend on the subscription tier
ChatGPT Rating for Bloggers
| Category | Rating |
|---|---|
| Ease of Use | 4.5/5 |
| Image Quality | 4.5/5 |
| Prompting Support | 5/5 |
| Conversational Editing | 4.5/5 |
| Text and Layouts | 4.5/5 |
| Blogging Workflow | 5/5 |
| Export Options | 3.5/5 |
| Value for Money | 4.5/5 |
| Overall Rating | 4.6/5 |
ChatGPT receives a slightly higher overall workflow score than Kre8or because it supports far more of the blogging process.
However, Kre8or remains my current winner for the narrower category of best dedicated AI image generator for bloggers.
Those are two different verdicts rather than a contradiction.
Bottom Line
ChatGPT is the best option for bloggers who want to plan, prompt, create, refine, and repurpose images within one conversation.
Its biggest strength is not simply the image quality.
It is the ability to understand why the image is being created and help develop the idea before generating anything.
For beginners and busy parent bloggers, that versatility may be more valuable than paying for a separate specialist platform straight away.
My practical recommendation is:
Use ChatGPT to think through the image—even when you later create or finish it somewhere else.
3. Canva: Best for Finishing Branded Graphics and Social Content
My Verdict
Canva is my best choice for turning AI-generated ideas into polished, branded, publish-ready graphics.
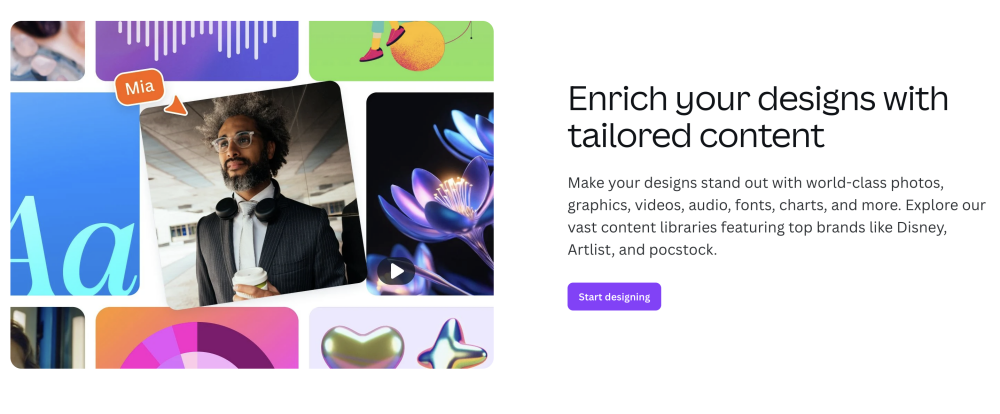
It is no longer simply a drag-and-drop design platform with a large template library. Canva now includes conversational AI, text-to-image generation, editable AI-created designs, photo-editing tools, and a growing collection of features designed to speed up visual content creation.
However, image generation is not the main reason Canva remains essential to my blogging workflow.
Its real strength is control.
Canva allows me to take an image created in ChatGPT, Kre8or, Canva itself, or another platform and finish it properly by adjusting:
- The headline
- Fonts
- Colours
- Spacing
- Logo placement
- Image position
- Background elements
- Calls to action
- Dimensions
- File format
- Overall brand consistency
That makes Canva less exciting than endlessly generating dramatic AI artwork—but often far more useful.
For bloggers, the final five minutes of design work can matter more than the first generation.
Why Canva Is Different From the Other Tools
Kre8or and Midjourney primarily help you create images.
ChatGPT helps you develop the idea and generate it through conversation.
Canva helps turn the image into a finished content asset.
That might be:
- A Pinterest Pin
- A Facebook graphic
- An Instagram post
- A blog hero image
- A lead magnet cover
- A comparison chart
- An infographic
- A YouTube thumbnail
- A printable
- A product mockup
- A branded quote graphic
You are not restricted to accepting whatever layout the AI decides to produce.
You can click on individual elements and move them.
You can change the exact wording.
You can adjust the font size by one point.
You can move the logo slightly to the left because it has been bothering you for the last seven minutes.
That level of manual control is important when the graphic represents your brand.
Canva’s AI Image and Design Tools
Canva includes several AI-powered creation tools within its wider design environment.
Canva AI can work conversationally to generate designs and other visual content, while Magic Design can produce collections of layouts and apply colours and fonts from a Canva Pro Brand Kit.
Canva also supports AI image generation through tools such as Magic Media and Dream Lab. Canva describes Dream Lab as being powered by Leonardo.AI’s Phoenix model, while its broader image-generation options have included Magic Media and other integrated models.
The most significant recent development is Canva AI 2.0.
Announced in April 2026, Canva says the updated system can generate fully layered and editable designs from a prompt rather than producing only a flat image. That means elements such as text, colours, fonts, and parts of the layout can be adjusted after generation.
That is particularly relevant for bloggers.
A beautiful flat image containing one misspelled word can be difficult to rescue.
An editable design gives you a much better chance of correcting the wording, repositioning the elements, applying your branding, and adapting the result for publication.
Canva for Pinterest Pins
Pinterest is one of the clearest reasons a blogger may want Canva.
A successful Pinterest Pin usually needs more than an attractive background image.
It also needs:
- A clear headline
- Strong contrast
- Readable typography
- Suitable spacing
- A vertical layout
- Consistent branding
- A reason to click
- A design that still works on a small screen
AI image generators can create impressive poster-style Pins, but the text and layout do not always behave exactly as intended.
Canva gives you direct control.
You can begin with:
- A Canva template
- A blank portrait design
- An AI-generated Canva layout
- An image created in Kre8or
- An image created in ChatGPT
- A stock photograph
- One of your own photographs
You can then add the headline manually and know that it is accurate.
That last point may sound basic, but accuracy beats creativity when the AI decides your article is called:
Best AI Imadge Gennerators for Blogers
A visually impressive spelling mistake is still a spelling mistake.
Creating Several Pinterest Pins From One Article
Canva is especially valuable when creating several Pin variations for the same blog post.
For example, one article could have:
- A straightforward title Pin
- A problem-focused Pin
- A benefit-led Pin
- A comparison Pin
- A checklist Pin
- A quote-style Pin
You can duplicate the original design, change the headline, swap the central image, adjust the layout, and retain the same visual identity.
That is usually faster than asking an AI image generator to recreate your exact branding six times.
It also gives you more control over variety.
The Pins can feel connected without looking identical.
For Flex For Families, I can retain:
- The teal and coral palette
- Consistent fonts
- The logo
- Similar spacing
- Recognisable graphic elements
- A family-friendly visual style
while testing different headlines and image concepts.
Canva for Facebook and Instagram Graphics
Canva works equally well for square social-media content.
I use it to create or finish:
- Facebook post images
- Instagram graphics
- Educational posts
- Quotes
- Review graphics
- Promotional images
- Infographics
- Branded content series
Its template-based approach makes recurring social content much easier.
Instead of redesigning every image from scratch, you can create a set of reusable layouts.
For example:
- Monday motivation
- Tuesday blogging tip
- Wednesday reality check
- Thursday AI workflow
- Friday question post
Each series can keep the same core format while changing the text and supporting image.
That is far more efficient than treating every social post as a completely separate design project.
Canva also provides AI-assisted social-post creation tools, although I would still review and personalise the output rather than publishing generic generated copy without editing.
Canva Brand Kit
Brand Kit is one of Canva Pro’s most useful features for bloggers who are trying to build a recognisable identity.
It allows you to organise your:
- Logos
- Brand colours
- Fonts
- Images
- Other brand assets
in one place. Canva states that Brand Kit can store official logos, colours, fonts, and assets, and that Pro users can manage multiple brands.
For Flex For Families, that means I do not have to remember the teal and coral colour codes every time I open a design.
The brand elements are already available.
That helps with consistency across:
- Blog graphics
- Pinterest Pins
- Facebook posts
- Lead magnets
- YouTube thumbnails
- Presentations
- Printable resources
Consistency does not mean every design must look identical.
It means the reader should gradually recognise that the content comes from the same source.
Canva makes that much easier for someone who is not a professional graphic designer.
On-Brand AI Images
Canva can also use Brand Kit images as guidance when creating new on-brand visuals through Dream Lab. Its help documentation explains that users can generate images matching a brand’s style by using Brand Kit photos as references.
This could be useful for bloggers who want AI-generated images to share a more consistent visual direction.
However, I would keep expectations realistic.
Providing a brand reference can improve consistency, but it does not mean every image will automatically match your previous designs perfectly.
You still need to review:
- Colour use
- Mood
- Subject choice
- Composition
- Accuracy
- Whether the image actually fits the article
Brand tools support judgement.
They do not replace it.
Magic Resize and Magic Switch
One of the most practical Canva Pro features is Magic Resize, now part of Canva’s wider Magic Switch functionality.
Canva says Magic Switch can resize one design into multiple formats for different channels and can also transform or translate designs.
For a blogger, that means one design can become:
- A Pinterest Pin
- A Facebook square
- An Instagram post
- A presentation slide
- A different promotional format
without rebuilding everything from the beginning.
The word can is important.
Automatic resizing saves time, but it does not always produce a perfect finished layout.
A wide blog image and a tall Pinterest Pin have very different proportions. The resized version may still need:
- The image repositioning
- The headline shortening
- The font resizing
- Elements moving
- Extra background space
- A different crop
Even so, starting from an adapted design is usually faster than starting from a blank page.
Canva Templates
Canva’s template library remains one of its biggest advantages.
You do not need to understand advanced design principles before creating something respectable.
You can search for a suitable format, choose a layout, and replace:
- The text
- The colours
- The photographs
- The fonts
- The icons
- The branding
Canva provides free and premium templates across a wide variety of content formats.
Templates are particularly helpful when you know what information needs to appear but are unsure how to arrange it visually.
However, heavily used templates can also make content look familiar.
The solution is not necessarily to avoid templates.
It is to customise them enough that they feel connected to your brand rather than looking like the first result everyone else selected.
Canva for Infographics
Canva is one of the strongest platforms for finishing infographics because text and individual design elements remain editable.
An AI image generator might create the initial concept, but Canva allows you to correct and refine:
- Section headings
- Labels
- Icons
- Arrows
- Step numbers
- Spacing
- Alignment
- Colours
- Fonts
- The final takeaway
That matters because infographics usually contain more information than a simple hero image.
The more text and structure involved, the greater the chance that a flat AI-generated graphic will contain an error.
For important infographics, I prefer this process:
- Plan the information and structure with ChatGPT.
- Generate any complex supporting visual in ChatGPT or Kre8or.
- Build or refine the final infographic in Canva.
- Proofread every word.
- Export and optimise it for the blog.
That may not be a one-click workflow, but it produces a result I can trust.
Canva for Lead Magnets and Digital Products
Canva becomes even more valuable when your visual content extends beyond individual blog images.
Bloggers can use it to create:
- Checklists
- Workbooks
- Planners
- Trackers
- Worksheets
- Ebooks
- Starter kits
- Media kits
- Printable resources
- Social content packs
The Flex For Families Parent Blogging Starter Kit is a good example of why layout control matters.
A lead magnet needs:
- Clear information
- Consistent page design
- Readable fonts
- Accurate text
- Branded covers
- Logical spacing
- A professional finish
AI can help plan the resource and create illustrations, but Canva remains better suited to arranging the final pages.
This is where its value extends well beyond AI image generation.
Canva’s Editing Tools
Canva also includes tools for editing existing images.
Depending on the plan and feature availability, these can include:
- Background removal
- Object selection
- Image adjustments
- Element replacement
- AI-assisted editing
- Magic Grab
- Cropping and repositioning
- Filters
- Transparency controls
Canva describes Magic Grab as a way to make subjects within an image editable so they can be repositioned or redesigned more like normal Canva elements.
These tools make it possible to rescue or improve an AI-generated image without returning to the original generator.
For example, you may be able to:
- Remove the background
- Reposition the main person
- Add branded shapes behind the subject
- Cover an unwanted detail
- Create more room for a headline
- Combine several visual elements
You still will not get the same level of precise editing available in advanced professional software, but Canva is more accessible for most bloggers.
Canva Free vs Canva Pro
Canva offers a free individual plan with access to its editor, free templates, and free content.
Canva Pro unlocks additional features such as Brand Kit, Magic Resize, Background Remover, premium templates and assets, and a larger collection of AI-powered tools.
For a new blogger, Canva Free may be sufficient to:
- Create simple blog graphics
- Make Pinterest Pins
- Add text to images
- Use free templates
- Build basic social-media designs
- Learn the platform
Canva Pro becomes easier to justify when you regularly use:
- Brand Kit
- Premium elements
- Background Remover
- Magic Resize
- Premium templates
- Additional AI features
- Larger content libraries
I would avoid quoting a fixed price here unless it is checked immediately before publication because Canva’s available plans, regional pricing, promotions, and feature allowances can change.
The more useful question is whether the time-saving Pro features support work you already complete regularly.
Is Canva Easy to Use?
Canva is beginner-friendly compared with traditional professional design platforms.
The drag-and-drop editor makes the basic process approachable:
- Select a design format.
- Choose a template or blank layout.
- Add an image.
- Edit the text.
- Apply your colours and fonts.
- Add your logo.
- Download the finished design.
However, beginner-friendly does not mean completely effortless.
Canva contains an enormous number of templates, apps, tools, effects, AI features, stock elements, and menu options.
That can become overwhelming.
A new user may enter Canva to make one Pinterest Pin and emerge 40 minutes later having tested animated lettering, removed three backgrounds, considered launching a podcast, and forgotten the original headline.
The best way to use Canva efficiently is to build a small repeatable system.
For example:
- Three Pinterest templates
- Three Facebook templates
- One hero-image template
- One infographic style
- One saved Brand Kit
You do not need to explore the entire platform every time you open it.
Canva’s Biggest Strength: Dependable Control
Canva’s biggest advantage is that the important parts remain under your control.
You decide:
- The exact wording
- The exact font
- The exact colours
- The exact placement
- The exact dimensions
- The exact logo size
- The final export
That makes it particularly valuable for branded content.
AI image generators are excellent at interpretation.
Canva is excellent at correction.
When a design needs to be accurate, repeatable, and recognisably yours, manual control still matters.
Canva’s Biggest Weakness: It Can Become Another Time Sink
Canva saves time once you have a system.
Before that, it can consume quite a lot of it.
The template library encourages browsing.
The premium elements encourage experimentation.
The AI tools encourage generation.
The fonts encourage debates that nobody else will ever notice.
You can spend an unreasonable amount of time deciding whether a headline looks better moved four pixels upward.
For busy bloggers, Canva works best when used as a finishing tool rather than a place to begin every design with unlimited possibilities.
- Open the template.
- Insert the image.
- Change the headline.
- Check the branding.
- Export it.
Leave before Canva convinces you the whole website now needs a new font.
What I Like About Canva
The main strengths are:
- Excellent manual design control
- Ideal for Pinterest and social-media graphics
- Reliable text editing
- Large template library
- Brand Kit for consistent visuals
- Magic Resize for adapting formats
- AI image and design tools
- Editable AI-generated layouts
- Useful photo-editing features
- Suitable for lead magnets and digital products
- Beginner-friendly drag-and-drop editor
- Free plan available
- Can combine AI images, stock assets, and your own uploads
Its greatest value is not that it does one thing better than every specialist tool.
It is that so much of the finishing process happens in one place.
What Could Be Better
The main limitations are:
- The number of features can feel overwhelming
- Many of the best time-saving tools require Canva Pro
- Template browsing can become a distraction
- AI image generation is not always as distinctive as specialist platforms
- Automatic resizing still needs manual checking
- Popular templates can make designs look generic
- AI-generated text and layouts still need reviewing
- Large projects can become difficult to organise
- It is easy to overdesign simple content
- Finished exports may still need web compression or conversion
Canva can save hours, but only when you avoid spending those hours testing every possible version.
Who Is Canva Best For?
Canva is best suited to:
- Beginner bloggers
- Pinterest users
- Bloggers publishing regularly on social media
- Creators who need accurate text
- Bloggers building a recognisable visual brand
- People making lead magnets or printables
- Non-designers who want professional-looking layouts
- Bloggers who use AI-generated images from several platforms
- Busy parents who want reusable templates
- Creators who need several sizes of the same design
It is one of the easiest tools to justify because it supports far more than image generation.
Who May Prefer Another Tool?
Canva may not be the best primary image generator if you:
- Want highly artistic or cinematic images
- Need advanced image-generation controls
- Prefer conversational prompting
- Want a dedicated AI creator community
- Mainly need original scenes rather than finished layouts
- Require advanced professional photo editing
- Want to export every blog image directly as WEBP without extra steps
- Already use another design suite confidently
In those cases, Canva may still be useful—but as the finishing tool rather than the starting point.
Canva Pros and Cons
Pros
- Strongest option for finished branded graphics
- Precise control over text and layouts
- Excellent for Pinterest and social media
- Reusable templates save time
- Brand Kit improves consistency
- Magic Resize supports multiple formats
- Growing range of AI tools
- Editable AI-generated designs
- Useful for lead magnets and digital products
- Free plan available
- Accessible to non-designers
Cons
- Can feel cluttered and overwhelming
- Pro features provide much of the real time-saving value
- AI image generation may be less distinctive than specialist tools
- Resized designs still need checking
- Popular templates can look generic
- Easy to waste time overdesigning
- Web exports may need further optimisation
- Not a replacement for advanced creative software
Canva Rating for Bloggers
| Category | Rating |
|---|---|
| Ease of Use | 4.5/5 |
| AI Image Quality | 4/5 |
| Text and Layout Control | 5/5 |
| Brand Consistency | 5/5 |
| Pinterest and Social Content | 5/5 |
| Editing Tools | 4.5/5 |
| Export and Resizing | 4.5/5 |
| Value for Money | 4.5/5 |
| Overall Rating | 4.6/5 |
Canva matches ChatGPT’s overall score, but for different reasons.
ChatGPT is stronger during planning, prompt development, and conversational creation.
Canva is stronger when the image needs to become an accurate, branded, reusable design.
Neither score means Canva creates better raw AI images than every dedicated generator.
It means Canva is exceptionally useful within the complete blogging workflow.
Bottom Line
Canva is the best platform for finishing branded blog graphics and social-media content.
Its AI features are becoming increasingly capable, particularly now that Canva AI can create layered, editable designs rather than only flat generated images.
However, its biggest advantage remains the ability to make precise manual changes after the AI has done its part.
For most bloggers, I would not think of Canva as a direct replacement for ChatGPT, Kre8or, or another image generator.
I would think of it as the place where everything comes together.
My practical workflow is:
Plan with ChatGPT. Create with ChatGPT or Kre8or. Finish with Canva.
For a new blogger trying to control costs, Canva can also be the starting point as well as the finishing point.
Use the free plan, create a few reusable templates, learn what your brand needs, and only add more specialised tools when your publishing workload genuinely justifies them.
4. Midjourney: Best for Highly Artistic and Visually Distinctive Images
My Verdict
Midjourney is my best choice for bloggers who want highly artistic, distinctive, and visually impressive images.
It is capable of producing the kind of visual that makes you stop scrolling and look twice.
That could be:
- A cinematic blog hero image
- A detailed editorial illustration
- A fantasy-inspired scene
- A dramatic conceptual image
- A stylised character
- A distinctive branded visual series
- An image that feels closer to digital artwork than a stock photograph
Midjourney’s strength is not simply realism.
It is style.
The platform is particularly good at taking a relatively ordinary concept and interpreting it in a way that feels more polished, atmospheric, or visually imaginative.
For bloggers who place a high value on aesthetics, that can be a major advantage.
However, Midjourney is not automatically the best everyday option for a busy parent blogger.
It requires a paid subscription, has a more specialised creative workflow, and can encourage a lot of experimentation before you reach the final image.
It may create the most beautiful image in this comparison while still not being the tool that saves you the most time.
What Is Midjourney?
Midjourney is a specialist AI platform for generating images—and now short videos—from text and image prompts.
You can create through the Midjourney website or Discord, although the web interface has made the platform considerably more approachable than it was when Discord was effectively the main way to use it.
Midjourney’s current web Create page includes an Imagine bar where you can enter prompts, upload reference images, and adjust generation settings. A subscription also allows users to work through Discord, with most core tools available across both environments.
The platform’s current default model is Midjourney V8.2, released on 24 July 2026. Midjourney says V8.1, its preceding major release, improved prompt interpretation, speed, detail retention, and native high-resolution image generation.
That pace of development is another reminder that AI image comparisons can date quickly.
Why Midjourney Stands Out
Midjourney’s defining strength is its ability to create images with a strong visual identity.
It performs particularly well with instructions involving:
- Lighting
- Atmosphere
- Texture
- Colour
- Artistic medium
- Camera style
- Composition
- Mood
- Detailed environments
A basic blogging prompt might produce a perfectly usable image elsewhere.
Midjourney is more likely to turn the same idea into something that feels deliberately art-directed.
For example, instead of a straightforward image of a parent working at a laptop, you could create:
A warm editorial illustration of a tired but determined dad blogger working at a kitchen table after bedtime, soft pools of lamplight, family drawings pinned nearby, subtle teal and coral details, realistic domestic clutter, intimate magazine-style composition.
Midjourney is well suited to that kind of creative direction.
The result may feel less like a generic AI image and more like a commissioned editorial illustration.
Midjourney for Blog Hero Images
Blog hero images are probably the strongest use case for Midjourney.
A hero image needs to do more than fill space at the top of an article.
Ideally, it should:
- Establish the mood
- Reinforce the topic
- Attract attention
- Reflect the brand
- Make the article feel original
- Give the reader a reason to continue
Midjourney can create strong conceptual visuals for articles that are difficult to represent with a literal stock photograph.
For example:
Why Blogging Feels Slow at First
A standard stock image might show someone looking frustrated at a laptop.
Midjourney could instead create a symbolic scene of a parent carefully building a pathway from small glowing tiles, with a distant finished route gradually emerging through the mist.
Is Blogging Passive Income?
Rather than showing money floating around a computer—which I would strongly avoid—you could create an editorial illustration of a waterwheel that continues turning after the initial effort of building the channel.
How Long Does It Take to Make Money Blogging?
You could show a parent tending a small indoor garden beside a workspace, with each plant representing a different stage of content growth.
This is where Midjourney can make an article feel visually different from competing blog posts covering the same subject.
Midjourney for Editorial Illustrations
Midjourney is particularly effective for editorial-style illustration.
These are images that communicate an idea rather than simply showing the subject literally.
For bloggers, editorial illustrations can be useful when writing about:
- Time
- Progress
- Burnout
- Flexibility
- Family priorities
- Online income
- Artificial intelligence
- Work-life balance
- Blogging strategy
- Long-term growth
A literal photograph does not always capture those ideas well.
Midjourney can translate abstract concepts into visual metaphors.
That makes it a potentially strong fit for Flex For Families, where many articles discuss emotional or strategic ideas rather than physical products.
However, the metaphor still needs to be understandable.
A visually beautiful image that confuses the reader is not automatically better than a simple, clear one.
Style References
One of Midjourney’s most useful features for bloggers building a recognisable visual identity is Style Reference.
A Style Reference allows you to provide an existing image whose overall visual qualities should influence a new creation.
Midjourney explains that Style References can carry across elements such as:
- Colour
- Medium
- Texture
- Lighting
- Overall visual feel
without directly copying the objects or people shown in the reference.
This can help bloggers create a more consistent series of visuals.
For example, you might establish a Flex For Families illustration style using:
- Warm editorial lighting
- Soft realistic textures
- Teal and coral accents
- Family-home environments
- Calm, practical scenes
- A friendly magazine-style finish
You could then use that style reference across several related blog posts.
The articles would not all contain the same image, but the overall aesthetic could feel connected.
That is valuable for brand recognition.
Moodboards and Style Creator
Midjourney also supports Moodboards and a Style Creator.
Moodboards let users select images representing a broader aesthetic direction. Midjourney then uses that collection to help guide future creations when words alone are not enough to describe the intended look.
The Style Creator allows users to develop reusable style-reference codes by choosing between visual options presented by Midjourney.
These features are more advanced than most bloggers will need for an occasional hero image.
However, they could be useful if you want to develop:
- A consistent illustration series
- A recognisable YouTube thumbnail style
- A branded social campaign
- A collection of lead magnet covers
- A visual identity for a particular content hub
The potential benefit is stronger consistency.
The potential drawback is the time required to build and refine the system.
For a busy parent blogger, it is worth asking whether the additional visual sophistication will create a meaningful result—or simply become another creative side project.
Using Image Prompts and References
Midjourney supports Image Prompts, allowing you to upload an image alongside your text instructions.
The reference can influence the new creation’s:
- Composition
- Subject
- Colour
- Visual content
- Overall direction
Midjourney describes these uploaded images as sources of inspiration rather than direct copying instructions.
This is useful when it is easier to show the AI what you mean than to describe everything in words.
You might upload:
- A rough sketch
- A previous blog graphic
- A colour reference
- A photographic composition
- A mockup
- An example workspace
- A branded visual
You can then explain how the new image should differ.
That gives you more control than relying on text alone.
Character and Omni References
Midjourney has also developed tools for keeping subjects more consistent across different images.
Character Reference can preserve recognisable features such as hair, clothing, and facial traits across multiple scenes, while Omni Reference can use characters, objects, vehicles, or creatures from a reference image within new creations.
For bloggers, consistency could be helpful when creating:
- A recurring illustrated parent character
- A mascot
- A visual story
- A step-by-step sequence
- A series of social-media posts
- An ebook or lead magnet
- A set of branded scenes
Instead of generating a completely different person every time, you can attempt to retain a recognisable central subject.
This is not the same as guaranteeing an identical character in every image, and the result still needs reviewing.
But it opens up creative options that go beyond one-off blog graphics.
Midjourney’s Web Editor
Midjourney now includes a web-based Editor for refining generated images and uploaded visuals.
The Editor supports tools such as:
- Remix
- Inpainting
- Pan
- Zoom Out
- Cropping
- Repainting selected areas
- Expanding the image
These tools can be combined within the same editing environment.
This means you are not always forced to regenerate the entire image when one part is wrong.
You may be able to:
- Remove an unwanted object
- Extend the background
- Replace part of the scene
- Change the framing
- Create more space for a headline
- Adjust a specific detail
Midjourney also offers variations, allowing you to create related versions that change either small details or the wider composition.
That makes the platform much more practical than a generator that only gives you a finished flat image and no route for refinement.
Midjourney and Text in Images
Midjourney can include words and short phrases in images.
Its official guidance recommends placing the required wording inside double quotation marks within the prompt.
However, text would not be my main reason for choosing Midjourney.
Even where a model can generate readable wording, bloggers should still check:
- Spelling
- Punctuation
- Letter shapes
- Line breaks
- Consistency
- Whether later edits have changed the text
For hero images containing no text—or perhaps one short phrase—Midjourney can work well.
For Pinterest Pins, comparison tables, or detailed infographics, I would usually create the artistic visual in Midjourney and add the final wording in Canva.
That gives you Midjourney’s visual quality without sacrificing accuracy.
Midjourney for Pinterest
Midjourney can create strong portrait-oriented visuals for Pinterest.
Its best use is likely to be the central image rather than the complete final Pin.
For example, it could generate:
- A distinctive editorial illustration
- A dramatic blogging metaphor
- A highly polished lifestyle scene
- An unusual flat-lay composition
- A stylised home-office image
You could then place that visual into a Canva Pin template and add:
- The exact headline
- The logo
- Supporting text
- Brand fonts
- A clear call to action
This hybrid workflow gives you more control.
It also stops every Pinterest graphic looking like a standard template built from the same stock-photo library.
Midjourney for Social Media
Midjourney works well for social posts where visual impact matters.
Potential uses include:
- Storytelling posts
- Inspirational graphics
- Conceptual illustrations
- Humorous blogging scenes
- Campaign visuals
- Branded character series
- Creative behind-the-scenes content
It may be less efficient for simple educational graphics where the main requirement is accurate text.
A Facebook post containing three short tips does not necessarily need an atmospheric, cinematic masterpiece.
Sometimes a clear Canva graphic is the better tool.
Midjourney earns its place when the image itself is expected to carry much of the message.
Prompting in Midjourney
Midjourney can generate impressive results from relatively simple prompts, but users who want consistent control will need to learn more about how the platform interprets instructions.
Its available parameters include controls for:
- Aspect ratio
- Stylisation
- Raw Mode
- Image quality
- Repetition
- Tiling
- Versions
- Style References
Midjourney’s parameter documentation also includes Multi-Prompts and weights for influencing how strongly different parts of the prompt affect the result.
That means the platform can reward users who enjoy learning a more specialist prompting system.
For some creators, this is part of the appeal.
For others, it adds friction.
A busy blogger may prefer to describe changes conversationally in ChatGPT rather than learning how different parameter values influence the final composition.
Midjourney Image Resolution
Midjourney’s newer models support higher-resolution generation.
Its official image-resolution documentation states that V8.1 can create 2048 × 2048-pixel HD images in the default square format, alongside standard-definition versions at 1024 × 1024 pixels.
Higher resolution is useful when:
- Cropping the image
- Adapting it for several formats
- Producing larger graphics
- Creating print resources
- Preserving detail
For web publishing, bigger is not automatically better.
A high-resolution file may still need resizing and compression before uploading to WordPress.
You do not want a visually stunning hero image that arrives with the file size of a small documentary.
Midjourney Pricing
Midjourney currently offers four paid subscription tiers:
| Plan | Monthly Price | Annual Equivalent |
|---|---|---|
| Basic | $10 per month | $8 per month, billed annually |
| Standard | $30 per month | $24 per month, billed annually |
| Pro | $60 per month | $48 per month, billed annually |
| Mega | $120 per month | $96 per month, billed annually |
The annual plans are paid upfront and currently receive a 20% discount.
The Basic plan includes 3.3 hours of Fast GPU time per month.
Standard includes 15 hours of Fast GPU time and unlimited image generation in Relax Mode. Pro and Mega provide larger Fast GPU allowances, unlimited Relax Mode image generation, and additional features.
Midjourney currently does not offer a free trial through its website or Discord, although a limited trial is available through the separate niji·journey mobile app.
That lack of a normal web trial is a disadvantage for bloggers who want to test the workflow before subscribing.
Fast Mode, Relax Mode and GPU Time
Midjourney subscriptions are based partly on GPU processing time.
The platform offers Fast, Relax, and Turbo generation speeds. Midjourney compares GPU time to a mobile-data allowance: generations consume part of the processing time included in your plan.
This matters because image credits or GPU allowances can affect behaviour.
You may become reluctant to experiment because you do not want to waste Fast time.
Or you may do the opposite and generate endless versions because Relax Mode feels unlimited.
Neither is automatically efficient.
A better approach is to decide:
- What the image is for
- Which format you need
- What visual style you want
- Which elements are essential
- How many variations you are willing to test
before beginning.
Privacy and Stealth Mode
Midjourney creations are generally part of its community-oriented platform.
Stealth Mode, which prevents images and videos from appearing publicly on Midjourney’s website, is currently limited to the Pro and Mega plans.
That may matter if you are creating:
- Confidential client work
- Unreleased campaigns
- Private product concepts
- Sensitive brand assets
- Images based on personal references
For most ordinary blog hero images, public visibility may not be a major concern.
However, users should understand the platform’s privacy setup before uploading references or creating work they do not want visible to others.
Commercial Use
Midjourney’s commercial-use guidance states that subscribers can generally use the content they create commercially, subject to its terms.
Businesses grossing more than $1 million USD per year must use the Pro or Mega plan for company commercial use. Midjourney also notes that upscaling someone else’s image does not transfer ownership of that creation to you.
Bloggers should read the current terms themselves before using any generated image commercially, particularly because AI policies and platform terms can change.
You should also avoid prompts or reference images that could infringe another person’s trademarks, copyright, or personality rights.
Is Midjourney Easy to Use?
Midjourney has become easier to use since the development of its web interface.
A beginner can now enter a prompt, choose settings, and generate images without needing to learn Discord commands first.
The basic process is manageable:
- Open the Create page.
- Enter a prompt.
- Add references if needed.
- Select the preferred settings.
- Generate four initial options.
- Choose a result.
- Create variations or edit it.
- Download the finished image.
Midjourney’s getting-started guide confirms that a normal generation produces a set of four initial images that can then be refined with variations, upscaling, pan, zoom, and editing tools.
Creating an image is therefore straightforward.
Mastering Midjourney is not.
The platform offers enough settings, styles, references, parameters, personalisation tools, and editing controls to reward deeper learning.
That is ideal for someone who enjoys creative experimentation.
It may be excessive for someone who just needs a competent blog image before the school run.
Midjourney’s Biggest Strength: Visual Impact
Midjourney’s biggest advantage is its ability to produce images that feel visually deliberate.
It is particularly strong when the brief calls for:
- Atmosphere
- Emotion
- Artistic style
- Rich texture
- Dramatic lighting
- Original visual metaphors
- High-end editorial composition
For a cornerstone article, major campaign, ebook cover, or important brand visual, that extra quality could be worthwhile.
It can help a blog move beyond the familiar visual language of stock photography and basic templates.
Midjourney’s Biggest Weakness: It Can Be More Creative Than Practical
The qualities that make Midjourney exciting can also make it less efficient.
It is easy to become absorbed in:
- Testing styles
- Creating variations
- Adjusting parameters
- Comparing compositions
- Building moodboards
- Refining references
- Trying one more generation
The tool is built for exploration.
Blogging often requires completion.
A blogger may begin needing a supporting image for Section 4 and finish the afternoon with 28 beautiful pictures, none of which has been resized, compressed, or uploaded.
Midjourney is most valuable when you give it a clear role.
For example:
I use Midjourney for selected hero images and major editorial illustrations—not for every routine social graphic.
That boundary keeps the creative power useful rather than distracting.
What I Like About Midjourney
The main strengths are:
- Exceptional artistic quality
- Distinctive visual styles
- Strong lighting and composition
- Excellent editorial illustrations
- Effective visual metaphors
- Style References
- Moodboards and Style Creator
- Character and object consistency tools
- Image prompts
- Powerful variations and editing
- High-resolution generation
- Web and Discord access
- Strong potential for major branded visuals
Midjourney offers more creative depth than most bloggers will ever fully use.
That is both a compliment and a warning.
What Could Be Better
The main limitations are:
- No standard free trial on the website or Discord
- Requires a paid subscription
- Pricing can be difficult to justify for occasional use
- More specialist learning curve
- Text is not its strongest blogging use case
- Final graphics may still need Canva
- WEBP optimisation may require another step
- Stealth Mode requires a higher-priced plan
- GPU allowances add another limit to manage
- The platform can encourage over-experimentation
- It may be unnecessary for routine blog graphics
- Not primarily designed around a complete blogging workflow
Midjourney creates outstanding images, but it does not plan your article, write your Pinterest description, build your Brand Kit, or upload the finished file to WordPress.
It solves one part of the process extremely well.
Who Is Midjourney Best For?
Midjourney is best suited to:
- Bloggers who prioritise visual identity
- Creative and design-led niches
- Bloggers using editorial illustrations
- Creators who want distinctive hero images
- People who enjoy learning advanced prompting
- Bloggers developing a recognisable artistic style
- Storytelling and lifestyle websites
- Creators making ebook or lead magnet covers
- Bloggers producing major campaign visuals
- Users who want more aesthetic control
It is particularly valuable when the image itself is a meaningful part of the content rather than a decorative extra.
Who Should Avoid Midjourney for Now?
Midjourney may not be the best fit if you:
- Are a brand-new blogger
- Need to keep costs low
- Only create occasional images
- Mainly need simple social graphics
- Want accurate text-heavy designs
- Prefer conversational editing
- Need a complete planning-to-publishing workflow
- Do not enjoy learning specialist tools
- Already get suitable images from ChatGPT or Kre8or
- Are likely to spend more time experimenting than publishing
A new blogger does not need Midjourney to look professional.
Good branding, readable graphics, useful content, and consistency matter far more than cinematic image generation.
Midjourney Pros and Cons
Pros
- Outstanding artistic image quality
- Distinctive and visually impressive results
- Excellent for conceptual hero images
- Strong editorial illustration capability
- Style References and Moodboards
- Advanced image and subject references
- Useful editing and variation tools
- High-resolution output
- Web interface is more beginner-friendly than the older Discord-only perception
- Strong option for visual branding
Cons
- No normal free web trial
- Paid subscription required
- More learning than many bloggers need
- Can become time-consuming
- Not ideal for precise text-heavy graphics
- Finished social designs may still require Canva
- Privacy features require a higher plan
- GPU-time system adds complexity
- Too specialised for some everyday blogging workflows
Midjourney Rating for Bloggers
| Category | Rating |
|---|---|
| Ease of Use | 4/5 |
| Artistic Image Quality | 5/5 |
| Prompting and Creative Control | 4.5/5 |
| Style Consistency | 5/5 |
| Editing Tools | 4.5/5 |
| Text and Structured Graphics | 3.5/5 |
| Everyday Blogging Workflow | 3.5/5 |
| Value for Money | 3.5/5 |
| Overall Rating | 4.2/5 |
Midjourney receives the highest score in this comparison for artistic quality.
Its overall blogging score is lower because most bloggers also need speed, accurate text, simple resizing, predictable branding, and a straightforward route from image idea to published asset.
Bottom Line
Midjourney is the best AI image generator in this comparison for bloggers who want highly artistic and visually distinctive images.
It can produce exceptional hero images, editorial illustrations, conceptual visuals, and branded creative series.
However, it is not the most practical starting point for every blogger.
For a new or time-poor parent blogger, ChatGPT, Canva, or Kre8or may offer a more balanced everyday workflow.
My practical recommendation is:
Use Midjourney when the image needs to be memorable—not simply because every article needs an image.
It is the creative specialist in this list.
Bring it in for the visuals that genuinely deserve extra artistic attention, then use Canva or another design tool to add accurate text, final branding, and platform-specific formatting.
5. Leonardo AI: Best for Advanced Control and Experimentation
My Verdict
Leonardo AI is my best choice for bloggers and creators who want more control over how their images are generated, edited, styled, and refined.
It is not simply one image model behind one prompt box.
Leonardo brings together a wide range of image models, reference controls, editing tools, upscaling features, custom-model options, and experimental workflows within one creative platform. Its current model selection includes specialist options for photorealism, typography, precise editing, illustration, structured layouts, fast experimentation, and high-resolution commercial visuals.
That flexibility is Leonardo’s biggest advantage.
It is also the reason the platform may feel more complicated than ChatGPT, Kre8or, or Canva.
A beginner can use Leonardo’s automatic settings and generate an image fairly quickly. However, the real value becomes clearer when you begin choosing models, uploading references, changing guidance strengths, editing selected areas, training personal models, or comparing how different engines interpret the same prompt.
For bloggers who enjoy experimenting and want more influence over the final result, Leonardo offers an impressive creative playground.
For someone who simply needs one dependable blog hero image before making dinner, it may offer considerably more playground than required.
What Is Leonardo AI?
Leonardo AI is a generative creative platform for producing and editing images, videos, designs, and other visual content.
The platform provides its own models alongside selected third-party image models. Rather than expecting one general model to handle every job, Leonardo allows users to choose an engine suited to the type of image they want to create.
That could mean selecting a model designed for:
- Photorealism
- Artistic images
- Typography
- Infographics
- Precise image editing
- Product mockups
- Character consistency
- Fast concept testing
- High-resolution commercial assets
- Structured visual layouts
Leonardo also includes tools for:
- Text-to-image generation
- Image-to-image creation
- Reference-image guidance
- Inpainting and outpainting
- Realtime sketching
- Background removal
- Image upscaling
- Personal model training
- Collections
- Image and video generation
This makes it more like a complete AI visual studio than a basic image generator.
Why Leonardo AI Stands Out
Most straightforward AI image tools ask you to describe the image and then decide how to interpret your instructions.
Leonardo gives you more opportunities to influence that interpretation.
Depending on the model and plan, you may be able to control:
- The generation model
- The reference style
- The subject or character
- The composition
- The pose
- Depth information
- Edges and line art
- The influence of each uploaded reference
- The output quality
- The dimensions
- The level of prompt adherence
- The image’s public or private status
Leonardo’s Image Guidance system includes options such as Style Reference, Content Reference, Character Reference, Depth, Edge, Sketch, Pose, Pattern, Lineart, and text-image input. Premium users can combine multiple references and adjust their influence individually.
That is far more control than most casual users will ever need.
However, it can be valuable when the first generated result is close but not structurally correct.
Instead of rewriting the prompt repeatedly and hoping the model finally guesses what you mean, you can give it visual guidance.
Leonardo’s Range of Image Models
One of Leonardo’s most distinctive features is access to multiple specialist image models.
Its official model guide explains that different engines are designed to excel at different tasks rather than treating every image request in the same way.
Examples currently available through Leonardo include:
- Lucid Origin for versatile, aesthetically polished images and social visuals
- Lucid Realism for photorealistic textures, portraits, environments, and product mockups
- Nano Banana models for image editing, infographics, text, and complex instruction-following
- Ideogram for typography and graphic-design tasks
- GPT Image models for structured layouts, editing, charts, and text-heavy visuals
- Flux models for photorealism, colour accuracy, editing, custom training, and rapid drafts
- Phoenix for strong instruction-following and controlled illustrations
- Seedream for high-resolution commercial images
Leonardo also offers an Auto setting that selects a model based on the prompt, which reduces some of the decision-making for beginners.
This range is useful because no single image model is best at everything.
A model that produces a beautiful cinematic portrait may struggle with infographic text.
A model that handles typography well may not create the artistic style you want for an editorial hero image.
Leonardo allows you to switch tools without leaving the platform.
Is That Choice Helpful or Overwhelming?
Potentially both.
The advantage is that you can choose a model suited to the task.
The disadvantage is that you now have another decision to make before generating anything.
A blogger could spend time comparing:
- Lucid Origin
- Lucid Realism
- Flux
- Phoenix
- Ideogram
- GPT Image
- Nano Banana
- Seedream
when the article would have been perfectly happy with one decent image from the default option.
Leonardo’s Auto selector helps, but the platform is still best suited to someone who enjoys learning why one model behaves differently from another.
For most everyday blogging work, you may eventually settle on two or three favourites rather than changing the model for every image.
That is probably the most efficient approach.
Leonardo for Blog Hero Images
Leonardo can produce excellent blog hero images because its model range supports several different visual directions.
You could use it for:
- Realistic parent-blogging scenes
- Editorial illustrations
- Conceptual imagery
- Product mockups
- Home-office photography
- Flat-lay compositions
- Stylised characters
- Abstract backgrounds
- Technology-themed visuals
For example, a Flex For Families article could require a realistic dad blogger working in a family kitchen.
A photorealistic model could focus on natural lighting, authentic textures, and a believable home environment.
Another article may need an illustration showing the stages of building a blog.
A model designed for instruction adherence or structured layouts may be more appropriate.
The ability to select the engine based on the job is one of Leonardo’s strongest advantages.
Leonardo for Realistic Images
Leonardo specifically promotes tools for realistic AI photography, including text-to-image and image-to-image workflows designed to preserve believable lighting, texture, and depth.
This could be useful for bloggers who want original lifestyle images without relying entirely on stock photography.
Potential examples include:
- A parent working from a kitchen table
- A realistic home office
- A product on a desk
- A family budgeting scene
- A content-planning workspace
- A close-up product mockup
- A natural portrait
As always, realistic AI images need careful inspection.
Look closely at:
- Hands
- Screens
- Reflections
- Background objects
- Jewellery
- Facial details
- Text
- Repeated items
- Physical interactions
An image can appear convincing at first glance while still containing small details that make no sense.
Image Guidance
Image Guidance is one of the clearest reasons to choose Leonardo over a simpler generator.
You can upload one or more reference images and specify how they should influence the output.
The available guidance types can affect areas such as:
- Style
- Content
- Character
- Pose
- Composition
- Depth
- Edges
- Sketch structure
- Patterns
- Line art
Premium users can upload several reference images simultaneously and give each one a different weighting.
For a blogger, this could mean combining:
- A brand-style reference
- A rough composition
- A character reference
- A colour or lighting example
within the same generation.
That gives you more direct influence over the finished image.
However, more reference images do not automatically guarantee a better result.
They can also introduce conflicting instructions.
The skill lies in deciding what each reference is supposed to contribute.
Style References
Style Reference allows Leonardo to borrow the aesthetic qualities of an uploaded image.
That may include:
- Colour
- Lighting
- Texture
- Medium
- General visual mood
without necessarily recreating the exact subject shown.
This could help a blogger develop more consistent supporting visuals across a content series.
For example, you might use a reference that represents:
- Warm editorial illustration
- Soft natural light
- Teal and coral accents
- Realistic family-home environments
- Clean but approachable compositions
You could then use that direction across several related posts.
As with Midjourney’s style tools, this is useful for visual consistency—but it still requires testing.
A reference image may introduce unwanted characteristics, and Leonardo’s own guidance recommends adjusting the reference strength or compensating through the written prompt where necessary.
Character References and Consistency
Character Reference can help retain recognisable features across multiple images.
That could be useful for creating:
- A recurring illustrated parent
- A blog mascot
- A consistent fictional family
- A lead magnet character
- A social-media storytelling series
- Step-by-step instructional scenes
Instead of receiving a completely different character in every generation, you can provide a visual reference that helps guide appearance.
This does not mean the character will remain perfectly identical in every scene.
You should still check:
- Facial details
- Clothing
- Age
- Hair
- Proportions
- Accessories
But it gives you a better foundation for consistency than relying on text alone.
Pose, Sketch and Composition Control
Leonardo’s Image Guidance tools are particularly useful when you know how the image should be arranged.
You can provide:
- A rough sketch
- A pose reference
- Edge information
- A line drawing
- A depth map
- A composition example
and use that structure to guide the generation.
For bloggers, this could help when creating:
- A specific flat-lay layout
- A character pointing towards headline space
- A person positioned on one side of a hero image
- A before-and-after composition
- A product mockup at a particular angle
- An infographic with a planned flow
This can reduce the familiar frustration of asking the AI to “place the person on the right” and receiving four images where they are triumphantly centred.
Canvas Editor
Leonardo’s Canvas Editor allows users to make detailed changes to an existing image.
It supports inpainting and outpainting, meaning you can replace selected areas or expand the image beyond its original boundaries.
You can use it to:
- Remove unwanted objects
- Replace part of a scene
- Extend a background
- Add new content
- Repair an awkward detail
- Create more space around the subject
- Change a selected feature
- Adapt the composition
The masking tool lets you paint over the area you want to change while retaining some of the original colour, subject, or style. Alternatively, you can erase an area completely before prompting Leonardo to replace it.
This provides more control than regenerating the entire image.
It can be particularly helpful when 95% of the picture is good and one mysterious object on the desk appears to be part stapler, part croissant.
Realtime Canvas
Realtime Canvas offers a more experimental way to build images.
You can sketch, upload artwork, and see AI-generated interpretations develop as the input changes. Leonardo describes it as a feedback loop in which users can draw over an image and continually refine the result.
This could be useful for creators who prefer visual experimentation to writing long prompts.
Potential blogging uses include:
- Planning infographic layouts
- Testing hero-image compositions
- Turning rough sketches into polished scenes
- Developing lead magnet covers
- Creating product concepts
- Exploring branded illustration styles
For most bloggers, Realtime Canvas will be an optional creative feature rather than an essential part of every publishing workflow.
But for visual thinkers, it could make Leonardo much more appealing.
Personal AI Model Training
Paid plans allow users to train personal AI models.
Leonardo says users can upload a small image collection—typically around 10 to 20 images—to train a model around a particular subject, style, theme, or visual concept.
This could help create consistency around:
- A brand illustration style
- A recurring character
- A product
- A mascot
- A visual texture
- A specific subject
That is a powerful feature for advanced users.
It is also well beyond what most new bloggers need.
Training a model only makes sense when consistency across many images has a real business or creative value.
Doing it because the feature exists may create more work than it saves.
Universal and Pro Upscaling
Leonardo includes tools for increasing image resolution and enhancing detail.
Its Universal Upscaler can create higher-resolution versions of images, while the newer Pro Upscaler is designed specifically to improve AI-generated images rather than merely stretching existing pixels. Leonardo says the Pro version can produce outputs up to 105 megapixels, with maximum magnification reserved for premium users.
Upscaling is useful when:
- An image needs to be cropped
- You want to reuse it in several formats
- The original lacks detail
- You are producing a printable
- You need a larger commercial asset
- You want to improve an older AI image
For normal blog use, however, an enormous image is rarely necessary.
You will probably resize and compress it before uploading to WordPress.
The goal is enough quality for the intended use—not the largest file your broadband can carry.
Leonardo for Pinterest
Leonardo can create strong vertical imagery for Pinterest, particularly when you want:
- An original lifestyle scene
- A distinctive illustration
- A visual metaphor
- A product mockup
- A textured branded background
- A character-led design
Its model selection also includes options designed for typography and structured layouts, which gives Leonardo more potential for complete poster-style graphics than some art-focused platforms.
Even so, I would continue checking every word.
For Pinterest, my preferred workflow would usually be:
- Create the central image or concept in Leonardo.
- Export the strongest result.
- Add the exact headline, logo, and branding in Canva.
- Proofread the finished Pin.
- Create additional variations from the same template.
Leonardo provides the creative control.
Canva provides the final layout certainty.
Leonardo for Infographics
Leonardo’s access to models focused on typography, structured layouts, editing, and instruction-following makes it potentially useful for infographics.
Its model guide identifies different options for:
- Text rendering
- Charts
- Educational diagrams
- Dense visual layouts
- Infographic creation
- Precise object placement
That makes Leonardo more versatile than a platform focused purely on artistic imagery.
However, infographic reliability depends on:
- The selected model
- The amount of text
- The complexity of the layout
- The clarity of the prompt
- The final proofreading
I would still treat detailed infographics cautiously.
For anything containing important statistics, instructions, labels, or claims, the final text should be checked against the source and corrected manually where necessary.
Leonardo for Social Media
Leonardo can support social-media content through:
- Promotional visuals
- Product mockups
- Campaign images
- Storytelling graphics
- Character series
- Quote backgrounds
- Branded illustrations
- Short animated content
It also offers Flow State, a rapid visual-exploration feature designed to generate and browse multiple creative directions more quickly. Leonardo positions the wider platform as a place to generate, edit, upscale, and experiment with different image and video models without switching between several separate services.
That breadth may appeal to creators producing a high volume of visual content.
For a blogger posting two simple Facebook graphics per week, it may be unnecessary.
Leonardo’s Free Plan
Leonardo offers a permanent free tier rather than only a short trial.
The free plan currently provides 150 Fast Tokens per day, basic quality settings, one personal collection, access to presets, and public creations.
That is a major advantage over Midjourney, which does not offer a normal free website trial.
It allows bloggers to explore:
- The interface
- Image generation
- Different models
- Basic editing
- Prompt behaviour
- Whether the platform suits their workflow
before paying.
However, the public status of free creations deserves attention.
Free-Plan Privacy and Commercial Use
Leonardo states that free users may use generated images and videos commercially, but free-plan creations are public. As between the user and Leonardo, Leonardo owns those free-plan assets and grants the user a commercial licence; other users may also be able to see and use public creations.
Paid subscribers can create privately and, as between themselves and Leonardo, retain ownership of their private generated assets.
That distinction matters for:
- Confidential client projects
- Original product concepts
- Exclusive brand assets
- Paid digital products
- Unreleased campaigns
- Proprietary visual designs
For ordinary blog illustrations, public creation may not be a concern.
For anything commercially sensitive or intended to remain exclusive, the free plan may not be suitable.
You should always check the current terms yourself before relying on generated assets commercially.
Leonardo AI Pricing
Leonardo currently offers four individual plans:
| Plan | Monthly Price | Fast Tokens | Creation Privacy |
|---|---|---|---|
| Free | $0 | 150 per day | Public |
| Essential | $12 per month | 8,500 per month | Private |
| Premium | $30 per month | 25,000 per month | Private |
| Ultimate | $60 per month | 60,000 per month | Private |
Annual billing can reduce the price by up to 20%.
The Essential plan also includes enhanced quality, unlimited personal collections, top-up tokens, and the ability to train up to ten personal models per month.
Premium adds a larger allowance, up to twenty personal models, more simultaneous generations, and unlimited relaxed image generation on selected models.
Ultimate increases the allowances again and adds unlimited relaxed generation for selected video models as well as supported image models.
Pricing and inclusions can change, so these figures should be checked again immediately before the article is published or updated.
How Leonardo’s Token System Works
Tokens are deducted for image generation and other processing tasks.
The amount used depends on the computational demands of the specific action rather than every generation costing one fixed number of tokens. More complex models, higher-quality settings, video creation, upscaling, or post-processing may therefore use different amounts.
Free tokens reset daily.
Paid-plan allowances reset with the billing cycle, and unused tokens can roll into a token bank up to the limit allowed by the chosen plan. Paid users can also purchase top-up tokens.
This is more flexible than a system where all unused credits disappear every month.
However, it also makes it harder to say exactly how many images a plan will produce.
The answer depends on which tools and settings you use.
Is Leonardo AI Easy to Use?
The basic image-generation process is not especially difficult.
A beginner can:
- Enter a prompt.
- Let Auto choose the model.
- Select the format.
- Generate several options.
- Download the preferred image.
The complexity appears when you explore the wider platform.
You may encounter:
- Multiple model choices
- Prompt settings
- Image Guidance
- Reference strengths
- Personal models
- Canvas tools
- Realtime generation
- Upscaling options
- Token costs
- Visibility settings
That does not make Leonardo badly designed.
It means the platform offers more than a casual user needs.
The best starting approach is to ignore most of the advanced controls.
Use Auto.
Generate a few images.
Test one reference image.
Try the editor.
Only explore the deeper settings when a genuine creative need appears.
Otherwise, Leonardo can become the visual equivalent of buying a professional mixing desk to adjust the volume on a podcast microphone.
Leonardo’s Biggest Strength: Choice and Control
Leonardo’s biggest advantage is the freedom to choose how an image should be created.
You are not locked into one model, one editing method, or one style workflow.
You can change:
- The model
- The references
- The guidance type
- The composition
- The editing method
- The output quality
- The resolution
- The level of privacy
That makes Leonardo appealing to creators who regularly find simpler image generators too restrictive.
It can support a wider range of projects without requiring a separate subscription for every specialist model.
Leonardo’s Biggest Weakness: Decision Overload
The same flexibility can slow the process down.
When a platform offers many models and controls, users may begin wondering:
- Did I choose the right model?
- Should I change the guidance strength?
- Would another reference work better?
- Should I train a custom model?
- Would this look better through Flux?
- Should I upscale it?
- Should I edit it in Canvas?
- Should I test one more version?
That is not necessarily efficient.
For a busy blogger, the extra control only has value when it solves a real problem.
If the first Auto-generated image is suitable, publish it.
You do not receive bonus blogging points for knowing what every slider does.
What I Like About Leonardo AI
The main strengths are:
- Large selection of image models
- Strong creative and technical control
- Useful Auto model selection
- Free plan available
- Detailed Image Guidance
- Multiple reference types
- Style and character consistency tools
- Canvas editing
- Inpainting and outpainting
- Realtime Canvas
- Personal AI model training
- Powerful image upscaling
- Suitable for realistic and artistic content
- Potential for typography and infographics
- Private creation on paid plans
- Token rollover on premium subscriptions
Leonardo offers one of the deepest toolsets in this comparison.
What Could Be Better
The main limitations are:
- The platform can feel overwhelming
- Model choice creates additional decisions
- Token costs vary by task
- Advanced features require learning
- Free-plan creations are public
- Free users do not receive the same ownership position as paid subscribers
- Text still needs checking
- Finished social graphics may still need Canva
- The full feature set is unnecessary for many bloggers
- Experimentation can become time-consuming
- Paid plans become expensive at higher levels
- Image optimisation may still require another step
Leonardo is flexible, but flexibility does not automatically equal simplicity.
Who Is Leonardo AI Best For?
Leonardo is best suited to:
- Bloggers who want more control than simple prompting provides
- Creators who enjoy visual experimentation
- Bloggers creating realistic product or lifestyle images
- Designers using reference images
- People building consistent characters or styles
- Bloggers producing digital products
- Creators working across images and video
- Users who want several image models in one platform
- Bloggers who need detailed editing and upscaling
- Advanced users who want to train personal models
- People who want to test a capable platform for free
It makes the most sense when visual creation is becoming a meaningful part of the business rather than an occasional blog task.
Who Should Avoid Leonardo for Now?
Leonardo may not be the best fit if you:
- Want the simplest possible workflow
- Rarely create original images
- Prefer conversational image planning
- Only need basic Pinterest graphics
- Already get suitable results from ChatGPT, Kre8or, or Canva
- Find technical settings distracting
- Do not need multiple specialist models
- Are likely to spend more time testing than publishing
- Need exclusive creations but do not want a paid subscription
- Want a tool designed specifically around blogging
A beginner can use Leonardo.
That does not mean a beginner needs Leonardo.
Leonardo AI Pros and Cons
Pros
- Excellent model choice
- Advanced creative controls
- Useful free plan
- Strong reference-image guidance
- Style, pose, sketch, and character controls
- Detailed Canvas editing
- Realtime creation tools
- High-quality upscaling
- Personal model training
- Suitable for many visual styles
- Private generations on paid plans
- Token rollover
- Strong option for experimentation
Cons
- More complicated than simpler alternatives
- Can create decision overload
- Variable token costs
- Free generations are public
- Full ownership position differs between free and paid plans
- Advanced tools require learning
- Social graphics may still need finishing elsewhere
- Easy to over-experiment
- Higher plans may be excessive for bloggers
- Not built specifically around a blog publishing workflow
Leonardo AI Rating for Bloggers
| Category | Rating |
|---|---|
| Ease of Use | 3.8/5 |
| Image Quality | 4.5/5 |
| Model Choice | 5/5 |
| Creative Control | 5/5 |
| Reference Tools | 5/5 |
| Editing and Upscaling | 4.8/5 |
| Everyday Blogging Workflow | 3.8/5 |
| Value for Money | 4.2/5 |
| Overall Rating | 4.4/5 |
Leonardo scores particularly highly for control, model choice, references, and editing.
Its everyday blogging score is lower because those strengths come with additional complexity.
For an advanced creator, that complexity may be worthwhile.
For a new blogger, it may simply be more settings standing between the article and the Publish button.
Bottom Line
Leonardo AI is the best choice in this comparison for bloggers who want advanced control and room to experiment.
Its combination of specialist models, Image Guidance, Canvas editing, Realtime Canvas, personal model training, and upscaling makes it one of the most flexible creative platforms available.
However, most bloggers will not need every feature.
My practical recommendation is:
Start with Leonardo’s free plan and Auto model. Only explore the advanced controls when you can identify the specific problem they will solve.
Leonardo can become a powerful creative studio as your visual needs grow.
It does not need to become another complicated system you learn before publishing your next blog post.
6. Adobe Firefly: Best for Bloggers Already Using Adobe
My Verdict
Adobe Firefly is my best choice for bloggers who already use Adobe products such as Photoshop, Adobe Express, Illustrator, or the wider Creative Cloud ecosystem.
Its biggest advantage is not necessarily that it produces the most artistic image or offers the simplest standalone workflow.
Its advantage is integration.
Firefly’s generative tools are available through Adobe’s dedicated Firefly platform and across Adobe applications, allowing users to generate an image, edit individual areas, extend the background, remove distractions, add text, resize the design, and continue refining it without constantly moving between unrelated platforms. Adobe describes Firefly as an all-in-one creative studio for generating and editing images, video, audio, and other content using Adobe and partner AI models.
That makes Firefly a logical option for someone whose creative workflow already lives inside Adobe.
For a beginner blogger who does not use Adobe, however, Firefly may not offer enough extra everyday value to justify learning another system or adding another subscription.
What Is Adobe Firefly?
Adobe Firefly is Adobe’s family of generative AI tools.
It began as a way to generate images from text prompts but has expanded into a much broader creative platform supporting:
- Text-to-image generation
- Image editing
- Generative Fill
- Generative Expand
- Text effects
- Vector generation
- Video generation
- Audio generation
- Translation
- Moodboarding and concept development
Firefly is available as a standalone web application and through integrations within Adobe products.
This means a user might begin by generating an image in Firefly and then continue working on it in Photoshop or Adobe Express.
That connected workflow is where Firefly becomes particularly useful.
Why Adobe Firefly Stands Out
Adobe Firefly stands out for three main reasons:
- Its integration with established Adobe design tools
- Adobe’s approach to training its own Firefly models
- Its combination of generation and detailed editing
Adobe says its current proprietary Firefly models are trained on licensed material such as Adobe Stock, alongside openly licensed and public-domain content where copyright has expired. Adobe positions these models as designed to be safe for commercial use.
That positioning may appeal to bloggers and businesses concerned about how generative models are trained.
However, Firefly now also provides access to partner models from other companies.
Adobe makes clear that its commercially safe claims about its own models should not automatically be applied to every third-party model available through Adobe products. Users remain responsible for reviewing the terms and deciding whether a partner model is appropriate for their project.
That is an important distinction.
Using a model inside Adobe does not mean Adobe trained or commercially protects that model in the same way as its own Firefly models.
Adobe Firefly Image Models
Adobe’s own image-model range includes Firefly Image Model 4 and Image Model 4 Ultra.
Adobe introduced these models in April 2025, highlighting improvements in realism, prompt accuracy, fine detail, complex scenes, and outputs at up to 2K resolution. Image Model 4 is intended for fast, high-quality creation, while Image Model 4 Ultra places more emphasis on detailed and realistic scenes.
For bloggers, these models can create:
- Realistic lifestyle scenes
- Blog hero images
- Editorial-style illustrations
- Product backgrounds
- Concept images
- Social-media visuals
- Decorative assets
- Textures
- Branded campaign imagery
Firefly also allows users to experiment with selected partner models through the same broader platform, giving creators more visual styles without necessarily opening a separate account for each provider.
That variety is useful, but it also introduces another decision.
Before generating, you may need to decide whether you want Adobe’s own commercially positioned model or a third-party option with different strengths and terms.
Adobe Firefly for Blog Hero Images
Firefly can produce strong blog hero images, particularly when the image will be refined afterwards in Photoshop or Adobe Express.
For example, you could create:
- A realistic parent working at a kitchen table
- A warm family-home blogging scene
- An editorial illustration about flexibility
- A workspace with space left for a headline
- A product-style composition
- A conceptual image about slow progress
- A clean technology background
The initial result does not always need to be perfect.
You can use Adobe’s editing tools to adjust:
- The background
- The subject
- Individual objects
- The crop
- The dimensions
- The surrounding space
- The lighting and colour
- The final text treatment
That makes Firefly especially valuable for users who see image generation as the beginning of the design process rather than the end.
Generative Fill
Generative Fill is one of the strongest reasons to use Firefly within Photoshop.
It allows you to select part of an image and describe what should be added, removed, or replaced.
A blogger could use it to:
- Remove an unwanted object
- Replace a distracting background
- Add a notebook or coffee cup
- Change an empty screen
- Adjust clothing
- Repair an awkward AI detail
- Add subtle brand-coloured objects
- Clear space for a headline
This can be much more efficient than regenerating the whole image because one corner contains an alarming six-fingered hand.
The benefit of working inside Photoshop is precision.
You control the selected area rather than hoping a conversational edit changes only the intended detail.
That makes Firefly more attractive to users who already understand layers, selections, masks, and image-editing tools.
Generative Expand
Generative Expand can extend an image beyond its original boundaries.
This is useful when an image has the right subject but the wrong shape.
For example, you may have:
- A square image that needs to become a wide blog hero
- A landscape image that needs additional vertical space
- A person positioned too close to the edge
- A background that needs extending for headline text
- A product image that needs more breathing room
Instead of stretching the original image or adding a plain background, generative expansion can create new surrounding content that matches the existing scene.
This is particularly helpful when repurposing one visual across several platforms.
However, the extended areas still need checking for repeated objects, strange textures, or new details that do not make sense.
Adobe Express
Adobe Express is likely to be the more relevant Adobe tool for many bloggers who do not need Photoshop’s full professional editing environment.
It supports the creation of:
- Social-media graphics
- Pinterest-style designs
- Posters
- Promotional content
- Simple videos
- Flyers
- Branded templates
- Blog graphics
Firefly features are integrated into Adobe Express, giving users a route from AI image generation to finished social design within the Adobe ecosystem. Adobe identifies Express, Photoshop, Premiere Pro, and other Creative Cloud applications as part of the wider Firefly workflow.
In practice, Adobe Express performs a similar finishing role to Canva.
You can combine:
- Generated images
- Templates
- Text
- Logos
- Brand colours
- Icons
- Stock assets
- Your own uploads
into a complete publish-ready design.
For someone already paying for Adobe services, Express may reduce the need for a separate Canva subscription.
For someone who already has a smooth Canva workflow, changing platforms may not save any time.
Firefly for Pinterest
Firefly can help with Pinterest in two ways.
First, it can generate the central visual.
That could be:
- A realistic blogging scene
- An editorial illustration
- A clean flat-lay
- A conceptual metaphor
- A product mockup
- A branded background
Second, the visual can be moved into Adobe Express or Photoshop for the final Pin design.
That allows you to add:
- Accurate headline text
- Brand fonts
- Your logo
- A clear layout
- Supporting text
- A call to action
- Consistent spacing
I would generally avoid relying entirely on the image model for a text-heavy Pinterest Pin.
The final wording is too important.
As with the other tools in this comparison, the safer workflow is:
Generate the artwork with Firefly. Add the final wording in an editable design tool.
Firefly for Social-Media Graphics
Firefly can also support Facebook, Instagram, and other social channels.
Potential uses include:
- Branded campaign imagery
- Lifestyle visuals
- Product promotions
- Quote backgrounds
- Educational graphics
- Event announcements
- Storytelling posts
- Original supporting illustrations
Adobe Express makes it possible to turn those visuals into reusable layouts.
This is where Firefly becomes more than a standalone generator.
A blogger can create the image, apply brand elements, resize the design, and prepare several social variations within the same broader suite.
That can be efficient for an Adobe user.
It may feel unnecessarily complicated to someone who already does all of this quickly in Canva.
Firefly for Infographics
Firefly can help create the visual components of an infographic.
For example:
- Decorative illustrations
- Icons
- Background scenes
- Textures
- Concept art
- Section imagery
However, I would build the final infographic in an editable platform such as Adobe Express, Illustrator, Photoshop, or Canva.
Infographics require accurate control over:
- Headings
- Labels
- Numbers
- Arrows
- Spacing
- Reading order
- Alignment
- Source information
An attractive AI-generated infographic can still fail if one label is incorrect or the information flow is confusing.
Firefly is most useful here as part of a wider Adobe design workflow rather than as a one-prompt infographic solution.
Text and Typography
Firefly can generate images containing text, but I would not choose it primarily for typography-heavy blog graphics.
Short phrases may work well.
Longer headlines, labels, charts, and detailed educational graphics should still be checked carefully.
For important wording, Adobe users have a major advantage: they can recreate the text as a normal editable layer.
That gives complete control over:
- Spelling
- Fonts
- Alignment
- Line breaks
- Kerning
- Size
- Colour
- Accessibility
This is another example of Firefly’s integration being more valuable than the initial generated output.
Structure Reference and Style Reference
Firefly supports reference-based generation, allowing users to guide the composition or appearance of a new image using an existing visual.
A structure reference can influence how the objects and shapes are arranged.
A style reference can influence qualities such as:
- Colour
- Lighting
- Texture
- Medium
- Mood
- Overall visual treatment
This can help bloggers create more consistent images or retain a particular composition.
For example, you might provide:
- A previous branded illustration
- A rough hero-image layout
- A product composition
- A visual style you created yourself
- A photograph showing the desired placement
You can then generate new content that follows aspects of that direction.
References improve control, but they do not guarantee a perfect match.
The result still needs checking for brand fit and visual accuracy.
Firefly Boards
Firefly Boards provides a collaborative and visual space for developing ideas, gathering references, comparing generations, and exploring creative directions.
Adobe launched Boards globally in September 2025 as part of the wider Firefly platform, positioning it as a place to brainstorm with generated and uploaded visual content.
For bloggers, this could be useful for:
- Planning a visual campaign
- Exploring a new brand style
- Collecting hero-image ideas
- Developing a lead magnet
- Comparing several design directions
- Planning a social series
- Working with a designer or client
For an individual parent blogger creating one image for tomorrow’s article, it may be more process than necessary.
Boards makes more sense when several related visuals need to feel connected.
Commercial-Use Positioning
Adobe’s commercial-use positioning is one of Firefly’s most distinctive selling points.
Adobe states that its proprietary Firefly models are trained on content it has permission to use, including licensed Adobe Stock material and public-domain content, and are designed for commercial use. Qualifying business plans may also include intellectual-property indemnification, subject to Adobe’s terms.
This does not mean every generated image is automatically free from all legal risk.
Users still need to consider:
- Trademarks
- Recognisable brands
- Public figures
- Personality rights
- Uploaded reference images
- Misleading content
- The terms of partner models
- The rights attached to the final use
Adobe’s approach may reduce some uncertainty around its own training data, but it does not replace responsible use or legal judgement.
For ordinary blog images, the key practical lesson is:
Check which model you are using and read the terms that apply to that model.
Content Credentials
Adobe has also been closely involved in the development of Content Credentials, which can attach information about how a digital asset was created or edited.
This can provide greater transparency around AI-assisted content.
For bloggers, Content Credentials are not currently a reason on their own to choose Firefly.
However, provenance and transparency may become increasingly important as platforms, publishers, advertisers, and audiences pay more attention to AI-generated media.
Adobe’s position within professional publishing and creative software gives it a strong reason to take that area seriously.
Adobe Firefly Free Plan
Adobe Firefly offers free access with a limited number of generations across selected image, video, and audio features.
Adobe currently describes the free tier as providing limited daily generations, although the exact allowance and available models can vary.
The free plan is enough to:
- Test the interface
- Generate a few images
- Explore different styles
- Try selected editing features
- Decide whether the Adobe workflow feels natural
For a blogger already using Adobe Express or another Creative Cloud product, some generative credits may also be included within the existing subscription. Adobe states that Creative Cloud plans include monthly credit allocations, although the allowance varies by plan and feature.
Adobe Firefly Pricing
Adobe currently offers several Firefly plans in the UK:
| Plan | Monthly Price | Monthly Generative Credits |
|---|---|---|
| Free | £0 | Limited free generations |
| Standard | £9.98 including VAT | 2,000 |
| Pro | £19.99 including VAT | 4,000 |
| Pro Plus | £47.99 including VAT | 10,000 |
| Premium | £167 excluding VAT | 50,000 |
Firefly Premium also includes unlimited access to Adobe’s Firefly Video Model under the current plan terms.
Adobe has also run temporary offers providing unlimited generations on selected models and features for eligible plans, so the current pricing page should be checked immediately before publication.
For most bloggers, Standard or the credits already included with another Adobe subscription would be the realistic starting point.
The higher plans are aimed more towards heavy creative, video, agency, or business use.
How Generative Credits Work
Adobe uses generative credits across Firefly and supported Creative Cloud features.
The number of credits consumed depends on the model and task.
A standard image may use fewer credits than premium image, video, audio, translation, or higher-compute features.
This means a plan’s credit figure does not translate neatly into one fixed number of images.
It depends on what you create.
Adobe’s credit rules and promotions have also changed over time, so users should check:
- Which features use credits
- Which models are included
- Whether standard generations continue after credits are used
- Whether any unlimited-generation offer applies
- When the monthly allowance resets
Credit systems are not inherently bad, but they can encourage either excessive caution or excessive experimentation.
The best way to control usage is to plan the image before generating it.
Is Adobe Firefly Easy to Use?
The basic Firefly web interface is approachable.
A beginner can:
- Select an image-generation tool.
- Enter a prompt.
- Choose a model and format.
- Add style or structure references.
- Generate several options.
- Download or edit the preferred result.
The difficulty depends on what happens next.
If the user moves into Photoshop, Illustrator, or advanced Creative Cloud workflows, the learning curve increases considerably.
Adobe Express is more accessible to beginners.
Photoshop offers more control but assumes greater design and editing knowledge.
That makes Firefly’s ease of use highly dependent on the wider Adobe tool being used.
Firefly’s Biggest Strength: Adobe Integration
Firefly’s biggest advantage is how naturally it can fit into an existing Adobe workflow.
A user can move from:
- Idea
- Generation
- Selection
- Detailed editing
- Layout design
- Resizing
- Export
without abandoning the software they already understand.
That can be a genuine time-saver.
The same feature is much less valuable to someone who does not already use Adobe.
Switching your entire design process to Adobe solely for Firefly may create more work than it saves.
Firefly’s Biggest Weakness: Its Best Value Depends on the Ecosystem
As a standalone AI image generator, Firefly is capable and flexible.
However, its strongest benefits become clearer when combined with:
- Photoshop
- Adobe Express
- Illustrator
- Creative Cloud Libraries
- Other Adobe workflows
Without those tools, a blogger may find that ChatGPT offers better planning, Kre8or offers a more focused generation experience, Canva offers easier social design, or Midjourney offers more distinctive artistic results.
Firefly is not weak outside the Adobe ecosystem.
It is simply less differentiated.
What I Like About Adobe Firefly
The main strengths are:
- Strong integration with Adobe products
- Good image-generation quality
- Generative Fill and Generative Expand
- Detailed editing through Photoshop
- Accessible social design through Adobe Express
- Adobe’s commercially safe positioning for its own models
- Use of licensed and public-domain training sources for proprietary Firefly models
- Style and structure references
- Access to multiple Adobe and partner models
- Free access available
- Credits included with some Creative Cloud plans
- Useful for images, video, audio, and vectors
- Strong fit for professional creative workflows
Adobe Firefly makes the most sense when it removes steps from a workflow you already use.
What Could Be Better
The main limitations are:
- Its strongest benefits depend on using other Adobe products
- The wider Adobe ecosystem can have a substantial learning curve
- Credit rules can feel complicated
- Partner models have separate terms and commercial considerations
- Text still requires checking
- Standalone results may be less distinctive than Midjourney
- It may offer more editing power than a blogger needs
- Paid plans add another subscription
- Photoshop may be intimidating for beginners
- Adobe Express may duplicate tools already available in Canva
- Pricing and promotions can change frequently
The main question is not whether Firefly is powerful.
It is whether that power fits the blogger’s existing workflow.
Who Is Adobe Firefly Best For?
Adobe Firefly is best suited to:
- Bloggers already using Photoshop
- Adobe Express users
- Creative Cloud subscribers
- Designers who also run blogs
- Bloggers who want detailed image editing
- Creators concerned about model-training sources
- Businesses producing larger volumes of branded visual content
- Bloggers combining images, vectors, video, and audio
- People who need precise control over selected areas
- Users who want AI features inside familiar professional software
It is particularly attractive when the subscription and creative knowledge are already in place.
Who Should Avoid Adobe Firefly for Now?
Firefly may not be the best choice if you:
- Do not use any Adobe products
- Want the simplest possible image workflow
- Prefer conversational planning
- Mainly create straightforward Pinterest graphics
- Already use Canva successfully
- Do not need advanced editing
- Want a dedicated creative community
- Prefer highly stylised artistic generation
- Want to minimise subscriptions
- Find professional design software overwhelming
A beginner blogger should not feel they need Photoshop simply because professional designers use it.
The right tool is the one that helps you publish—not the one with the longest feature list.
Adobe Firefly Pros and Cons
Pros
- Excellent Adobe integration
- Strong generation and editing combination
- Generative Fill and Expand
- Detailed Photoshop controls
- Accessible Adobe Express workflow
- Commercially safe positioning for Adobe’s own models
- Proprietary models trained on licensed and public-domain content
- Style and structure references
- Multiple creative formats
- Free access available
- Included credits with some Adobe plans
- Access to partner models
- Suitable for professional workflows
Cons
- Best value depends on the wider Adobe ecosystem
- Can involve a significant learning curve
- Credit system may feel complicated
- Partner-model terms need separate checking
- May duplicate an existing Canva workflow
- Not always the most artistic standalone generator
- More editing power than many bloggers need
- Paid plans can add significant cost
- Text still needs proofreading
- Not built specifically around blogging
Adobe Firefly Rating for Bloggers
| Category | Rating |
|---|---|
| Ease of Use | 4/5 |
| Image Quality | 4.4/5 |
| Editing and Refinement | 5/5 |
| Adobe Integration | 5/5 |
| Text and Structured Graphics | 4/5 |
| Commercial-Use Positioning | 4.8/5 |
| Everyday Blogging Workflow | 4/5 |
| Value for Money | 3.8/5 |
| Overall Rating | 4.3/5 |
Firefly scores particularly well for editing, integration, and Adobe’s approach to its own training data.
Its value-for-money score depends heavily on whether you already subscribe to Adobe.
For an existing Creative Cloud user, the practical value may be considerably higher.
Bottom Line
Adobe Firefly is the best option in this comparison for bloggers already working inside Adobe’s creative ecosystem.
It combines capable AI generation with professional editing, social design, image expansion, object replacement, and wider Creative Cloud integration.
Its commercially safe positioning for Adobe’s proprietary models may also provide additional reassurance to businesses and creators, although users still need to check the terms of any partner models they select.
My practical recommendation is:
Choose Firefly because it improves your existing Adobe workflow—not because you feel you ought to use professional design software.
For Adobe users, Firefly can remove friction and bring AI into tools they already understand.
For everyone else, ChatGPT, Canva, or Kre8or will probably provide a more approachable starting point.
7. WA ImageStudio: Best for Wealthy Affiliate Members
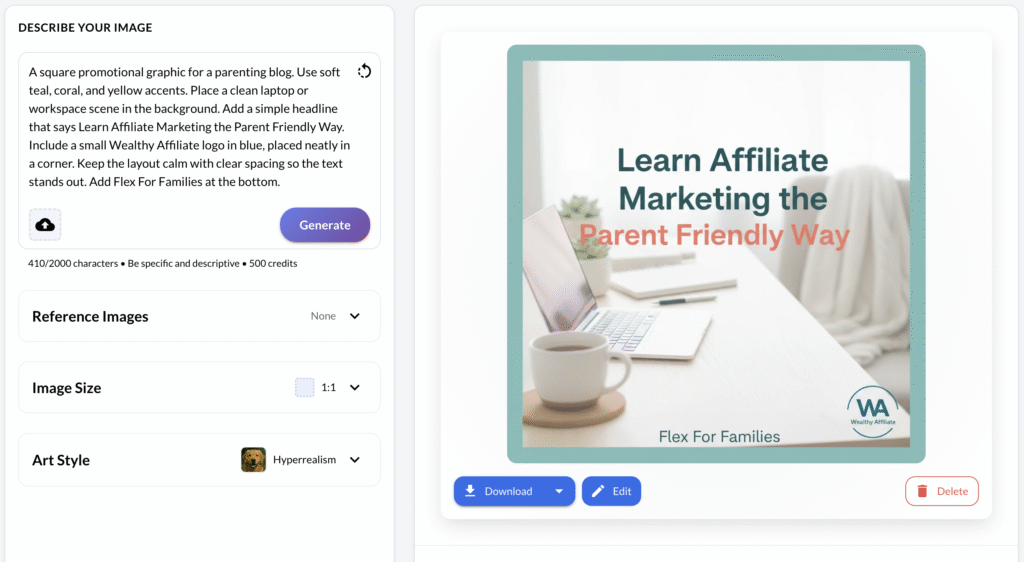
My Verdict
WA ImageStudio is my best choice for Wealthy Affiliate members who want a straightforward way to create blog images, social graphics, product mockups, and promotional visuals without adding another separate platform to their workflow.
Its main advantage is convenience.
ImageStudio sits alongside Wealthy Affiliate’s other AI and business-building tools, including Article Designer, Logo Designer, and Jaaxy Research. Members can move from researching an idea and planning an article to creating the supporting visuals without opening another subscription or learning an entirely separate ecosystem.
That makes ImageStudio particularly appealing to beginners.
You can:
- Describe the image you want
- Choose an aspect ratio
- Select an art style
- Upload reference images
- Generate several visual options
- Edit or reimagine an existing image
- Download the result for your blog or social channels
It is much more capable than a token image feature added as an afterthought.
However, ImageStudio is still part of Wealthy Affiliate rather than a standalone visual-design platform.
It does not replace Canva’s precise layout controls, ChatGPT’s wider planning support, Midjourney’s artistic depth, or Leonardo’s advanced model settings.
Its strongest recommendation is therefore very specific:
If you are already a Wealthy Affiliate member, try ImageStudio before paying for another dedicated AI image generator.
What Is WA ImageStudio?
ImageStudio is Wealthy Affiliate’s integrated AI image-generation and editing platform.
It officially launched in beta in November 2025 and has continued receiving model and feature improvements since then. Wealthy Affiliate describes it as a tool for creating new images, blog visuals, advertisements, banners, thumbnails, memes, branded graphics, product mockups, and promotional content.
You can access it through:
AI Tools → Image Studio
The interface is designed to be approachable rather than technically complicated.
You provide a prompt, choose the required format and style, optionally upload reference images, and generate the result.
That gives members a direct route from a content idea to a usable image without needing to understand model names, GPU allowances, or specialist image-generation parameters.
Why ImageStudio Stands Out for Wealthy Affiliate Members
The key benefit is not that ImageStudio automatically beats every specialist platform in every category.
It is that the tool is already connected to the environment where many Wealthy Affiliate members:
- Research keywords
- Plan content
- Write articles
- Learn affiliate marketing
- Build websites
- Ask the community for feedback
- Manage their online business
That removes some friction.
A new blogger may otherwise end up paying for:
- An AI writing tool
- A keyword tool
- An image generator
- A logo tool
- A hosting platform
- A training membership
- A community
- A separate website-support service
Wealthy Affiliate is attempting to combine several of those functions within one membership.
ImageStudio strengthens that all-in-one argument.
It also gives members a practical place to experiment with AI images before deciding whether they genuinely need a specialist tool such as Kre8or, Midjourney, or Leonardo AI.
Is ImageStudio Easy to Use?
ImageStudio is one of the more approachable options in this comparison.
The basic workflow is:
- Open ImageStudio.
- Choose the required aspect ratio.
- Describe the image.
- Select an art style if needed.
- Upload any reference images.
- Generate the options.
- Edit, reimagine, or download the preferred result.
Available style groupings have included options such as:
- General art
- Traditional art
- Illustration and design
- Thematic styles
- Decorative and abstract styles
The platform also offers common dimensions for blog headers, Pinterest graphics, square social posts, vertical content, and wider banner-style images.
You do not need to choose between a long list of underlying AI models.
You do not need to learn Midjourney parameters.
You do not need to understand Leonardo’s guidance systems.
That simplicity is valuable for beginners who already have enough to learn about blogging.
ImageStudio for Developing Blog Images
ImageStudio can create visuals for many common blog requirements, including:
- Hero images
- Section illustrations
- Tutorial graphics
- Product scenes
- Review images
- Comparison visuals
- Decorative backgrounds
- Conceptual illustrations
- Lifestyle scenes
For example, a parent-blogging article could request:
A realistic dad blogger working at a kitchen table during the evening, warm family home, child’s drawings in the background, natural domestic details, subtle teal and coral accents, honest and achievable atmosphere, no luxury office or money imagery.
You could choose a wide ratio for the blog hero and generate the image directly within Wealthy Affiliate.
That makes it particularly useful for members who previously relied heavily on generic stock images.
Instead of searching for a photograph that almost fits the article, you can create a visual around the article’s actual message.
Aspect Ratios
ImageStudio supports different aspect ratios for common publishing formats.
Examples discussed within the Wealthy Affiliate community include:
- 16:9 for blog heroes, YouTube thumbnails, and wide social content
- 21:9 for wide banner-style images
- 1:1 for Facebook and Instagram squares
- 2:3 for Pinterest Pins
- 9:16 for Stories and vertical video projects
- 5:4 for some print and blog formats
Choosing the right ratio before generating is important.
An AI tool may create the perfect subject but place it in the centre of a square image when you actually needed space for a headline on the left of a wide blog hero.
For blogging, I would normally decide the image’s final use first and then generate it in the closest available ratio.
ImageStudio for Pinterest
ImageStudio can create vertical images suitable for Pinterest using a 2:3 ratio.
Possible uses include:
- Title-based Pins
- Lifestyle scenes
- Checklist graphics
- Illustrations
- Blog-post promotions
- Product graphics
- Before-and-after concepts
- Quote-style visuals
It can also attempt to generate text as part of the image.
However, as with every AI generator in this comparison, I would carefully inspect:
- Spelling
- Punctuation
- Repeated words
- Small text
- Logo accuracy
- Line breaks
- Headline placement
For reliable Pinterest graphics, my preferred workflow would be:
- Plan the Pin concept and wording.
- Generate the central visual in ImageStudio.
- Download the image.
- Add the exact headline, logo, and branding in Canva.
- Export the finished Pin.
ImageStudio handles the original artwork.
Canva gives you predictable text and layout control.
ImageStudio for Facebook and Social Media
ImageStudio is well suited to creating quick social visuals.
You could use it for:
- Facebook squares
- Instagram posts
- Motivational images
- Educational graphics
- Quote images
- Blog promotions
- Product scenes
- Humorous niche content
- Branded campaign visuals
One Wealthy Affiliate member compared ImageStudio with Bing Image Creator using the same prompts and preferred the ImageStudio results for their quote image, artwork, and Wealthy Affiliate promotional visual. That is an individual user test rather than an independent benchmark, but it demonstrates that members are using the platform for practical everyday social content rather than merely experimental artwork.
For simple posts, the generated result may be usable immediately.
For important promotional graphics, I would still finish the design in Canva or another editable layout tool.
Reference Images
Reference-image support is one of ImageStudio’s most valuable features.
You can upload:
- A logo
- A product photograph
- A person
- A previous design
- A branded image
- A mockup
- A visual-style example
and ask ImageStudio to incorporate it into a new scene.
Wealthy Affiliate says recent model updates improved the handling of context, product references, multiple characters, and complex scene generation.
For bloggers, reference images could help with:
- Placing a product into a lifestyle scene
- Showing a recurring person in different settings
- Including a brand logo
- Building product-review visuals
- Creating digital-product mockups
- Maintaining some visual consistency
- Transforming an existing photograph
This is considerably more useful than only creating generic images from text.
Product Placement and Mockups
ImageStudio can be useful for affiliate reviews, ecommerce content, and digital-product promotion.
You can upload a product reference and ask the tool to place it into a new setting.
For example:
- A course workbook displayed on a desk
- A software dashboard shown on a laptop
- A printable shown inside a framed mockup
- A physical product in a home environment
- Branded packaging in a promotional scene
- A print-on-demand design shown in context
A Wealthy Affiliate member documented using ChatGPT to develop a print-on-demand design brief, generating the artwork through WA ImageStudio, and then uploading a flat product image back into ImageStudio to create lifestyle mockups.
That combination highlights an important workflow:
Use ChatGPT to develop the visual brief and ImageStudio to create the artwork.
It is similar to the ChatGPT-and-Kre8or workflow, but everything does not necessarily require another paid image subscription.
Multiple Reference Images
Updates announced in March 2026 improved ImageStudio’s ability to work with several reference subjects inside one scene.
Wealthy Affiliate demonstrated multiple reference characters being placed into a shared environment while retaining recognisable characteristics.
Potential blogging uses include:
- Showing several team members
- Creating family-based illustrations
- Combining a person and product
- Placing two products into a comparison scene
- Developing storytelling sequences
- Producing branded campaign imagery
As with all AI identity and character tools, consistency will not always be perfect.
Check whether the system has altered:
- Facial features
- Clothing
- Body proportions
- Product shape
- Logo details
- Relative scale
The ability to upload multiple references is useful, but the final image still requires human review.
Editing and Reimagining Images
ImageStudio is not limited to generating a completely new image from scratch.
It also supports editing, enhancing, and reimagining existing visuals. Wealthy Affiliate has highlighted uses such as changing scenes, adjusting outfits, adding a person to a new environment, and incorporating branded or product elements.
This could help when:
- The composition is nearly right
- You want a new background
- A product needs placing in a scene
- You want to adapt an existing image
- A social graphic needs another version
- You want to change the visual style
Progressive edits generally work better than attempting to change ten things at once.
Ask for one clear adjustment, inspect the result, and then continue.
That reduces the risk of the tool fixing one detail while quietly redesigning everything else.
ImageStudio for Branded Content
ImageStudio can incorporate brand elements through prompts and references.
For Flex For Families, I could specify:
- Teal and coral accents
- Warm family-home scenes
- Realistic parents
- Clean editorial compositions
- Practical rather than luxurious settings
- No fake-guru imagery
- No exaggerated money graphics
I could also upload the Flex For Families logo or an existing visual as a reference.
However, I would not assume that every generation will reproduce a logo or brand colour perfectly.
AI image models may:
- Alter the logo
- Approximate the colour
- Change the wording
- Move the design
- Invent extra brand elements
For exact branding, the safest approach is still to add the original logo manually in Canva after generating the image.
Infographics and Charts
Wealthy Affiliate promotes ImageStudio for infographics, charts, comparison graphics, and on-image text content.
That makes it potentially useful for:
- Step-by-step processes
- Blog frameworks
- Comparison summaries
- Timelines
- Checklists
- Educational visuals
- Simple charts
However, generated data and text should never be trusted without checking.
An AI image can confidently produce:
- Incorrect figures
- Misspelled labels
- Repeated steps
- Missing stages
- Illogical arrows
- Invented claims
For an important infographic, I would use ImageStudio to create the visual direction or supporting illustrations and then rebuild the final labels and information in Canva.
The more factual the graphic, the more manual control matters.
Multilingual Visuals
ImageStudio’s March 2026 update also introduced stronger multilingual image-editing capabilities.
Wealthy Affiliate demonstrated transforming existing English visual content into languages including Japanese, Spanish, and Arabic.
That could be useful for bloggers and businesses targeting more than one market.
However, translated graphics need checking by someone who understands the target language.
A design can look polished while containing a mistranslation, awkward phrasing, or incorrect text direction.
The AI output should be treated as a starting point rather than automatic localisation.
Image Quality
ImageStudio can produce high-quality realistic, illustrative, promotional, and conceptual visuals.
Wealthy Affiliate reported improvements to lighting, realism, composition, contextual understanding, and reference handling following a model update in March 2026.
The final quality still depends heavily on:
- The prompt
- The selected ratio
- The art style
- The reference images
- The complexity of the scene
- The amount of text
- The required level of accuracy
Simple prompts can work well for straightforward scenes.
More distinctive brand images benefit from clearer direction around:
- Subject
- Setting
- Composition
- Lighting
- Mood
- Colour palette
- Intended platform
- Elements to avoid
This is where ChatGPT can help.
You can develop the detailed prompt conversationally and then paste it into ImageStudio.
ImageStudio and ChatGPT Together
ImageStudio does not need to replace ChatGPT.
The two tools can perform different roles.
ChatGPT can help with:
- Reviewing the article
- Identifying the image’s purpose
- Suggesting visual concepts
- Developing a detailed prompt
- Producing variations for each platform
- Writing alt text
- Creating social captions
ImageStudio can then generate the visual.
This is likely to be the strongest workflow for Wealthy Affiliate members:
Plan with ChatGPT. Generate with WA ImageStudio. Finish with Canva.
That gives you strategic support, integrated image creation, and precise final branding.
AI Credits and Access
Wealthy Affiliate uses a shared AI-credit system across its AI-powered tools.
Its current public homepage advertises 4,000 free AI credits when beginning with a free account.
ImageStudio initially launched in beta for Premium and Premium Plus+ members, with promotional bonus-credit offers during the launch period. Those launch bonuses were time-limited and should not be presented as permanent current inclusions.
The number of credits required may vary based on the action being performed.
That means it is difficult to translate an allowance into one fixed number of finished images.
Before relying on ImageStudio, members should check inside their current account for:
- Whether their membership includes access
- Their available AI-credit balance
- The cost of each generation
- Whether edits use additional credits
- Whether credits reset or roll over
- The current options for purchasing more
Wealthy Affiliate develops its AI tools quickly, so allowances and access conditions may change.
Is ImageStudio Free?
ImageStudio should not be described as an entirely free standalone image generator.
It is part of Wealthy Affiliate’s wider platform and AI-credit system.
A free Wealthy Affiliate account currently includes a starting allocation of AI credits, but ImageStudio’s full availability and allowances may depend on the membership level and current platform rules.
That leads to an important distinction:
For an existing Wealthy Affiliate member
ImageStudio may feel like an included tool because the membership is already being used for training, hosting, keyword research, and other services.
For someone who only wants an image generator
Joining an entire online-business platform purely to use ImageStudio would make less sense than choosing a dedicated image service.
The value depends on whether you use the wider membership.
The Advantage of Having Everything Together
For Wealthy Affiliate members, the platform can support a connected process:
- Research a keyword with Jaaxy.
- Plan the article.
- Draft or structure it with Article Designer.
- Create the logo or visual elements.
- Generate the blog images in ImageStudio.
- Publish the content on the hosted website.
- Ask the community for feedback.
That reduces the number of separate accounts involved.
It can also make AI image creation feel less intimidating because the tool is presented as one stage of building a website rather than an entirely separate creative discipline.
This is particularly useful for beginners who want to focus on publishing rather than assembling a complicated collection of software.
ImageStudio’s Biggest Strength: Convenience for Members
ImageStudio’s biggest advantage is that it meets Wealthy Affiliate members where they are already working.
There is:
- No separate specialist subscription
- No unfamiliar creative community
- No complex model selection
- No Discord requirement
- No need to learn advanced parameters
- No need to leave the wider business platform
That can make it the most sensible first AI image generator for a Wealthy Affiliate beginner.
It may not beat Midjourney artistically or Leonardo technically.
It does not need to.
It needs to help members create suitable images and get back to building their websites.
ImageStudio’s Biggest Weakness: It Is Tied to Wealthy Affiliate
The strongest reason to use ImageStudio is also its main limitation.
It is part of Wealthy Affiliate.
That means its value is much lower for someone who:
- Does not use Wealthy Affiliate
- Already has another hosting and training setup
- Wants a dedicated visual community
- Needs highly advanced image controls
- Only wants image generation
- Prefers a platform-independent creative library
It also means that ImageStudio is not normally evaluated as a standalone subscription in the same way as Midjourney, Leonardo AI, or Kre8or.
The cost is part of a much broader membership.
That makes direct price comparisons difficult.
What I Like About WA ImageStudio
The main strengths are:
- Integrated within Wealthy Affiliate
- Straightforward interface
- Suitable for beginners
- Creates blog and social images
- Supports several aspect ratios
- Includes art-style options
- Accepts reference images
- Can work with products and branded assets
- Supports editing and reimagining
- Can combine multiple references
- Useful for mockups and promotional scenes
- Works well alongside ChatGPT
- Removes the immediate need for another specialist subscription
- Supported by an active Wealthy Affiliate community
It is a practical addition to the platform rather than an isolated novelty.
What Could Be Better
The main limitations are:
- Its value is closely tied to Wealthy Affiliate membership
- It is not available as a normal standalone image service
- AI-credit use adds another allowance to manage
- Precise pricing comparisons are difficult
- Text and logos still need checking
- It lacks Canva’s manual layout control
- It does not offer Leonardo’s advanced technical settings
- It does not have Midjourney’s specialist artistic ecosystem
- It may still require Canva for final branding
- Image optimisation may require another step
- Current access and allowances can change as the platform develops
ImageStudio can simplify one part of the workflow, but it does not remove the need for proofreading, branding, or image optimisation.
Who Is WA ImageStudio Best For?
ImageStudio is best suited to:
- Existing Wealthy Affiliate members
- New affiliate marketers
- Beginner bloggers using WA
- Members who want fewer external subscriptions
- People creating blog hero images
- Members producing Pinterest and Facebook graphics
- Affiliate reviewers creating product scenes
- Bloggers experimenting with reference images
- Members who want image tools beside their other business tools
- People using ChatGPT to develop prompts
It is especially useful for someone who has already paid for Wealthy Affiliate and has not yet chosen a dedicated AI image platform.
Who Should Avoid WA ImageStudio?
ImageStudio may not be the right choice if you:
- Do not use Wealthy Affiliate
- Only want an image generator
- Need highly artistic specialist output
- Require advanced model and guidance controls
- Want a full professional design editor
- Prefer a large standalone creator marketplace
- Already have a successful workflow with another platform
- Need total independence from a wider business membership
Someone choosing tools from scratch should evaluate Wealthy Affiliate as a complete online-business platform—not subscribe solely because ImageStudio is included.
WA ImageStudio Pros and Cons
Pros
- Convenient for Wealthy Affiliate members
- Integrated with other business-building tools
- Beginner-friendly
- Supports common social and blog formats
- Reference-image support
- Editing and reimagining tools
- Multiple-character and product integration
- Useful for blog visuals and mockups
- Avoids an immediate extra image subscription
- Works well with ChatGPT prompting
- Community support and examples
Cons
- Tied to Wealthy Affiliate
- Not a normal standalone subscription
- Credit allowances must be managed
- Text and logos still require checking
- Limited manual layout control
- Less advanced than specialist creative platforms
- May still need Canva for finishing
- Harder to compare on price alone
- Access and features may change with membership level
WA ImageStudio Rating for Bloggers
| Category | Rating |
|---|---|
| Ease of Use | 4.5/5 |
| Image Quality | 4.3/5 |
| Reference Images | 4.5/5 |
| Editing and Reimagining | 4.2/5 |
| Blog and Social Formats | 4.5/5 |
| Advanced Creative Control | 3.7/5 |
| Value for Existing WA Members | 4.8/5 |
| Value as a Standalone Choice | 3/5 |
| Overall Rating | 4.2/5 |
ImageStudio’s overall score reflects its usefulness to bloggers rather than raw artistic power alone.
For an existing Wealthy Affiliate member, I would rate its practical value more highly than the overall figure suggests.
For someone outside Wealthy Affiliate, it is difficult to recommend over a dedicated tool because joining the entire platform solely for image generation would be excessive.
Bottom Line
WA ImageStudio is the best option in this comparison for Wealthy Affiliate members who want a capable and convenient image generator inside the platform they already use.
It can create:
- Blog hero images
- Social graphics
- Pinterest visuals
- Product scenes
- Mockups
- Branded illustrations
- Promotional content
without immediately requiring another specialist subscription.
It is not the most advanced image tool in this guide.
It does not need to be.
Its purpose is to make visual content creation easier for people already building their online businesses inside Wealthy Affiliate.
My practical recommendation is:
Use the image credits and tools already available within your Wealthy Affiliate membership before paying for another generator.
You may eventually decide that Kre8or, Midjourney, Leonardo AI, or another specialist platform provides something you genuinely need.
But make that decision after testing ImageStudio—not before.
For a new Wealthy Affiliate member, the simplest workflow may be:
Research with Jaaxy. Plan with ChatGPT. Generate with ImageStudio. Finish with Canva.
That covers most everyday blogging visuals without turning image creation into a separate business of its own.
AI Image Generator Comparison at a Glance
After looking at each platform individually, it can be difficult to remember which tool excels in which area.
That is exactly why I created the comparison table below.
Rather than trying to decide based on hundreds of individual features, focus on the questions that actually matter for blogging:
- Which tool is easiest to learn?
- Which produces the best-looking images?
- Which offers the most creative control?
- Which handles text well?
- Which supports reference images?
- Which gives the best value for bloggers?
- Which one is best suited to your current stage?
There is no perfect AI image generator.
Each platform has its own strengths.
Some prioritise artistic quality.
Others focus on speed, branding, editing, or workflow integration.
As a busy parent blogger, I would always choose the tool that helps me publish useful content more consistently rather than the one with the longest feature list.

What the Comparison Shows
Looking across all seven tools, a few clear patterns emerge.
Kre8or is the strongest all-round image generator for bloggers.
It offers the best overall balance between image quality, ease of use, creative flexibility, and everyday blogging features without becoming unnecessarily complicated.
That is why it remains my overall recommendation.
ChatGPT is not simply an image generator.
Its biggest strength is helping you think through the image before you create it.
It is brilliant for:
- Brainstorming concepts
- Improving prompts
- Creating several visual ideas
- Writing alt text
- Producing social captions
- Planning complete content assets
For many bloggers, ChatGPT improves the quality of every image—even when another platform actually generates it.
Canva is still the finishing tool I recommend most often.
Even the best AI image usually benefits from adding:
- Accurate headlines
- Logos
- Brand colours
- Consistent fonts
- Pinterest layouts
- Social-media templates
AI creates the artwork.
Canva makes it publishable.
Midjourney produces the most artistic and visually distinctive images in this comparison.
When you want a hero image that immediately stands out, Midjourney is difficult to beat.
However, that extra creativity comes with a steeper learning curve and a workflow that may be more involved than many bloggers actually need.
Leonardo AI gives you the greatest amount of technical control.
If you enjoy experimenting with models, references, editing, and advanced settings, Leonardo is one of the most capable platforms available.
Most beginners, however, will probably never use half of what it offers.
Adobe Firefly is strongest when you already live inside Adobe’s ecosystem.
Its AI tools become much more valuable when combined with Photoshop, Adobe Express, Illustrator, and Creative Cloud rather than being used as a completely standalone image generator.
WA ImageStudio fills a different role.
For Wealthy Affiliate members, it removes the need to immediately subscribe to another image platform because image creation sits alongside the rest of the blogging workflow.
That convenience is its biggest advantage.
Which Tool Wins Overall?
If I had to recommend just one dedicated AI image generator for most bloggers today, it would be Kre8or.
Not because it wins every individual category.
It doesn’t.
Midjourney creates more artistic images.
Leonardo offers more technical control.
Canva is better for finishing graphics.
ChatGPT is better for planning.
Instead, Kre8or wins because it consistently performs well across the areas that matter most to bloggers.
That makes it the easiest recommendation for someone who wants one primary image tool.
Don’t Choose Based on Features Alone
One mistake I see people make is comparing feature lists instead of workflows.
A platform can offer:
- 50 AI models
- Hundreds of settings
- Endless editing options
- Advanced technical controls
and still slow you down.
Meanwhile, a simpler platform that helps you create good images in five minutes may produce far better long-term results.
As bloggers, we are not trying to become full-time digital artists.
We are trying to publish helpful content consistently.
That is why I always recommend choosing the tool that removes friction from your workflow rather than adding more decisions.
The best AI image generator is not necessarily the most powerful one.
It is the one that helps you create high-quality visuals while leaving you more time to write articles, help readers, and grow your blog.
In the next section, I’ll help you narrow the choice even further by matching each tool to the stage of blogging you’re currently at.
Which AI Image Tool Fits Your Blogging Stage?
The best AI image tool for an established content creator may be completely unnecessary for someone publishing their first ten blog posts.
That is why I would not choose a platform based only on image quality, feature count, or what appears most impressive in a demonstration.
The better question is:
What visual problem are you trying to solve at your current blogging stage?
A beginner may need speed and simplicity.
A growing blogger may need stronger branding and consistent social graphics.
A more established creator may want better editing, original visual styles, or advanced control over products and reference images.
Your ideal tool can therefore change as your blog develops.
Use the Decision Tree
The decision tree below provides a quick way to narrow down the options.
Start with your main goal and follow the route that most closely reflects the way you want to create images.
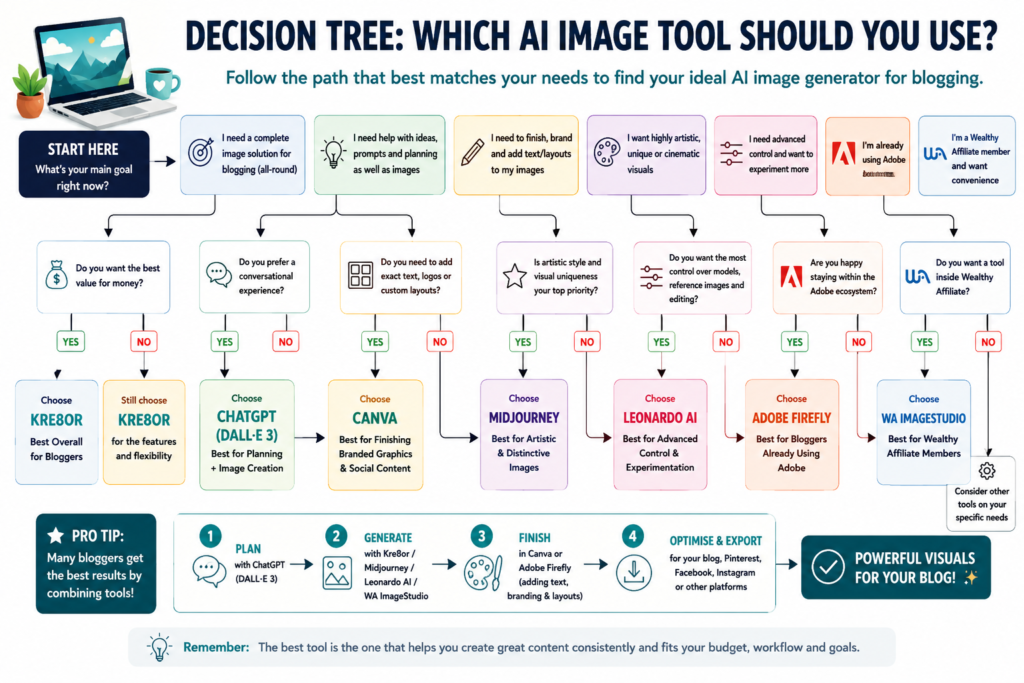
The decision tree is useful because there is no single winner for every type of blogger.
Kre8or is my overall recommendation, but that does not mean every blogger should immediately subscribe to it.
The strongest choice depends on:
- Your current blogging stage
- The images you create most often
- Your available budget
- The tools you already use
- How much creative control you want
- Whether the tool saves time or creates more work
Here is how I would approach the decision at each stage.
Stage 1: You Are Starting Your First Blog
At the beginning, you do not need the most advanced image generator.
You need something that helps you publish consistently without adding another complicated system to learn.
Your early visual requirements will probably include:
- A basic blog hero image
- A featured image
- One or two social graphics
- Perhaps an occasional Pinterest Pin
- Simple supporting illustrations
At this stage, I would begin with the tools you already have access to.
That could mean:
- ChatGPT if your subscription includes image creation
- Canva Free for layouts and social graphics
- WA ImageStudio if you are already a Wealthy Affiliate member
- Leonardo AI Free if you want to experiment before paying
My preferred beginner workflow would be:
Plan the idea with ChatGPT, generate the image using a tool you already have, and add the final text in Canva.
This keeps costs and complexity under control.
A new blog will not succeed or fail because its first hero image lacked cinematic lighting.
Useful content, consistent publishing, clear branding, and helping the right audience matter far more.
Best Starting Choices
Best for planning: ChatGPT
Best free finishing tool: Canva
Best for WA members: WA ImageStudio
Best free platform for experimentation: Leonardo AI
Stage 2: You Are Publishing Consistently
Once you are regularly publishing articles, image creation starts becoming a repeated workflow rather than an occasional task.
You may notice that:
- Finding suitable stock images takes too long
- Your blog visuals look inconsistent
- Social graphics require too much manual work
- You repeatedly rewrite the same prompts
- You need several images for every article
- Free-plan limits are becoming restrictive
This is the stage where a dedicated image tool can begin to save meaningful time.
Kre8or becomes particularly attractive because it is designed to handle several common blogger requirements within one platform.
You can create:
- Hero images
- Social graphics
- Pinterest images
- Product visuals
- Mockups
- Supporting blog images
without building an overly technical workflow.
ChatGPT remains useful for developing the visual brief, but Kre8or can take over more of the actual production.
Best Choice for Most Consistent Bloggers
Kre8or
It offers the best overall balance of:
- Image quality
- Ease of use
- Flexibility
- Blogger-focused formats
- Reference-image support
- Practical everyday creation
This is the point where I would consider paying for a dedicated tool—provided image creation is happening often enough to justify the cost.
Stage 3: You Are Building a Recognisable Brand
As your blog grows, the question changes from:
“Can I create an image?”
to:
“Does this image look like it belongs to my brand?”
You may now need:
- Consistent colours
- Repeatable layouts
- Recognisable fonts
- A correctly placed logo
- Several social variations
- Matching Pinterest Pins
- Lead magnet graphics
- Branded content series
At this stage, Canva becomes increasingly valuable.
AI generators can create the central artwork, but Canva gives you predictable control over the elements that should not change.
That includes:
- Headline spelling
- Brand fonts
- Logo placement
- Colour consistency
- Margins
- Alignment
- Template structure
My preferred workflow at this stage would be:
Plan with ChatGPT → Generate with Kre8or or another image tool → Finish with Canva.
Canva does not need to generate the strongest original image to remain an essential part of the process.
Its job is to make the visual consistent, accurate, and publishable.
Best Choice for Brand Consistency
Canva
Use it to create reusable templates for:
- Blog heroes
- Pinterest Pins
- Facebook posts
- Instagram graphics
- Lead magnets
- Infographics
- YouTube thumbnails
The more content you create, the more valuable those repeatable systems become.
Stage 4: You Want More Original and Memorable Visuals
Eventually, a blogger may want images that do more than look clean and professional.
You might want:
- Editorial illustrations
- Visual metaphors
- Cinematic hero images
- Distinctive artistic styles
- A stronger visual identity
- Images that feel less like stock photography
This is where Midjourney becomes more relevant.
It is not the simplest everyday blogging tool.
However, it can create images with a stronger artistic identity than most straightforward generators.
Midjourney is best used selectively.
You do not necessarily need it for every Facebook post or supporting image.
It makes more sense for:
- Cornerstone articles
- Major campaigns
- Ebook covers
- Important hero images
- Brand storytelling
- Editorial-style content
Best Choice for Artistic Visuals
Midjourney
Use it when the image itself needs to be memorable.
Then bring the result into Canva for exact text, logo placement, and platform formatting.
Stage 5: You Want More Technical Control
Some bloggers eventually reach the point where simple prompting feels restrictive.
You may want to control:
- The underlying generation model
- A character’s appearance
- A product reference
- A pose
- A sketch
- The image composition
- Style strength
- Inpainting and outpainting
- The final resolution
Leonardo AI is the strongest fit at this stage.
It offers more models and guidance options than most bloggers need, but those controls become valuable when you can identify exactly why you need them.
Leonardo may be particularly useful for:
- Product-focused websites
- Digital-product businesses
- Character-led visual content
- Repeated branded scenes
- Detailed reference-image workflows
- Advanced editing
- Model experimentation
Best Choice for Advanced Control
Leonardo AI
Start with its simpler Auto setting.
Explore deeper controls only when they solve a genuine creative problem.
The objective is still to publish useful content—not collect an impressive number of model settings.
Stage 6: You Already Work Inside Adobe
Adobe Firefly is most compelling when it fits into an existing Adobe workflow.
You may already use:
- Photoshop
- Adobe Express
- Illustrator
- Creative Cloud Libraries
- Other Adobe design tools
In that situation, Firefly can help you generate, extend, repair, and refine images without moving between several disconnected platforms.
Its Generative Fill and Generative Expand tools are particularly useful when an image is almost right but needs precise adjustments.
Best Choice for Existing Adobe Users
Adobe Firefly
Choose it when its integration removes steps from the workflow you already use.
I would not recommend learning Photoshop purely because Firefly exists.
For an existing Adobe user, it can be extremely convenient.
For everyone else, Canva or a simpler image generator may be faster.
Stage 7: You Are Building Through Wealthy Affiliate
Wealthy Affiliate members have a slightly different decision to make because ImageStudio is already available within the wider platform and AI-credit system.
Before paying for a separate generator, I would test what ImageStudio can produce for:
- Blog hero images
- Pinterest graphics
- Facebook visuals
- Product mockups
- Affiliate-review content
- Supporting illustrations
Its biggest advantage is not that it has more controls than Leonardo or more artistic depth than Midjourney.
Its advantage is that it is already there.
It fits alongside Jaaxy, Article Designer, website hosting, training, and the other tools members are using.
Best Choice for Wealthy Affiliate Members
WA ImageStudio
My recommended WA workflow would be:
Research with Jaaxy → Plan with ChatGPT → Generate with ImageStudio → Finish with Canva.
Only add another paid generator when you can clearly explain what ImageStudio is unable to do for you.
When Should You Upgrade to a Paid Image Tool?
A paid image subscription starts making sense when at least one of the following is true:
- You create images every week
- Free limits interrupt your workflow
- Image creation takes too long
- You need private generations
- You regularly use reference images
- Consistency is becoming important
- You need commercial mockups
- You are producing several visuals per article
- The subscription replaces another paid tool
- Better images support traffic, sales, or conversions
Do not upgrade simply because the paid plan produces more images.
More generation capacity is only useful when you have a clear reason to use it.
A paid tool should help you:
- Publish faster
- Create more consistently
- Improve the reader experience
- Strengthen your brand
- Support content promotion
- Produce commercial assets
If it mainly encourages you to generate endless variations, it may be adding distraction rather than value.
Do You Need More Than One AI Image Tool?
Possibly—but you probably do not need several paid generators.
Different platforms solve different parts of the process.
A practical blogging toolkit might include:
- ChatGPT for ideas, prompts, planning, captions, and alt text
- Kre8or, ImageStudio, Midjourney, Leonardo, or Firefly for creating the central image
- Canva for branding, accurate text, layouts, and resizing
That is not the same as paying for every tool in this comparison.
Choose one main generator.
Use ChatGPT as the planning partner.
Use Canva as the finishing platform.
Only add another specialist generator when a repeated need justifies it.
My Recommended Tool by Blogging Stage
| Blogging Stage | Best Starting Choice | Main Reason |
|---|---|---|
| Starting your first blog | ChatGPT, Canva Free, or an included tool | Low cost and simple workflow |
| Publishing consistently | Kre8or | Best overall balance for bloggers |
| Building a recognisable brand | Canva | Templates, text, branding, and resizing |
| Creating artistic cornerstone visuals | Midjourney | Distinctive editorial and cinematic images |
| Needing advanced references and control | Leonardo AI | Model choice and detailed guidance |
| Already using Creative Cloud | Adobe Firefly | Seamless Adobe editing workflow |
| Building through Wealthy Affiliate | WA ImageStudio | Convenient integrated image creation |
My Practical Recommendation
For most busy parent bloggers, I would keep the workflow simple:
Plan with ChatGPT. Generate with one main image tool. Finish with Canva.
My overall generator recommendation remains Kre8or because it offers the strongest everyday balance for bloggers.
However, the best choice at the beginning may be a tool you already have.
You do not need to build your final visual toolkit on day one.
Start with the simplest workflow that helps you publish consistently.
Upgrade when your blog creates a genuine reason to upgrade.
The right AI image tool is not necessarily the one that can produce the most impressive demonstration.
It is the one that helps you turn useful content into clear, branded, publishable visuals without consuming the time you were trying to save.
My AI Image Workflow for Blog Posts
AI image creation works best when it has a clear place inside the wider blogging process.
I do not begin by opening an image generator and asking it to surprise me.
That can produce interesting results, but it can also lead to a long session of experimenting without creating anything the article actually needs.
Instead, I start with the content.
The image should support the article—not become a separate creative project competing for my time.
My preferred workflow is:
Plan with ChatGPT → Generate with one main image tool → Finish with Canva → Optimise for the blog
That simple sequence gives each tool a specific job.
Step 1: Finish or Fully Plan the Article
I prefer to create the main images after the article has been drafted.
By that point, I understand:
- The article’s main promise
- The target reader
- The emotional tone
- The most important sections
- The final recommendation
- The images that would genuinely improve the content
This helps prevent generic visuals.
For example, an article titled:
Why Blogging Feels Slow at First
does not simply need an image of someone looking unhappy beside a laptop.
The article is really about delayed results, invisible progress, and the compound effect of consistent work.
A better image could communicate that idea through:
- A pathway appearing one step at a time
- A parent planting seeds beside a workspace
- Small building blocks gradually forming something larger
- A quiet evening work scene showing steady progress
Finishing the article first gives the image more meaning.
Step 2: Decide What Each Image Needs to Do
Not every image has the same purpose.
Before generating anything, I decide whether I need:
- A blog hero image
- A section illustration
- A comparison graphic
- An infographic
- A Pinterest Pin
- A Facebook graphic
- A product mockup
- A personal-experience visual
This matters because the format and composition should reflect the final use.
A blog hero usually needs:
- A wide composition
- One clear concept
- Enough space for the title
- A strong visual focus
- Minimal detail around the edges
A Pinterest Pin needs:
- A vertical format
- A strong central image
- Clear headline space
- Immediate readability
- A reason to stop scrolling
A Facebook graphic may need:
- A square format
- A simpler message
- Larger text
- Strong visual contrast
Planning the use first reduces unnecessary resizing and regeneration later.
Step 3: Ask ChatGPT for Visual Concepts
Once I understand the image’s job, I use ChatGPT to develop the concept.
I might ask for:
- Three hero-image ideas
- A realistic option
- An editorial-illustration option
- A symbolic visual metaphor
- A Pinterest-friendly concept
- A Facebook variation
- A version that reflects the Flex For Families brand
This is one of ChatGPT’s biggest strengths.
It can help move from:
“I need an image about blogging progress.”
to something much more specific:
“A warm editorial scene of a parent building a pathway from small glowing tiles beside a kitchen-table workspace, with the path gradually becoming clearer in the distance, realistic family-home details, calm evening lighting, and subtle teal and coral accents.”
The tool is helping me think through the visual rather than merely generating one.
Step 4: Choose One Clear Direction
I try not to generate every idea.
That sounds obvious, but it is easy to ask for three concepts and then create twelve variations of each.
Instead, I choose the idea that best supports the article.
My decision is usually based on:
- Does it communicate the topic quickly?
- Does it suit the reader?
- Does it fit the brand?
- Is it different from the images already on the site?
- Will it work in the required format?
- Can I add the headline without covering the important details?
The best concept is not always the most artistic one.
Clarity matters.
A reader should not need an art-history degree to understand why the image is attached to an article about email marketing.
Step 5: Build the Prompt
Once the concept is chosen, I turn it into a more detailed prompt.
A useful blogging prompt normally covers:
The subject
Who or what should appear?
The setting
Where is the scene taking place?
The action
What is happening?
The visual style
Should it be realistic, editorial, illustrated, cinematic, minimal, or playful?
The composition
Where should the subject be placed?
The mood
Should it feel calm, hopeful, practical, frustrated, warm, or energetic?
The brand details
Should it include teal and coral accents, a realistic family home, or an approachable parent?
The format
Is it a wide hero, square social image, or vertical Pin?
What to avoid
Should it avoid money flying from laptops, luxury offices, fake dashboards, exaggerated expressions, or unreadable text?
A good prompt might look like this:
Create a wide editorial-style blog hero image showing a busy parent working at a kitchen table in the evening, gradually building a pathway from small glowing tiles that represent steady blogging progress. Include realistic family-home details, warm practical lighting, subtle teal and coral accents, and plenty of clean space on the left for a headline. The scene should feel hopeful and achievable rather than luxurious. No money imagery, no exaggerated success symbols, no text, and no futuristic office.
That gives the image generator a much clearer job.
Step 6: Generate the Main Image
I then use one main image generator.
For most bloggers, that might be:
- Kre8or
- ChatGPT
- WA ImageStudio
- Midjourney
- Leonardo AI
- Adobe Firefly
I do not think bloggers need to run every prompt through six platforms.
That creates more decisions rather than better productivity.
I would usually generate a small batch, compare the results, and choose the one with the strongest:
- Composition
- Relevance
- Natural details
- Brand fit
- Headline space
- Overall clarity
If one result is almost right, I will edit or regenerate it.
If none of them works, I return to the prompt rather than producing endless near-identical versions.
Step 7: Inspect the Image Properly
Before using any AI-generated image, I zoom in and check the details.
I look for:
- Hands and fingers
- Facial features
- Reflections
- Screens
- Logos
- Product shapes
- Background objects
- Repeated items
- Unreadable writing
- Strange furniture
- Impossible shadows
- Objects merging together
AI image errors are not always obvious at first glance.
A hero image can look excellent until you notice the laptop has two keyboards or the coffee mug is growing from the table.
Those details damage trust.
They are worth checking.
Step 8: Create Platform Variations
Once I have a strong main visual, I decide whether it can support other formats.
I may create:
- A wide blog hero
- A square Facebook version
- A vertical Pinterest version
- A section image
- A text-free background
Sometimes I regenerate each format using the same concept.
Other times I use the original visual as a reference and adapt the composition.
I avoid simply cropping every image into every size.
A wide hero image may lose the subject when cropped vertically.
A square visual may leave no room for a Pinterest headline.
Each format should be composed for its final use.
Step 9: Finish the Design in Canva
The image generator creates the artwork.
Canva turns it into a branded content asset.
I use Canva to add:
- The exact article title
- The Flex For Families logo
- Brand fonts
- Teal and coral accents
- Consistent spacing
- Background overlays
- Calls to action
- Platform-specific layouts
This step is especially important for:
- Pinterest Pins
- Facebook graphics
- Infographics
- Comparison tables
- Lead magnets
- YouTube thumbnails
Even when an AI generator produces readable text, I prefer adding the final wording manually.
That gives me full control over spelling, layout, accessibility, and branding.
Step 10: Resize and Compress the Image
A beautiful image can still create a poor user experience if the file is unnecessarily large.
Before uploading it, I check:
- The final pixel dimensions
- The file format
- The file size
- Whether the image still looks sharp after compression
I generally do not need the largest image an AI tool can produce.
The image only needs enough resolution for its intended use.
For WordPress, I normally resize the visual close to the dimensions it will actually display.
That helps with:
- Loading speed
- Mobile performance
- Storage
- Core Web Vitals
- Reader experience
The exact compression method can vary, but the principle stays the same:
Do not upload a huge original file when the website will display a much smaller version.
Step 11: Rename the File
I rename the file before uploading it.
Instead of:
image-874392-final-v3.png
I use something descriptive such as:
why-blogging-feels-slow-at-first-hero.webp
A clear filename helps me organise the media library and understand what the image belongs to later.
I avoid stuffing the filename with repeated keywords.
It should describe the image naturally.
Step 12: Add Useful Alt Text
Alt text should explain the image to someone who cannot see it.
It should not simply repeat the article title or list keywords.
For example:
A parent building a glowing pathway beside a kitchen-table blogging workspace.
That describes what the image communicates.
Decorative images may not need detailed alt text, depending on how they are used.
For informative graphics, the alt text should capture the key message rather than every decorative detail.
Step 13: Preview the Published Page
Finally, I preview the article on desktop and mobile.
I check:
- Is the headline readable?
- Does the image crop correctly?
- Is the subject still visible on mobile?
- Does the page load smoothly?
- Does the image support the surrounding section?
- Is the logo too large?
- Does the design still feel consistent with the rest of the site?
An image can look perfect inside Canva and less effective once placed inside the actual page layout.
The final check should happen where the reader will see it.
My Practical AI Image Workflow
The complete process is:
- Finish the article.
- Decide what each image needs to do.
- Develop the concept with ChatGPT.
- Choose one clear visual direction.
- Build a detailed prompt.
- Generate with one main image tool.
- Inspect the result carefully.
- Create the required format variations.
- Add final branding and text in Canva.
- Resize and compress the files.
- Rename them clearly.
- Add helpful alt text.
- Preview the article on desktop and mobile.
That may look like a long process when written out.
In practice, the steps become quick once you develop repeatable templates and prompts.
The aim is not to spend hours perfecting every image.
It is to create visuals that are:
- Relevant
- Clear
- Branded
- Accessible
- Properly optimised
- Ready to publish
That is what turns AI image generation from an entertaining experiment into a useful blogging workflow.
Common AI Image Mistakes Bloggers Make
AI image tools can save a considerable amount of time.
They can also create an entirely new way to procrastinate.
The difference usually comes down to how deliberately they are used.
Here are the most common mistakes I would avoid.
Mistake 1: Starting With the Image Instead of the Article
Creating images before understanding the article often leads to generic visuals.
The generator knows the title but not:
- The real message
- The intended reader
- The final recommendation
- The emotional tone
- The most useful visual metaphor
That is how you end up with another smiling person pointing at a laptop.
Write or fully plan the article first.
Then create the image around what the content is actually saying.
Mistake 2: Using Vague Prompts
A prompt such as:
“Create an image about blogging.”
gives the AI almost no meaningful direction.
The result will probably rely on familiar clichés:
- A laptop
- A coffee cup
- Floating social icons
- A suspiciously tidy desk
- Someone grinning at a screen
Better prompts explain:
- Who appears
- Where they are
- What they are doing
- How the image should feel
- Which composition is needed
- What style suits the brand
- What should not appear
You do not need to write a novel.
But the generator should understand the job.
Mistake 3: Generating Too Many Versions
AI makes it very easy to request another batch.
Then another.
Then one with warmer lighting.
Then one with a slightly different jumper.
Before long, the article is still unpublished and you have 46 images of a parent sitting near a laptop.
Set a limit.
For example:
- Generate four options.
- Choose the strongest.
- Allow one or two targeted edits.
- Move on.
The goal is a suitable image—not the theoretically perfect image hiding somewhere in generation number 83.
Mistake 4: Choosing Beauty Over Relevance
A stunning image is not automatically a useful blog image.
It may be:
- Too abstract
- Too dramatic
- Difficult to understand
- Unrelated to the article
- Poorly composed for text
- Inconsistent with the site
The image should support the content.
A simple, clear visual can be more effective than an artistic masterpiece that leaves the reader wondering what it means.
Mistake 5: Trusting AI-Generated Text
AI image models have improved at creating text.
They still make mistakes.
Common problems include:
- Misspellings
- Missing letters
- Repeated words
- Strange punctuation
- Inconsistent fonts
- Distorted logos
- Incorrect labels
- Altered numbers
Never assume the text is correct because it looks believable at first glance.
For important graphics, add the final wording manually in Canva, Adobe Express, Photoshop, or another editable design tool.
Mistake 6: Ignoring Small Visual Errors
AI mistakes can hide in the background.
Check for:
- Extra fingers
- Merged objects
- Impossible reflections
- Nonsense screens
- Floating objects
- Incorrect shadows
- Repeated furniture
- Distorted faces
- Products with altered packaging
Readers may not consciously analyse every detail, but obvious mistakes make the image feel less trustworthy.
Always inspect the full-size version before publishing.
Mistake 7: Using the Wrong Aspect Ratio
Generating one square image and forcing it into every platform creates poor results.
A blog hero, Pinterest Pin, and Facebook post have different visual requirements.
Generate or design for the intended format.
Consider:
- Where the subject should sit
- How the image will crop
- Where the headline will go
- Which details must remain visible
- Whether the design still works on mobile
Choosing the correct ratio at the beginning saves time later.
Mistake 8: Letting Every Image Use a Different Style
One article may use a cartoon.
The next uses cinematic realism.
The next looks like a watercolour children’s book.
Each image may be attractive individually, but together the site can feel disconnected.
You do not need every visual to look identical.
However, it helps to establish some consistent choices around:
- Colour
- Lighting
- Illustration style
- Realism
- Composition
- Logo treatment
- Fonts
- Emotional tone
A recognisable visual approach strengthens the brand.
Mistake 9: Trying to Put the Entire Article Into One Graphic
AI makes it tempting to create an enormous infographic containing every point from the article.
This often produces:
- Tiny text
- Poor reading order
- Repeated information
- Inaccurate labels
- Overcrowded layouts
- An image that is impossible to read on mobile
A graphic should simplify the message.
Choose the central idea.
If necessary, split the content into two or three visuals.
The comparison table and decision tree in this article work separately because each has one clear job.
Mistake 10: Forgetting the Reader
The image should be appropriate for the people reading the blog.
For Flex For Families, that means avoiding visuals that suggest every parent blogger works in:
- A spotless luxury office
- A beachfront villa
- A penthouse overlooking a city
- A room filled with cash
- A perfect home with no visible family life
Those images may look aspirational.
They can also feel unrealistic and disconnected from the reader’s actual situation.
I prefer imagery that feels:
- Warm
- Practical
- Achievable
- Family-aware
- Honest
- Encouraging
The visual should help the reader see themselves in the content.
Mistake 11: Using Fake Success Imagery
Images of money flying from laptops, exploding analytics charts, and overnight-success dashboards are common in online-business content.
They are also one of the quickest ways to make realistic blogging advice feel less credible.
If the article discusses income, show:
- Progress
- Work
- Systems
- Growing assets
- Realistic milestones
- Flexibility
Avoid implying that AI, blogging, or affiliate marketing produces instant wealth.
The image should match the honesty of the article.
Mistake 12: Forgetting Brand Finishing
An AI image may look excellent but still not feel like it belongs to your blog.
It may need:
- The correct logo
- Brand colours
- Consistent fonts
- A familiar layout
- A headline overlay
- A subtle border or background
- Proper spacing
This is why Canva remains part of my workflow.
The generator creates the visual.
The finishing stage makes it recognisably mine.
Mistake 13: Uploading Huge Files
AI tools often create images at larger dimensions than a blog needs.
Uploading the original without resizing can hurt:
- Loading speed
- Mobile performance
- Storage
- User experience
Resize and compress the image before uploading it.
Image quality matters, but a blog hero does not need to be large enough to cover a bus.
Mistake 14: Keyword-Stuffing the Alt Text
Alt text is an accessibility feature.
It should describe the image clearly.
It should not look like this:
Best AI image generator for bloggers AI image tool blogging image AI blogging 2026.
Write naturally.
Explain what the image shows or communicates.
That is more useful to readers and more aligned with the purpose of alt text.
Mistake 15: Replacing Real Experience With AI
AI images are useful when a genuine photograph is unavailable, unnecessary, or would not communicate the concept well.
They should not automatically replace:
- Original screenshots
- Real product photographs
- Genuine results
- Personal process images
- Evidence
- First-hand examples
If you are reviewing software, readers may benefit more from a real screenshot than an attractive illustration of someone using a laptop.
If you are demonstrating a result, show the result.
AI visuals should support lived experience—not pretend to be it.
Mistake 16: Creating Misleading Images
A generated image should not imply something happened when it did not.
Be careful with:
- Fake testimonials
- Invented dashboards
- Unrealistic product results
- Artificial before-and-after images
- Public figures
- Branded products
- Images presented as documentary evidence
An illustration can represent an idea.
It should not mislead the reader into believing it is proof.
Mistake 17: Ignoring Commercial Terms
Different platforms have different rules around:
- Commercial use
- Ownership
- Public generations
- Reference images
- Partner models
- Trademarks
- Uploaded content
Do not assume every image generator uses the same terms.
Check the current rules for the tool and model you use, especially when creating:
- Paid products
- Client work
- Advertisements
- Product mockups
- Branded merchandise
- Confidential business content
AI image policies are still evolving.
Mistake 18: Paying for Too Many Generators
It is easy to build an expensive collection of overlapping AI subscriptions.
You probably do not need:
- Kre8or
- Midjourney
- Leonardo
- Firefly
- Another specialist generator
- Several premium stock libraries
all at the same time.
Choose one main generator.
Use ChatGPT for planning.
Use Canva for finishing.
Add a specialist tool only when it solves a repeated problem your current setup cannot handle.
Mistake 19: Assuming AI Removes the Need for Judgement
AI can generate the image.
It cannot fully decide whether that image is:
- Appropriate for the reader
- Honest
- Accessible
- On-brand
- Relevant
- Legally suitable
- Worth publishing
That remains your responsibility.
The strongest AI workflow still depends on human judgement.
Mistake 20: Spending More Time on Images Than Content
This is the most important mistake.
Visuals can improve a blog post.
They can:
- Break up the page
- Explain an idea
- Strengthen the brand
- Support social promotion
- Make the content more memorable
But the image is not the article.
Do not spend four hours creating a hero image for a post that still needs research, editing, internal links, and a useful conclusion.
Set a sensible standard.
Create the visual.
Check it.
Publish.
The Rule I Would Keep in Mind
The purpose of AI is not to make every image endlessly customisable.
It is to help you create useful visual content more efficiently.
My rule would be:
If the image tool is creating more decisions than it removes, simplify the workflow.
A good blogging visual should support the reader, fit the brand, and help the article feel complete.
It does not need to win an international design award.
Can AI Images Hurt Your SEO?
The use of AI-generated images does not automatically hurt your Google rankings.
Google’s published guidance focuses on whether content is helpful, relevant, accessible, and created for people—not whether every visual was produced by a camera, an illustrator, or an AI tool. Google also actively recommends using high-quality, relevant images to support written content and create additional opportunities to appear in visual search results.
Based on that guidance, there is no separate SEO penalty simply for publishing an AI-generated image.
That is an inference from Google’s broader AI and image policies rather than a specific promise that every AI image is acceptable.
The image still needs to improve the page.
A relevant, well-designed AI illustration can support an article.
A generic, inaccurate, oversized, or misleading one can weaken the reader’s experience.
The real question is therefore not:
Does Google dislike AI images?
It is:
Is this image useful, relevant, properly optimised, and appropriate for the page?
Google Cares About the Result, Not the Shortcut
Google’s guidance on generative AI follows the same principle it applies to other forms of automation.
AI can be useful for creating and structuring content, but generating large amounts of material without adding genuine value may breach Google’s scaled-content-abuse policy.
That guidance is written mainly around web content rather than blog images specifically, but the underlying lesson still applies:
Using AI is not the problem. Using AI to produce low-value material at scale is.
For images, this could include automatically adding dozens of generic visuals that:
- Do not explain anything
- Repeat the same idea
- Have little connection to the surrounding content
- Contain obvious errors
- Exist mainly to make the page look longer
- Mislead the reader
- Slow the website down
One useful AI image is better than ten decorative ones that add no value.
Relevant Images May Help Readers and Search Visibility
Google recommends placing high-quality images close to text that is relevant to them.
The surrounding content gives Google more context about what an image represents and how it relates to the page. Google also notes that images can provide another way for people to discover a website through visual search.
That means an AI image can potentially support SEO when it genuinely improves the content.
For example, an original visual could:
- Explain a blogging process
- Summarise a comparison
- Show a decision tree
- Demonstrate a framework
- Illustrate an abstract idea
- Make an important section easier to understand
- Provide a useful visual result for Google Images
The comparison table and decision tree in this article are good examples.
They do not simply decorate the page.
They help the reader understand the differences between the tools and decide which platform may fit their situation.
That is a much stronger use of imagery than inserting another unrelated photograph of someone typing on a laptop.
Relevance Matters More Than Whether the Image Is AI-Generated
Google’s structured-data guidance says that images used to represent a page should be relevant to that page. Its wider image guidance also recommends choosing images that clearly represent the subject rather than using something generic.
For bloggers, that means the visual should match the actual section or article.
A relevant image might show:
- A visual blogging workflow
- The stages of building traffic
- A comparison between two tools
- A realistic parent working in limited time blocks
- A clear illustration of a content strategy
- A genuine screenshot of the software being reviewed
An irrelevant image might show:
- A generic luxury office
- Money flying from a laptop
- A random robot
- A smiling person with no connection to the topic
- A futuristic scene attached to a basic WordPress tutorial
The fact that an image looks polished does not make it useful.
AI Images Should Not Replace Genuine Evidence
AI visuals are suitable for illustrating concepts.
They are not a replacement for evidence.
If you are reviewing software, readers may need:
- Genuine interface screenshots
- Pricing screenshots
- Feature demonstrations
- Examples from your own account
- Real results
- Original photographs
Using an AI image of a fictional analytics dashboard would not provide the same value.
It could also mislead readers if they assume the figures or interface are genuine.
For review content, I would use AI images to support:
- The hero section
- Conceptual explanations
- Social promotion
- Editorial illustrations
I would use real screenshots for:
- Product features
- Account dashboards
- Pricing
- Results
- Tutorials
- First-hand experience
That balance strengthens trust.
Poorly Optimised AI Images Can Slow the Page
AI generators often produce large, high-resolution files.
Those files may look excellent, but uploading them directly to WordPress can create unnecessary page weight.
Google’s web-performance guidance explains that images are often among the heaviest resources on a webpage and that properly sizing and compressing them can significantly improve performance.
Page loading performance is also measured through Core Web Vitals, which Google recommends site owners keep in a healthy range for both Search and the overall user experience.
This does not mean one large AI image will suddenly destroy your rankings.
However, repeatedly uploading oversized images can contribute to:
- Slower loading
- Poorer mobile performance
- Increased data usage
- A worse reader experience
- A slower Largest Contentful Paint result
This is especially important for the main hero image because it may be one of the largest visible elements loaded near the top of the page.
Before uploading an AI image, I would:
- Resize it close to the dimensions used on the site.
- Convert it to an efficient format such as WebP where appropriate.
- Compress it without making it visibly blurry.
- Check it on mobile.
- Test important pages in PageSpeed Insights.
The largest image available is rarely the best image to upload.
Use Descriptive Alt Text
Alt text helps people using screen readers understand the image and also helps search engines understand its relationship to the page.
Google recommends writing alt text that is useful, descriptive, and appropriate to the surrounding content. It specifically warns against filling alt attributes with keywords because that creates a poor experience and may appear spammy.
Good alt text for the decision tree in this article might be:
Decision tree matching bloggers with AI image tools based on their workflow, budget, and creative needs.
Poor alt text would be:
Best AI image generator bloggers AI images SEO blogging tools 2026 best AI picture generator.
The second version is not more optimised.
It is simply harder to read.
Describe the image naturally.
Do Not Use the Article Title as Every Alt Description
A common shortcut is copying the post title into every image’s alt-text field.
That does not explain what each image shows.
Several visuals within the same article may serve completely different purposes.
For example:
Hero image
A parent planning blog graphics with AI tools at a kitchen workspace.
Comparison table
Comparison of seven AI image tools for bloggers across quality, ease of use, pricing, and creative control.
Decision tree
Flowchart helping bloggers choose an AI image generator based on their current needs.
Each description gives useful context.
Repeating the same article title would not.
Decorative Images May Not Need Descriptive Alt Text
Not every image needs a detailed description.
If an image is purely decorative and adds no meaningful information, empty alt text may be more appropriate so that a screen reader can skip it.
Informative images should be described.
Decorative elements should not create unnecessary noise.
That is an accessibility decision rather than an opportunity to add another keyword.
File Names Can Help With Organisation and Context
A clear file name makes an image easier to manage and provides more context than a random generated label.
Instead of:
ai-output-92746-final-4.png
use:
ai-image-tools-for-bloggers-comparison.webp
or:
blogger-ai-image-tool-decision-tree.webp
The filename should describe the image.
It does not need to contain every related keyword.
Place Images Near the Relevant Content
Google recommends placing images near text that helps explain them.
That means the comparison-table image should sit inside the comparison section.
The decision tree should sit beside the guidance explaining how to use it.
A workflow graphic should appear near the workflow steps.
Do not place every image at the top of the article merely because it is easier.
The closer relationship between the text and visual helps both the reader and search engines understand why the image is there.
Make Sure Google Can Access the Image
For an image to appear in Google Images, Google needs to be able to crawl and index it.
Google advises website owners not to block important image files through robots.txt and to use supported image formats and accessible URLs.
Most WordPress bloggers will not need to do anything unusual here.
However, it is worth checking if:
- Images never appear in Google Search
- A security plugin blocks media files
- Images are loaded through unusual scripts
- The media URLs keep changing
- A CDN is configured incorrectly
- Important files are blocked in
robots.txt
The fact that you can see the image inside WordPress does not always guarantee that Google can crawl it.
Image Quality Still Matters
Google recommends using clear, high-quality images rather than files that are too small or poorly defined.
Compression should reduce unnecessary file weight without making the graphic unreadable.
This is particularly important for:
- Comparison tables
- Decision trees
- Charts
- Infographics
- Screenshots
- Text-based graphics
If the reader cannot read the graphic on mobile, it is not helping the page.
For detailed visuals, also explain the key conclusions in the surrounding article text.
Do not make the image the only place where important information appears.
AI Images Can Contain Factual Errors
An AI image generator may produce:
- Incorrect statistics
- Invented product features
- Misspelled names
- Fake logos
- Altered interfaces
- Incorrect labels
- Nonsensical charts
- Misleading before-and-after results
Publishing those errors can reduce the reliability of the page.
Google’s broader guidance emphasises creating helpful, reliable, people-first content.
That responsibility includes the visuals.
Check every:
- Number
- Label
- Product name
- Claim
- Logo
- Diagram
- Step
- Comparison result
An attractive infographic containing incorrect information is worse than having no infographic at all.
Avoid Creating Images Purely for Search Engines
An image should exist because it helps the reader.
Do not create dozens of near-identical graphics simply to target variations of the same image keyword.
Google’s spam policies focus on scaled content created primarily to manipulate rankings rather than help users.
Again, that policy is broader than images alone, but the principle is sensible.
Create one strong, useful image rather than an artificial library of almost identical files.
Should You Disclose That an Image Was AI-Generated?
Google’s standard image SEO guidance does not state that bloggers must add an “AI-generated” label to every ordinary illustration.
However, transparency may be appropriate when the origin of the image could affect how a reader interprets it.
I would consider disclosure when:
- A realistic image could be mistaken for documentary evidence
- The image depicts an event that did not happen
- It includes a realistic person
- It represents a product result
- The context is sensitive
- The platform or client requires disclosure
An obviously illustrative blog hero may not need a prominent warning.
A realistic image presented alongside a personal story may deserve more context.
The decision should be guided by honesty rather than fear of an SEO penalty.
Can AI Images Appear in Google Images?
Potentially, yes.
Google’s image guidance does not exclude visuals because they were generated with AI.
To give an image the best chance of being understood and indexed:
- Use a relevant, high-quality visual
- Place it near related text
- Add descriptive alt text
- Use a clear filename
- Make sure the image URL is crawlable
- Avoid blocking it from indexing
- Use suitable dimensions
- Optimise the file size
- Provide useful surrounding content
Google also says relevant images and videos can create additional opportunities for websites to appear across Search and its generative AI experiences.
There is never a guarantee that an image will rank.
But AI-generated visuals are not automatically excluded.
Can AI Images Improve SEO?
An image does not improve rankings simply because it was custom-generated.
Its value comes from what it contributes.
A useful image may improve the page by:
- Explaining a complex point
- Making the content easier to scan
- Giving readers a memorable summary
- Supporting accessibility
- Providing another potential route through image search
- Encouraging social sharing
- Helping the article feel more complete
Those benefits may support the overall quality and usefulness of the page.
However, an image should not be treated as an SEO trick.
It should be part of the reader experience.
My AI Image SEO Checklist
Before publishing an AI-generated image, I would ask:
- Is the image genuinely relevant?
- Does it help explain or support the content?
- Is every visible word correct?
- Are any figures or claims accurate?
- Does it contain misleading details?
- Is it properly sized?
- Has it been compressed?
- Does it remain readable on mobile?
- Is the file name descriptive?
- Does it have appropriate alt text?
- Is it placed near relevant content?
- Can Google crawl the image?
- Would a real screenshot or photograph provide better evidence?
- Does the visual fit the brand?
- Is it useful enough to justify its place on the page?
If the answer to those questions is yes, the fact that AI helped create the image is unlikely to be the main SEO concern.
Bottom Line
AI-generated images do not automatically hurt SEO.
Google’s current guidance prioritises helpful, reliable, people-first content and recommends relevant, high-quality, properly described images.
The risks come from poor execution:
- Irrelevant visuals
- Misleading imagery
- Incorrect text
- Missing alt descriptions
- Keyword stuffing
- Oversized files
- Slow loading
- Decorative clutter
- Replacing real evidence with artificial images
My practical recommendation is:
Treat an AI image exactly as you would any other piece of published content: check it, optimise it, and make sure it genuinely helps the reader.
AI can create the visual.
It cannot decide whether that visual deserves a place in the article.

About the Reviewer
Hi, I’m John Crossley, founder of Flex For Families.
I’m a parent, blogger, and online business owner who helps families find realistic ways to create more flexibility through blogging, affiliate marketing, and online business.
Like many people, I’ve spent years researching online opportunities, testing platforms, and learning how to separate genuine business models from expensive hype. I’ve also experienced the frustration of chasing opportunities that promised freedom but demanded more time away from family.
Today, I use that experience to review courses, side hustles, AI opportunities, and online business programmes through a simple lens:
Will this genuinely help parents create more flexibility, or will it create more pressure?
Every review on Flex For Families focuses on costs, time commitments, risks, and realistic expectations, so you can make informed decisions before investing your time or money.
Final Verdict: What Is the Best AI Image Generator for Bloggers?
There is no single AI image tool that wins every category.
Some platforms produce stronger artistic images.
Others offer more technical control.
Some are better for branding, while others fit neatly into an existing blogging platform.
But for most bloggers, the best tool is not the one with the most impressive demonstration.
It is the one that helps you create useful, branded visuals without turning every article into a design project.
My Overall Winner: Kre8or
My overall recommendation for bloggers is Kre8or.
It provides the strongest balance of:
- Image quality
- Ease of use
- Creative flexibility
- Reference-image support
- Blogger-friendly formats
- Everyday practicality
It may not produce the most artistic images in every situation, and it does not offer the deepest technical controls.
However, it performs consistently well across the areas that matter most to bloggers.
That makes it the easiest tool to recommend as a primary image generator.
Best for Planning: ChatGPT
ChatGPT remains one of the most valuable tools in the entire workflow.
Its real strength is not simply pressing a button and producing an image.
It helps you:
- Develop visual concepts
- Improve prompts
- Match images to the article
- Create format variations
- Refine awkward results
- Write alt text
- Plan social graphics
- Turn one idea into a complete image set
Even when another platform generates the final visual, ChatGPT can improve the thinking behind it.
Best for Branding and Finishing: Canva
Canva remains the tool I would recommend for turning AI-generated artwork into something ready to publish.
It gives you reliable control over:
- Headlines
- Fonts
- Logos
- Brand colours
- Layouts
- Templates
- Pinterest Pins
- Facebook graphics
- Lead magnets
- Infographics
AI image generators are improving at creating text, but I still prefer adding important wording manually.
Canva gives you accuracy and consistency.
That is why my preferred workflow remains:
Plan with ChatGPT → Generate with Kre8or or another main tool → Finish with Canva
Best for Artistic Images: Midjourney
Midjourney is the strongest option when visual quality and creative style are the priority.
It is particularly good for:
- Editorial illustrations
- Cinematic scenes
- Visual storytelling
- Mood-driven hero images
- Distinctive cornerstone content
- Ebook and campaign artwork
It is not necessarily the most efficient option for every everyday blog image.
However, when you want the image itself to stand out, Midjourney remains difficult to beat.
Best for Advanced Control: Leonardo AI
Leonardo AI is best suited to creators who want more control over how images are generated.
It offers:
- Multiple models
- Image Guidance
- Advanced editing
- Reference-image workflows
- Canvas tools
- Realtime experimentation
- Personal model options
That flexibility is powerful.
It can also create more decisions than a beginner needs.
Leonardo is a strong platform, but I would recommend it mainly to bloggers who know why they need the additional control.
Best for Adobe Users: Adobe Firefly
Adobe Firefly makes the most sense when you already use Adobe products.
Its strongest advantage is how it works alongside:
- Photoshop
- Adobe Express
- Illustrator
- Creative Cloud
If Adobe is already part of your workflow, Firefly can make editing and image expansion feel seamless.
If you do not use Adobe, I would not switch ecosystems purely for Firefly.
Best for Wealthy Affiliate Members: WA ImageStudio
WA ImageStudio is a practical option for bloggers already building through Wealthy Affiliate.
Its biggest strength is convenience.
It sits inside the same environment as:
- Jaaxy
- Article Designer
- Website tools
- Training
- Hosting
- The wider Business Hub
For existing members, I would test ImageStudio properly before paying for another image generator.
The workflow is straightforward:
Research with Jaaxy → Plan with ChatGPT → Generate with ImageStudio → Finish with Canva
A separate subscription only becomes necessary when you can identify a repeated limitation that ImageStudio cannot solve.
Which Tool Would I Choose as a Beginner?
If I were starting a blog today, I would not immediately subscribe to several AI image tools.
I would begin with:
- ChatGPT for planning
- Canva Free for layouts and branding
- Any image generator already included in my existing subscriptions
If I were a Wealthy Affiliate member, that would mean starting with WA ImageStudio.
Once I was publishing consistently and creating several visuals each week, I would consider Kre8or as the main dedicated generator.
The tool should grow with the workflow.
It should not become another cost before the blog genuinely needs it.
Which Tool Would I Choose for Flex For Families?
For the type of content I create, my ideal workflow is:
ChatGPT for planning → Kre8or for everyday image generation → Canva for branding and final design
I would use specialist platforms selectively.
Midjourney would be useful for an especially important artistic hero image.
Leonardo could help with a more advanced reference-image project.
Firefly would become more relevant if Adobe became central to my design workflow.
WA ImageStudio remains a sensible option within the Wealthy Affiliate ecosystem.
But I would not pay for every platform.
One strong generator, one planning tool, and one reliable finishing tool are enough for most blogging workflows.
Do Bloggers Actually Need AI Images?
No.
A blog can succeed without AI-generated images.
You can still use:
- Original photography
- Screenshots
- Stock-image libraries
- Canva graphics
- Charts
- Diagrams
- Simple branded text designs
AI images are useful because they can help bloggers create more specific visuals without organising a photo shoot or searching through hundreds of stock photographs.
They are especially helpful for illustrating:
- Abstract blogging concepts
- Workflows
- Comparisons
- Emotional experiences
- Family-friendly online-business scenes
- Visual metaphors
- Branded social content
But they should support the article.
They should not replace useful writing, genuine experience, or real evidence.
My Final Recommendation
For most bloggers, I would recommend keeping the system simple:
- Use ChatGPT to plan the image and improve the prompt.
- Choose one main image generator.
- Finish the image in Canva.
- Resize and compress it.
- Add accurate alt text.
- Publish it and move on.
My overall winner is Kre8or.
But the most practical starting choice may be a tool you already have.
The right AI image generator is not the one that gives you the most settings.
It is the one that helps you publish clear, useful, branded visuals while leaving you enough time to work on the part that matters most:
Creating genuinely helpful content for real people.
Ready to Start Building Your Parent Blog?
Choosing the right image tool can make blogging easier.
But images are only one part of building a blog that can eventually create more flexibility for your family.
You still need to work out:
- What your blog should be about
- Who you want to help
- What content to create
- How to organise your limited time
- How blogs actually make money
- Which steps matter first
- What progress realistically looks like
That is why I created the free Parent Blogging Starter Kit.
It is designed to help busy parents move from “I would love to start a blog” to a clear and realistic plan.
Inside, you will receive:
- The Nap-Time Blogging Checklist
- The Parent Blog Niche Finder
- 50 Parent Blog Post Ideas
- The Busy Parent Weekly Planner
- The Blogging Income Tracker
- The Parent Blogging Success Roadmap
- The Family Flexibility Planner
You do not need to have everything figured out.
You just need a sensible next step.
Frequently Asked Questions
What is the best AI image generator for bloggers?
Kre8or is my overall recommendation because it offers a strong balance of image quality, ease of use, creative flexibility, and practical formats for blog and social content.
However, the best choice depends on your workflow.
Midjourney is stronger for artistic images, Leonardo AI offers more advanced control, Canva is best for branding and layouts, and WA ImageStudio is a practical starting point for Wealthy Affiliate members.
Can I use ChatGPT to create blog images?
Yes.
ChatGPT can help create images, but I find it particularly valuable for planning the visual concept, improving prompts, suggesting variations, and refining an existing idea.
It can also help with alt text, image captions, and creating platform-specific briefs.
Do I still need Canva if I use an AI image generator?
For most bloggers, yes.
An AI generator can create the main artwork, but Canva gives you more reliable control over:
- Headlines
- Logos
- Fonts
- Brand colours
- Templates
- Layouts
- Social-media sizes
Canva is where I would add accurate text and turn the generated image into a consistent branded graphic.
Are AI-generated images bad for SEO?
AI images do not automatically harm SEO.
The more important factors are whether the image is relevant, useful, accurate, properly sized, compressed, accessible, and placed near related content.
Oversized, misleading, irrelevant, or poorly optimised images can create problems regardless of how they were made.
Can AI-generated images rank in Google Images?
Potentially, yes.
AI-generated images are not automatically excluded from Google Images.
Use a relevant high-quality image, a descriptive filename, useful alt text, suitable dimensions, and supporting content around it.
The image must also be accessible to search engines.
Should every blog post include AI-generated images?
No.
Use AI-generated images when they improve the article.
Some posts may benefit more from:
- Real screenshots
- Original photographs
- Charts
- Tables
- Simple branded graphics
A software tutorial, for example, will often need genuine screenshots rather than an AI illustration.
Can I use AI-generated images commercially?
Commercial-use rights depend on the platform, plan, model, and content used to create the image.
Always check the current terms of the tool you are using, especially for client work, paid products, advertisements, merchandise, or branded commercial assets.
You should also be careful when using trademarks, copyrighted characters, public figures, or reference images you do not own.
Is Midjourney better than Kre8or?
Midjourney is stronger for artistic, cinematic, and highly distinctive images.
Kre8or is my preferred all-round choice for bloggers because it offers a more practical balance between image quality, ease of use, reference support, and everyday content formats.
The better option depends on whether you prioritise artistic style or workflow efficiency.
Is Leonardo AI good for beginners?
Leonardo AI can be used by beginners, particularly through its simpler settings.
However, it offers many models and advanced controls that may feel overwhelming if you only need basic blog images.
It becomes more valuable when you want detailed reference-image control, advanced editing, or experimentation.
Is Adobe Firefly worth using for bloggers?
Adobe Firefly is most worthwhile for bloggers who already use Photoshop, Adobe Express, Illustrator, or Creative Cloud.
Its integration with Adobe’s editing tools is its biggest advantage.
For bloggers outside the Adobe ecosystem, Canva or a dedicated image generator may offer a simpler workflow.
Is WA ImageStudio worth using?
WA ImageStudio is worth testing if you are already a Wealthy Affiliate member.
It provides an integrated way to create blog images, social graphics, and mockups without immediately paying for another standalone generator.
Its main advantage is how conveniently it fits into the wider Wealthy Affiliate blogging workflow.
How many AI image tools do bloggers need?
Most bloggers need only one main image generator.
A practical setup is:
- ChatGPT for planning and prompts
- One image generator for the artwork
- Canva for branding and finishing
You may add a specialist tool later, but only when it solves a repeated need your existing workflow cannot handle.
Let’s Chat
Which AI image tool are you currently using for your blog?
Are you mainly creating:
- Hero images
- Pinterest Pins
- Facebook graphics
- Product mockups
- Infographics
- Supporting blog visuals
And does the tool genuinely save you time—or do you find yourself spending far too long generating new versions?
I would love to hear which platform has worked best for you, which one you found frustrating, and whether there is another AI image generator you think belongs in this comparison.
Leave a comment below and let’s chat.