
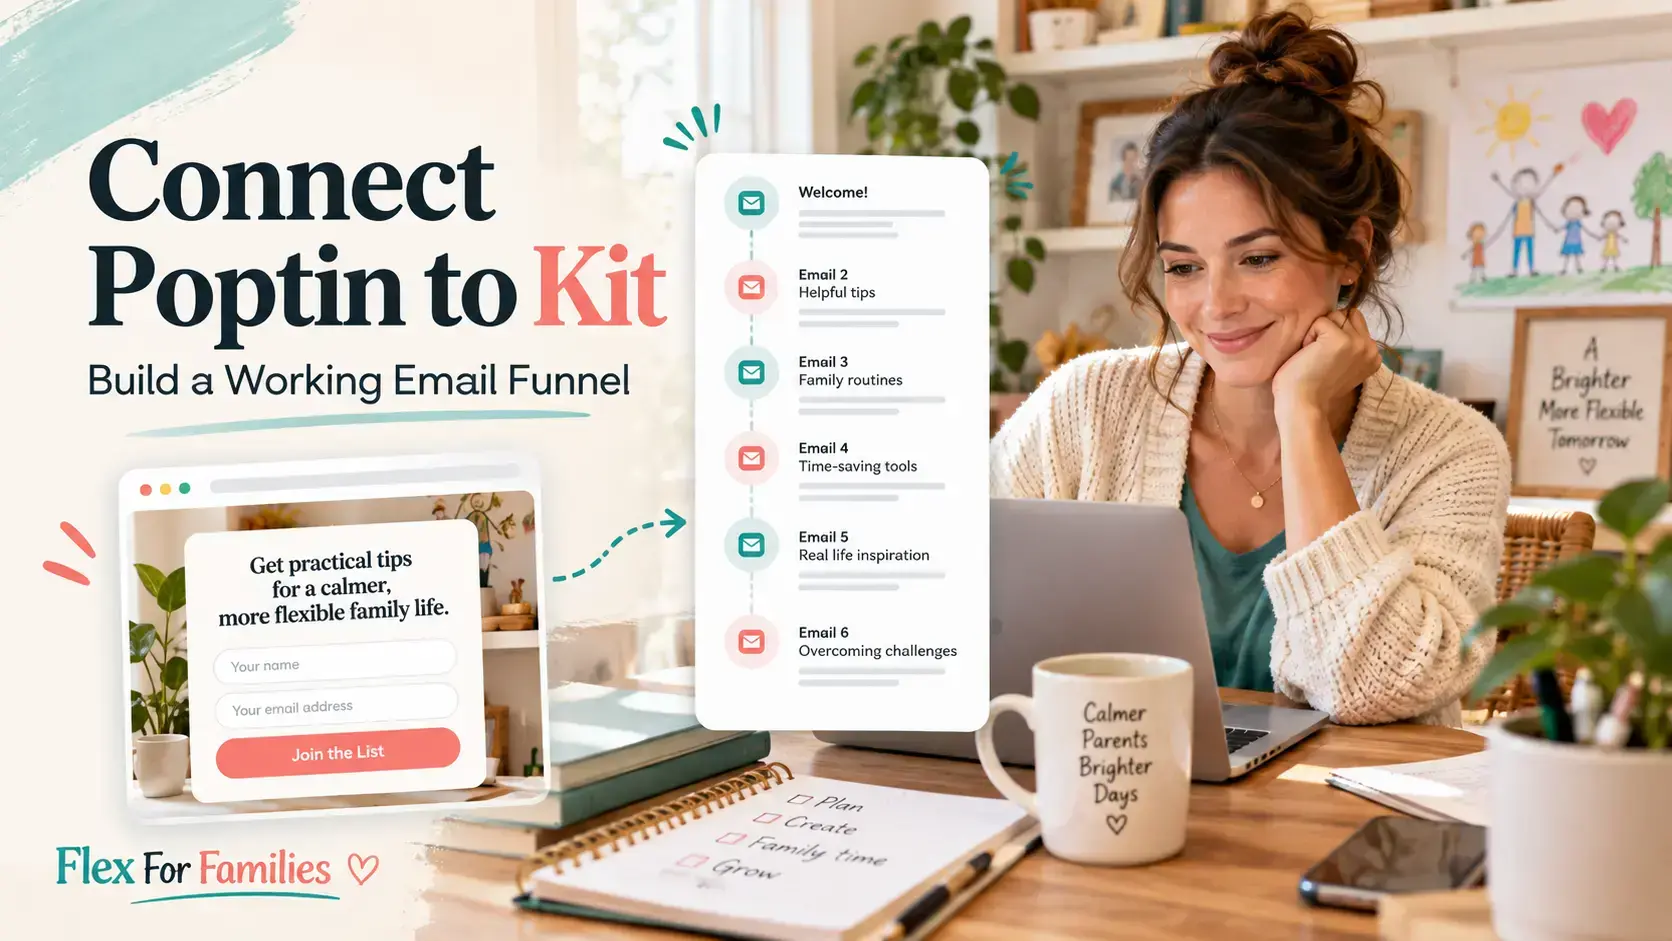
You can connect Poptin directly to Kit and send each new popup subscriber to a chosen Kit form.
However, that connection alone does not guarantee that your lead magnet or welcome emails will be delivered.
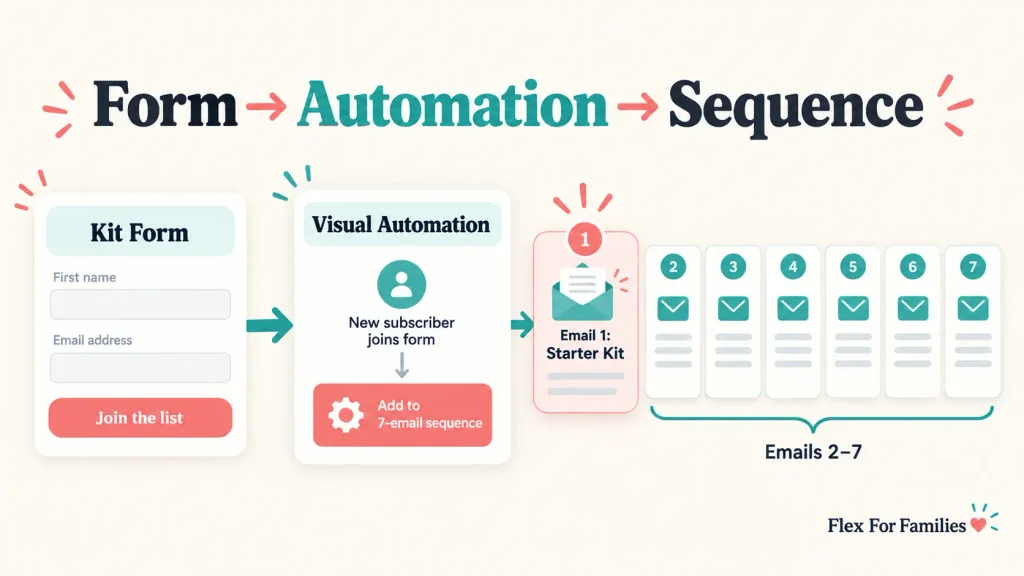
The Kit form must also connect to an active Visual Automation. That automation then adds the subscriber to the correct email sequence.
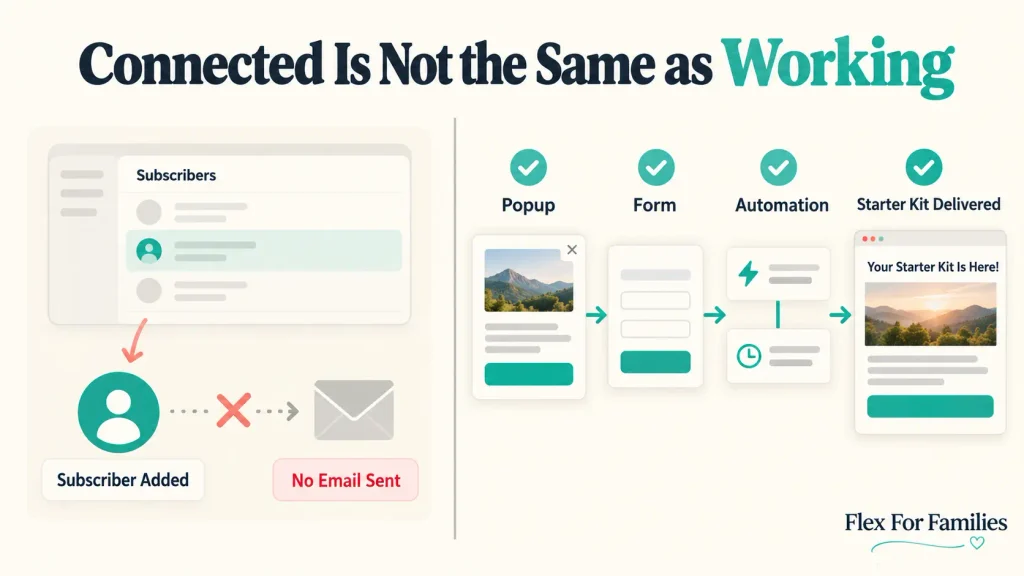
I discovered this while testing the Flex For Families signup journey. Poptin collected my test submission and the subscriber appeared in Kit, but the Parent Blogging Starter Kit did not arrive. The missing step was the connection between the Kit form and my welcome automation.
This guide takes you through the complete setup:
Poptin popup → Kit form → Visual Automation → Seven-step sequence → Starter Kit delivery
Heads up: I use Poptin on Flex For Families and am a member of its affiliate programme. This article may contain affiliate links, which means I may earn a commission if you sign up through them, at no extra cost to you. My guidance is based on my own experience using Poptin’s free plan.
How Do You Connect Poptin to Kit?
Open your Poptin campaign, select Email and integrations, add Kit and authorise the correct account. You then choose the Kit form that should receive each new subscriber.
Inside Kit, use that same form as the entry point for a Visual Automation. Add your email sequence as the next action and activate both the automation and sequence.
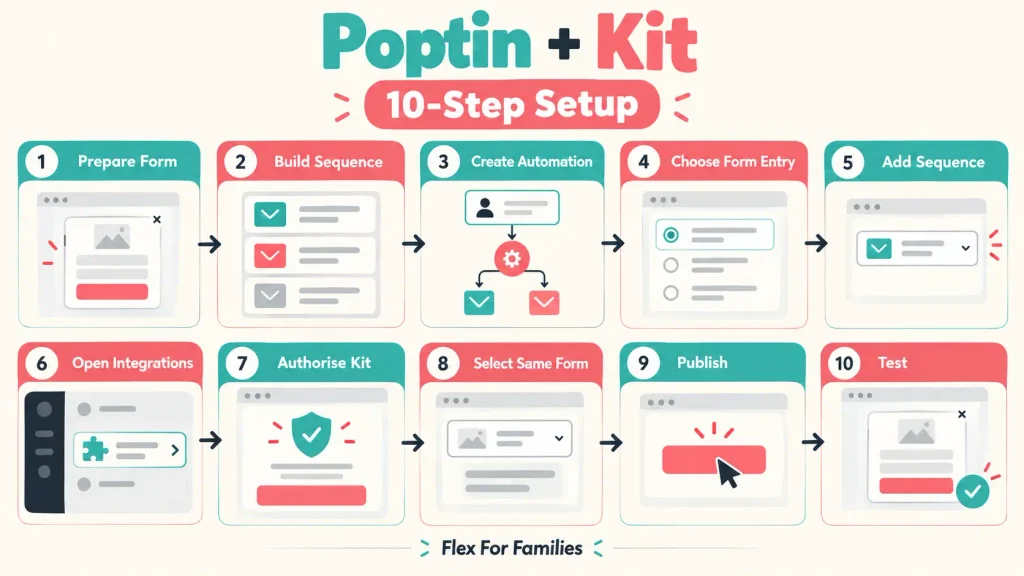
The full process is:
- Create or choose a Kit form.
- Prepare your lead magnet and email sequence.
- Create a Kit Visual Automation.
- Use the Kit form as its entry point.
- Add the email sequence as an action.
- Connect Kit inside Poptin.
- Select the same Kit form.
- Check your fields and consent wording.
- Publish the Poptin campaign.
- Test the complete subscriber journey.
Poptin currently offers two connection methods. You can authorise your Kit account directly or connect it manually with an API key. The direct authorisation route is the simplest place to start.
Is ConvertKit Now Called Kit?
Yes. ConvertKit changed its name to Kit, so older tutorials and search results may still refer to a Poptin and ConvertKit integration.
They are discussing the same email platform. Inside Poptin, look for Kit when adding the integration.
How the Poptin and Kit Integration Works
Poptin and Kit handle different parts of the signup journey.
Poptin:
- Displays the popup.
- Applies your trigger and targeting rules.
- Collects the visitor’s details.
- Records the conversion.
- Sends the submitted details to Kit.
Kit:
- Stores the subscriber.
- Records the form they joined through.
- Uses that form to trigger a Visual Automation.
- Adds the subscriber to your email sequence.
- Sends your lead magnet and follow-up emails.
The Kit form acts as the connection point. You may never display that form on your website because Poptin provides the visible popup, but Kit still uses the selected form to organise the subscriber and start the next stage.
According to the official Poptin integration guide, new leads are sent to the Kit form chosen during setup. Poptin currently supports the name, email and phone fields through this integration.

What You Need Before You Start
Prepare the main parts of the funnel before connecting the platforms.
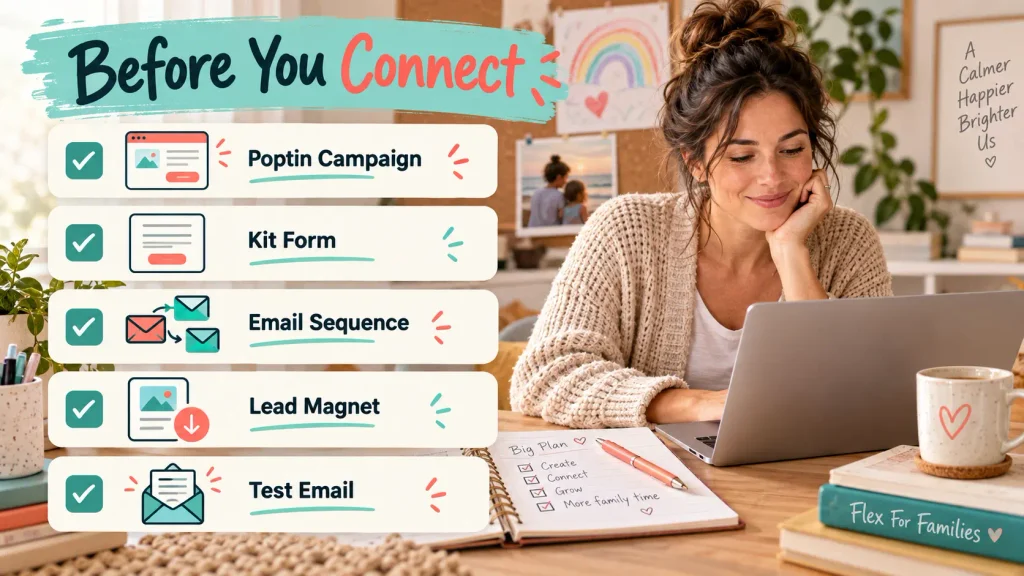
You will need:
- An active Poptin account.
- A Poptin popup or form with an email field.
- A Kit account.
- A clearly named Kit form.
- Your lead magnet uploaded somewhere secure and accessible.
- A Kit email sequence.
- A Visual Automation.
- A fresh email address for testing.
You can build these pieces in stages. However, preparing them first makes it easier to see where each connection belongs.
For my setup, the offer is the Parent Blogging Starter Kit. The first email in my seven-step Kit sequence contains the download link. The following six emails continue the welcome journey.
Step 1: Create or Choose the Correct Kit Form
Start inside Kit.
Create a form for the specific offer or choose an existing form that is already associated with it.
Give the form a clear internal name. For example:
Parent Blogging Starter Kit – Poptin
That name is better than something broad such as Newsletter Form 2. You will need to identify the correct form when you connect Poptin and again when you build the Visual Automation.
Check:
- The form is active.
- The email field is present.
- Any first-name field is configured correctly.
- The confirmation settings match your chosen signup process.
- The form has not been replaced by a newer version.
You do not need to embed this Kit form on the website when Poptin is collecting the details. Its main role here is to identify the signup source and trigger the automation.
Step 2: Prepare Your Kit Email Sequence
Open your email sequence and check every email before sending real subscribers into it.
For the Flex For Families funnel, the sequence contains seven emails. The first email welcomes the reader and delivers the Parent Blogging Starter Kit. The remaining six emails continue the planned introduction and support.
Check the first email carefully:
- Use a clear subject line.
- Thank the reader for requesting the resource.
- Include a working Starter Kit link or button.
- Explain what is included.
- Tell the reader what emails will follow.
- Include the required sender and unsubscribe information.
- Set it to send as soon as possible.
- Publish the email.
Kit states that an email will not send if it has not been published. The first sequence email can be set to send as soon as possible after the subscriber joins, although delivery may still take a few minutes. You must also activate the complete sequence. You can check these points in Kit’s official email sequence guide.
Check the other six emails too. A working first email does not prove that the later schedule is correct.
Review:
- The delay before each email.
- The permitted sending days.
- The overall sequence schedule.
- The status of every email.
- Any subscriber exclusions.
- Every link and download.
Step 3: Connect the Kit Form to a Visual Automation
This is the step that was missing from my first test.
A sequence does not start simply because someone appears in your Kit subscriber list. Kit needs an instruction that connects the form to the sequence.
Create the automation as follows:
- Open Automate in Kit.
- Select Automations.
- Select New automation.
- Choose Start from scratch.
- Add an entry point.
- Select Joins a form.
- Choose the form created for your Poptin offer.
- Add the next step beneath the entry point.
- Choose the action that adds the subscriber to an email sequence.
- Select your seven-step welcome sequence.
- Add a source tag if it will help your reporting.
- Activate the Visual Automation.
Kit’s Visual Automation instructions confirm that a form can act as an entry point. An action beneath it can then add the subscriber to an email sequence.
A useful optional tag could be:
Lead Source – Poptin Starter Kit
The tag is not essential for delivering the emails. It can help you identify where a subscriber entered the list and compare different signup routes later.
Step 4: Connect Kit Inside Poptin
You can now connect the Poptin campaign to Kit.
Connect With Direct Authorisation
This is the simplest current method:
- Open your Poptin campaign.
- Enter the campaign editor or design page.
- Select Email and integrations.
- Select Add integration.
- Search for Kit.
- Select Authenticate.
- Sign in to Kit if requested.
- Confirm that you have selected the correct Kit account.
- Grant Poptin access.
- Return to the integration window.
- Select the correct Kit form.
- Approve and save the connection.
Poptin’s current instructions state that direct authorisation fills the API-key field automatically. You still need to choose the correct Kit form before approving the integration.
Connect With a Kit API Key
Use this alternative if direct authorisation is unavailable or does not work:
- Sign in to Kit.
- Open Settings.
- Open Developer.
- Create or copy the API key required by the integration.
- Return to Poptin.
- Open Email and integrations.
- Add Kit.
- Paste the API key into the integration window.
- Select the correct Kit form.
- Approve the integration.
Kit explains that older third-party integrations may require its V3 API key. Follow the version requested by Poptin rather than substituting a different key. You can review Kit’s API overview if the connection asks for manual credentials.
Treat an API key like a password. Do not include it in a screenshot, video, support forum or shared document.

Step 5: Select the Same Kit Form
The form selected inside Poptin must match the form used as the entry point in the Visual Automation.
This is the key connection:
| Poptin Setting | Kit Setting | Required Result |
|---|---|---|
| Selected Kit form | Visual Automation entry point | The same form appears in both places |
| Email field | Subscriber email | The address reaches Kit correctly |
| Name field | Subscriber first name or name field | Personalisation works if collected |
| Form submission | Email sequence action | The seven-step sequence begins |
If you select General Newsletter in Poptin but the automation starts when someone joins Parent Blogging Starter Kit – Poptin, the subscriber may reach Kit without entering the intended sequence.
Use specific internal names and check them character by character before saving.
Step 6: Check Your Fields and Consent Wording
Poptin currently supports name, email and phone fields in its Kit integration. You only need to collect information that serves a clear purpose.
For a simple blogging lead magnet, an email address may be enough. A first name can help with personalisation, but every extra field creates another decision for the visitor.
Check that:
- The email field is required.
- The name field maps to the intended Kit field.
- The visitor knows what they will receive.
- Your wording explains that follow-up emails are included.
- Your privacy policy is easy to reach.
- Every marketing email includes an unsubscribe option.
The UK’s Information Commissioner’s Office guidance explains that marketing emails to individuals normally require specific consent, subject to a limited existing-customer exception. Check the rules that apply to your audience and business. This article is practical guidance rather than legal advice.
Step 7: Save and Publish the Poptin Campaign
Once the integration is approved:
- Save the Poptin design.
- Confirm that the campaign is published.
- Check the connected website domain.
- Review the trigger settings.
- Review the page and device targeting.
- Confirm that the Kit Visual Automation is active.
- Confirm that the Kit sequence is active.
- Confirm that the first email is published.
My main Flex For Families popup can appear through exit intent or after 20% scroll. My smaller bottom-corner popup appears after 50% scroll.
Your test must meet the campaign’s trigger and targeting rules. If the campaign requires 50% scroll, opening the page and waiting at the top does not test it.
Step 8: Test the Complete Subscriber Journey
Do not finish testing when the popup displays or when the subscriber appears in Kit.
Use a fresh email address and follow the entire route.
Test the Poptin Stage
- Open a private browser window.
- Visit a page included in your targeting.
- Activate the scroll or exit-intent trigger naturally.
- Submit a fresh email address.
- Check the success message.
- Confirm that Poptin records the conversion.
Test the Kit Form Stage
- Open Kit.
- Find the test subscriber.
- Check the recorded signup form.
- Confirm that it is the form connected to Poptin.
- Complete the confirmation step if double opt-in is active.
Test the Automation Stage
- Open the Visual Automation.
- Confirm that the subscriber entered through the form.
- Check that the subscriber reached the email-sequence action.
- Confirm that the automation is active.
Test the Email Stage
- Wait a few minutes for the first email.
- Check the inbox, spam and promotions folders.
- Open the Starter Kit link.
- Confirm that the correct resource loads.
- Check the sender name, reply address and unsubscribe link.
- Confirm that the remaining six emails are scheduled.
Use another fresh address after correcting a problem. Kit states that Visual Automations do not work retroactively, so a subscriber who joined before you created or activated the automation may not enter it automatically.

What Happened When I Tested My Poptin and Kit Setup?
My first test showed that part of the funnel worked.
The Poptin popup accepted the email address. The test subscriber then appeared in Kit. However, the first email containing the Parent Blogging Starter Kit did not arrive.
That narrowed the problem down.
The WordPress and Poptin connection worked. The Poptin and Kit integration also worked. The missing connection sat inside Kit.
The selected Kit form needed to become the entry point for the Visual Automation that added subscribers to my seven-step welcome sequence.
Once that connection was identified, the lesson was clear:
A subscriber appearing in Kit proves that their details transferred. It does not prove that the promised email sequence started.
This is why I recommend testing five separate results:
- Popup submission.
- Poptin conversion.
- Kit form entry.
- Visual Automation entry.
- Starter Kit email delivery.
Why Is My Poptin Subscriber Not Receiving Kit Emails?
If the subscriber appears in Kit but receives nothing, the integration has probably completed its first job. Focus on the form, automation and sequence settings next.
The Wrong Kit Form Is Selected in Poptin
Open the integration settings and compare the selected form with the automation entry point. They must match.
The Kit Form Is Not an Automation Entry Point
Add Joins a form as the Visual Automation entry point and select the form used by Poptin.
The Visual Automation Is Inactive
Open the automation and check the active toggle. Kit warns that an automation will not work until it is activated.
The Sequence Has Not Been Added as an Action
The form entry point starts the automation. It does not select a sequence by itself. Add the email sequence as the next action.
The Email Sequence Is Inactive
An active automation can contain an inactive sequence. Activate the sequence so its published emails can send.
The First Email Is Unpublished
Open the sequence and check the status of the first email. Publish it and save any later changes.
The Send Schedule Is Delaying the Email
Check the sequence’s permitted days and the delay applied to the first email. Use as soon as possible if you want the lead magnet to arrive shortly after signup.
Double Opt-In Is Waiting for Confirmation
Poptin notes that Kit forms use double opt-in by default. If it is active, the reader must complete Kit’s confirmation step before being added as a confirmed subscriber.
Do not disable double opt-in simply to make a test easier. Decide which approach suits your list, audience and consent process.
You Reused an Existing Subscriber
An existing subscriber may already have completed the sequence or may be unable to restart it under the current sequence settings.
Test with a genuinely fresh email address.
The Automation Was Added After the Subscriber Joined
Visual Automations do not work retroactively. Correct the setup and run a new test rather than expecting an earlier subscriber to enter automatically.
The Account Authorisation or API Key Has Changed
Reconnect the Kit account if access has been revoked or an API key has been replaced.

Should You Use Double Opt-In With Poptin and Kit?
Double opt-in asks the subscriber to confirm their email address before the signup is fully accepted.
It can help you:
- Reduce mistyped email addresses.
- Keep automated or unwanted signups off the active list.
- Create clearer evidence of confirmation.
It also adds another step. Some genuine subscribers will not open or act on the confirmation message.
If you keep double opt-in active:
- Explain that a confirmation email is coming.
- Ask the reader to check their spam folder.
- Keep the confirmation message clear.
- Confirm when the Starter Kit will be delivered.
- Test the confirmation and delivery emails separately.
Poptin’s current integration guide says double opt-in is enabled by default for Kit forms and can be managed within the form’s confirmation email settings.
Do You Need a Tag as Well as a Kit Form?
No. The form can act as the Visual Automation entry point without an additional tag.
A tag can still be useful for organisation and reporting. For example, it can record that the subscriber came through a Poptin Starter Kit campaign.
Avoid building a complicated tagging system before you need it. Start with one clear form, one working automation and one relevant source tag if it helps.
Poptin-to-Kit Setup Checklist
Before considering the integration complete, confirm each item:
- The Poptin campaign is published.
- The correct Kit account is authorised.
- Poptin sends leads to the intended Kit form.
- The form is the Visual Automation entry point.
- The automation adds subscribers to the seven-step sequence.
- The Visual Automation is active.
- The email sequence is active.
- The first email is published.
- The first email is set to send at the intended time.
- The Starter Kit link works.
- The consent wording matches the follow-up emails.
- A fresh test subscriber completes the full journey.
Is Connecting Poptin to Kit Worth It?
Yes, if you want Poptin to control how the signup offer appears while Kit manages the subscriber and follow-up emails.
The integration gives each platform a clear job. Poptin handles the visible campaign, triggers and targeting. Kit handles the form record, automation and sequence.
However, the setup is only useful when you test the complete funnel. A popup that records a conversion without delivering the promised resource creates a poor first experience.
If you are still building the campaign, read my guide to creating a popup with Poptin. If Poptin is not yet connected to your website, start with how to add Poptin to WordPress without coding.
You can also read my full Poptin Review 2026 for its pricing, strengths and limitations.
If you are planning your first blog and email funnel, the free Parent Blogging Starter Kit includes practical tools for choosing your direction and working around family life.
Frequently Asked Questions
Does Poptin Integrate Directly With Kit?
Yes. Poptin offers a direct Kit integration. You can authorise your Kit account or connect manually with the API key requested by Poptin. You then select the Kit form that should receive leads from the Poptin campaign.
Is ConvertKit Now Called Kit?
Yes. ConvertKit changed its name to Kit. Older tutorials may describe the Poptin and ConvertKit integration, but they refer to the same email platform. Look for Kit when adding the integration inside Poptin.
Do I Need a Kit API Key to Connect Poptin?
Not always. Poptin currently supports direct account authorisation, which fills the required connection details automatically. It also provides a manual API-key method. Direct authorisation is the simplest option for most beginners.
Which Kit Form Should I Select in Poptin?
Choose the Kit form created for the offer in your Poptin campaign. The same form must be used as the entry point for the Visual Automation that adds subscribers to your email sequence.
Why Is My Subscriber in Kit but Not Receiving Emails?
Check that the selected Kit form is an entry point for an active Visual Automation. Confirm that the automation adds the subscriber to an active sequence and that the first email is published. Double opt-in or the sequence schedule may also delay delivery.
Can I Connect Poptin to a Kit Visual Automation?
Poptin sends the subscriber to a chosen Kit form. You then use that form as the entry point for a Kit Visual Automation. The automation can add the subscriber to an email sequence and apply any useful tags.
How Do I Test the Poptin and Kit Integration?
Use a fresh email address in a private browser window. Confirm that Poptin records the conversion, Kit records the correct form, the subscriber enters the Visual Automation and the first sequence email delivers the promised resource.
Let’s Chat
Have you connected Poptin to Kit yet?
Did your subscriber enter the correct sequence, or did they appear in Kit without receiving the promised email?
Leave a comment below. Your experience may help another blogger find the missing step in their own funnel.