
Creating a popup with Poptin is straightforward once you know what you want the popup to do.
The difficult part is rarely moving text boxes or changing colours. It is creating a useful offer, connecting the correct email form and making sure the complete subscriber journey works.
In this guide, I will show you how to create a lead-magnet popup with Poptin from the first template choice through to the final live test.
I use Poptin on Flex For Families to promote my free Parent Blogging Starter Kit. Poptin collects the subscriber’s details before Kit delivers the resource and begins the welcome sequence.
That real setup will provide the example throughout the tutorial.
Heads up: I use Poptin on Flex For Families and am a member of its affiliate programme. This article may contain affiliate links, which means I may earn a commission if you sign up through them, at no extra cost to you. My guidance is based on my own experience using Poptin’s free plan.
How Do You Create a Popup With Poptin?
You create a popup with Poptin by choosing a popup template, editing the design and form, selecting what happens after submission, setting the display rules and testing the complete campaign before publishing it.
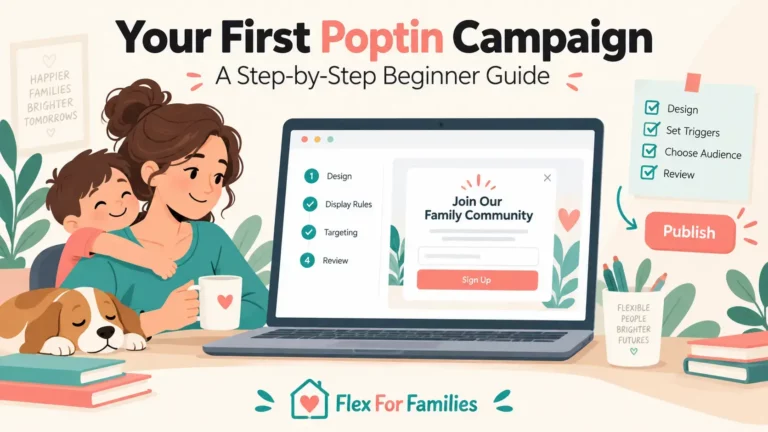
The process involves these sixteen steps:
- Prepare the offer and copy.
- Start a new popup.
- Choose the popup type.
- Select a template.
- Name the campaign and choose the domain.
- Set the size and background.
- Add the offer image.
- Write the headline and supporting copy.
- Add the CTA button.
- Choose the form fields.
- Set the post-submission action.
- Connect the email platform.
- Create the mobile version.
- Set the trigger, targeting and frequency.
- Test the complete subscriber journey.
- Publish and monitor the popup.
Poptin’s official first-popup guide follows the same broad route from campaign creation and template selection through to the display rules and publication.

What You Need Before Opening the Poptin Editor
Prepare the campaign before choosing a template.
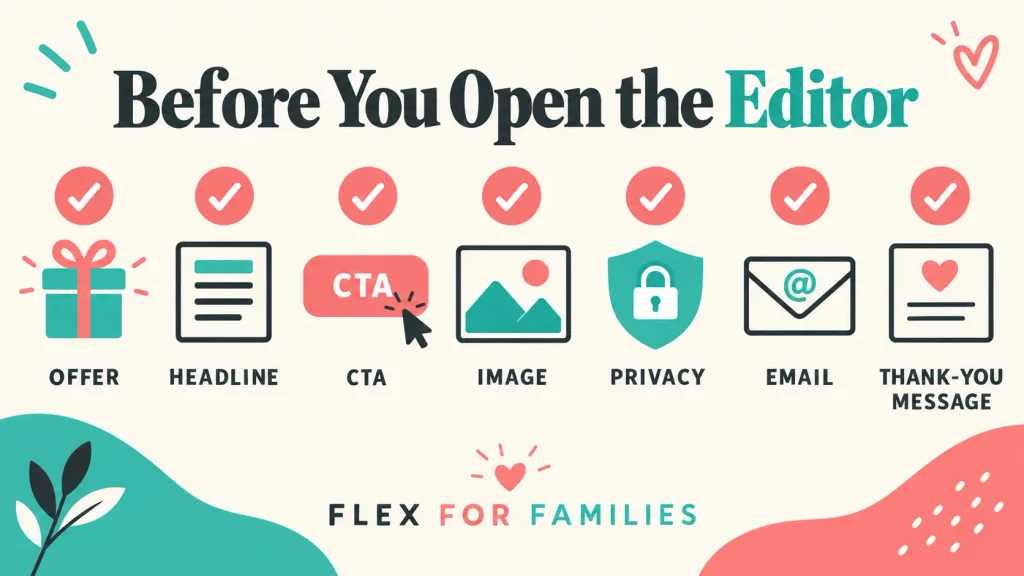
You will work faster when you already know:
- What you are offering.
- Who the offer helps.
- What information you need from the visitor.
- Which email form or list will receive the subscriber.
- How the visitor will receive the promised resource.
- Where and when the popup should appear.
For the Flex For Families campaign, the offer is the Parent Blogging Starter Kit. It helps busy parents choose a niche, organise content ideas and begin building a blog around family life.
The popup does not need to explain everything inside the Starter Kit. It only needs to make the offer clear enough for the right reader to decide whether they want it.
Prepare these assets before continuing:
- One short headline.
- One or two supporting sentences.
- Specific CTA button text.
- A compressed image of the offer.
- A privacy policy link.
- Your email-platform details.
- A thank-you message or destination page.
Step 1: Start a New Poptin Popup
Sign in to your Poptin account and open the Popups area of the dashboard.
Select the option to create a new popup. Depending on the current dashboard view, this may appear as Create, New Popup or New Poptin.
Choose Popup rather than an embedded form.
An embedded form remains inside a page. A popup appears over or alongside the page after a selected trigger activates it.
If your website is not connected yet, complete that step before you publish. WordPress users can normally connect Poptin through its plugin without editing the website code manually.
The full guide to using Poptin on your website explains the broader first-campaign process. A separate WordPress tutorial will cover the installation in detail.
Step 2: Choose the Right Popup Type
Poptin provides several campaign layouts. Choose the format that suits the offer and the amount of interruption you want to create.
Lightbox Popup
A lightbox appears over the main page content, often in the centre of the screen.
It suits a lead magnet because it gives the offer enough space for a headline, image, short description and form.
Slide-In Popup
A slide-in enters from the side or corner of the screen.
It normally covers less of the content and can feel less disruptive. I use a small bottom-corner campaign on Flex For Families after a visitor has scrolled through 50% of the page.
Floating Bar
A floating bar sits across the top or bottom of the page.
It works best for a brief announcement or short CTA. The limited space makes it less suitable for explaining a detailed lead magnet.
Full-Screen Popup
A full-screen campaign attracts attention by covering most or all of the page.
Use this format carefully. A beginner email offer rarely needs that level of interruption.
For this tutorial, choose a lightbox popup. A slide-in is also a sensible starting point if you want a smaller campaign.
Step 3: Select a Template
Choose a template based on its structure rather than its demonstration colours, image or wording.
Look for a layout that gives you:
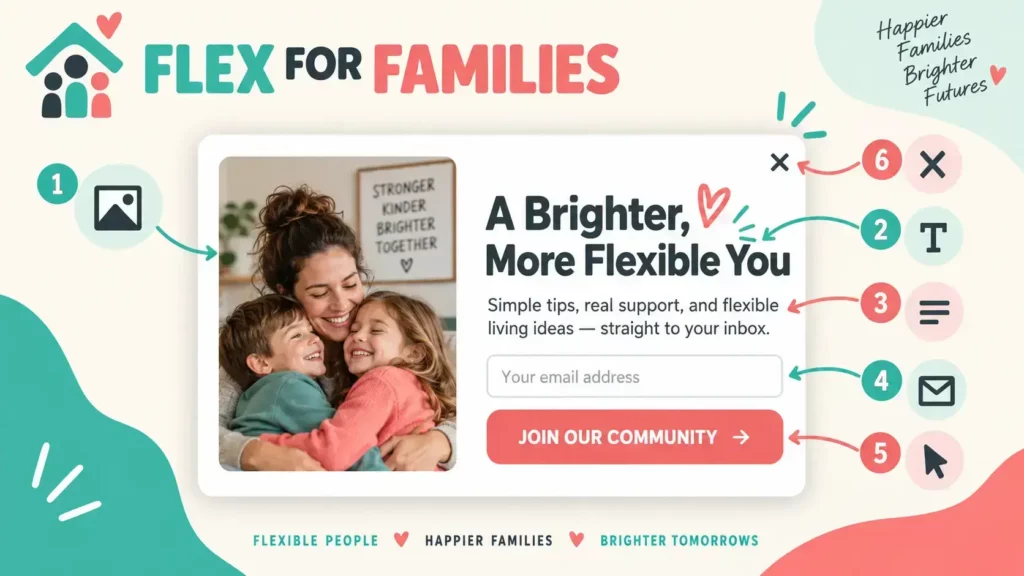
- Enough room for a short headline.
- One clear image area.
- One or two form fields.
- A prominent CTA button.
- A visible close button.
- A layout that can be simplified on mobile.
A busy template creates more editing work. Start with the simplest layout that can communicate the offer.
Avoid choosing a template because it contains animations, several buttons or a large number of decorative elements. Those features do not make the offer more useful.
Step 4: Name the Campaign and Choose the Domain
Give the popup an internal name that explains its purpose.
A useful naming structure is:
Offer | Format | Audience or Location
For example:
Parent Blogging Starter Kit | Main Popup | Blog Readers
This will be easier to identify later than “Popup 1” or “New Test.” Clear names also help when you have several campaigns or start comparing versions.
Choose the correct website domain and leave the popup inactive while you build it.
This prevents visitors from seeing an unfinished design.
Step 5: Set the Popup Size and Background
Open the design editor and start with the overall popup container.
Set the width and height so the design has enough space without dominating the browser window. Poptin lets you adjust the popup dimensions within the design settings. Its design help centre also explains how to edit the background, borders, shadows and individual elements.
Use a background that provides clear contrast with the text and form fields.
For Flex For Families, I use warm cream with teal, coral and charcoal details. Those colours match the rest of the website and keep the popup recognisable.
Do not fill every space. Padding around the headline, image and form makes the information easier to scan.
Check these elements:
- Popup width and height.
- Background colour or image.
- Inner spacing.
- Border and shadow.
- Close-button colour and position.
- Contrast between the text and background.
Step 6: Add Your Lead-Magnet Image
The image should help the visitor understand what they will receive.
For a downloadable lead magnet, use a clear cover, bundle mockup or simple preview of the resources. Avoid using an unrelated stock photo simply to fill the image space.
Poptin supports image elements inside the visual editor. Its guidance recommends keeping uploaded files below 1MB. Compressing the image also reduces the amount of work the browser needs to do.
Add helpful alternative text. Poptin supports alternative text for popup images as part of its accessibility options.
Good alternative text describes the image’s purpose. For example:
Preview of the free Parent Blogging Starter Kit resources.
Do not put essential details only inside the image. The headline and written copy should still explain the offer if the image fails to load.
Step 7: Write the Popup Headline and Supporting Copy
The headline should answer one immediate question:
What will I receive?
My lead-magnet popup uses a version of:
Get Your Free Parent Blogging Starter Kit
That is clearer than:
Join Our Newsletter
The second version asks the visitor to join something without explaining the practical benefit.
Use the supporting copy to show who the resource helps and what it helps them do.
For example:
Get practical resources to help you choose a niche, plan useful content and start building your blog around family life.
Keep the text short. Visitors should not need to read several paragraphs before reaching the form.
Step 8: Create a Specific CTA Button
The CTA should confirm what happens next.
Useful examples include:
- Send Me the Starter Kit.
- Get the Free Guide.
- Send Me the Checklist.
- Join the Free Workshop.
Avoid generic wording such as Submit or Click Here.
Make the button easy to see against the popup background. Keep the wording short enough to remain readable on mobile.
The CTA promise should match the headline. If the headline offers a free guide, the button should not suddenly refer to joining a community unless that is what the visitor is doing.
Step 9: Add Only the Form Fields You Need
For a basic lead magnet, an email address may be enough.
You may also request a first name if you genuinely use it to personalise your emails. Every additional field creates more work for the visitor.
Ask whether each field is necessary before adding it.
You may also need:
- A consent checkbox.
- A link to your privacy policy.
- Short wording explaining what the subscriber will receive.
Poptin lets you add a consent checkbox through the input-field settings. Your exact consent wording and requirements will depend on how you collect and use the data.
Keep the form labels visible. Do not rely only on placeholder text that disappears when the visitor starts typing.
Step 10: Decide What Happens After Submission
Poptin currently gives you three main actions after someone submits or clicks:
- Close the popup.
- Redirect the visitor to another page.
- Show a thank-you screen.
You can select these from the general design settings. Poptin documents the options in its button functionality guide.
For a lead magnet, a thank-you screen or dedicated thank-you page normally provides the clearest experience.
Tell the new subscriber:
- That the form was successful.
- Where the resource will arrive.
- How long delivery should take.
- Which email address or sender name to look for.
- What to do if the email does not appear.
Do not promise that the download is on its way until you have tested the delivery process.
Step 11: Connect Poptin to Your Email Platform
Open the Email and Integrations area inside the Poptin design settings.
Select your email platform and connect the popup to the correct destination. Depending on the platform, this may be a form, list, audience, group or tag.
The important word is correct.
When I first tested the Flex For Families setup, Poptin successfully sent the new subscriber into Kit. However, the welcome sequence did not begin.
The missing connection was inside Kit. The selected Kit form needed to be connected to the automation that delivered the Starter Kit and started the welcome emails.
The popup had worked, but the complete funnel had not.
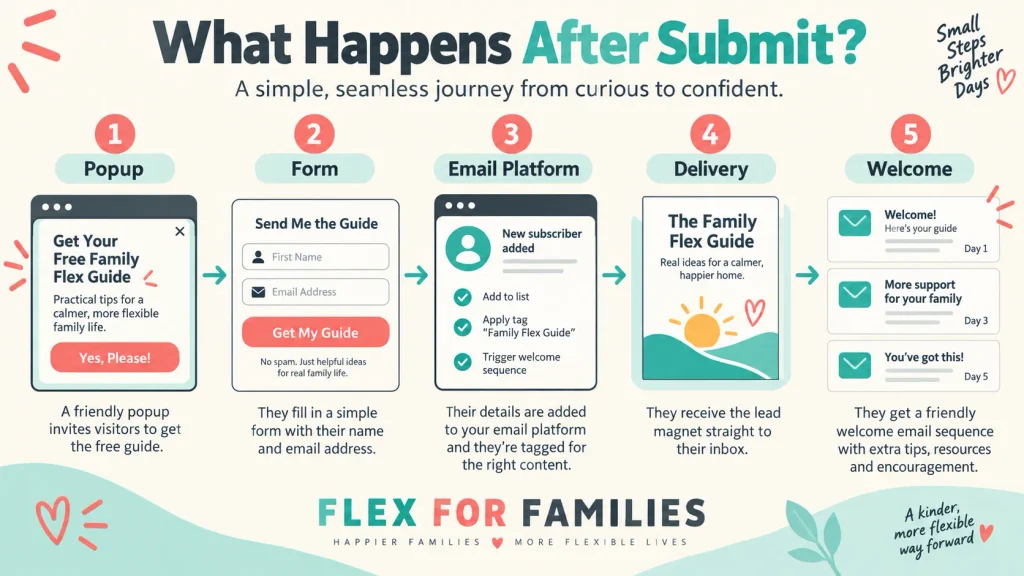
Confirm all four stages:
- Poptin receives the form submission.
- The email platform receives the subscriber.
- The correct form, tag or group is applied.
- The delivery email or automation begins.
The forthcoming Poptin and Kit guide will show that connection in full. This article keeps the focus on building the popup.
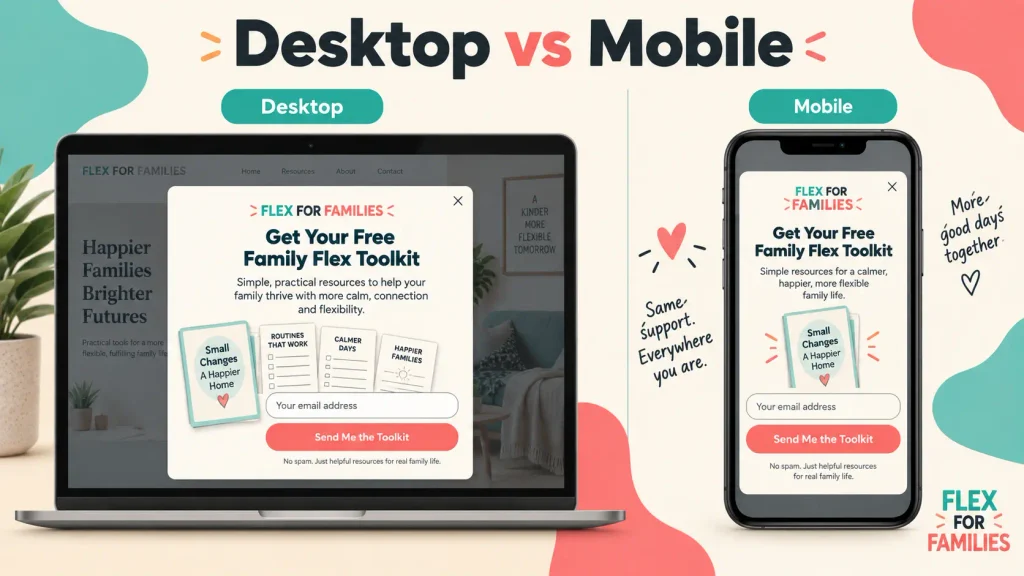
Step 12: Create and Check the Mobile Version
Do not assume the desktop design will work on a phone.
Poptin offers a mobile-editing option that creates separate desktop and mobile versions. Once separate mobile editing is enabled, changes to the desktop design do not automatically update the mobile design and vice versa. Poptin’s current guidance recommends a mobile size below 430 by 780 pixels.
Check the mobile version for:
- A headline that fits without becoming cramped.
- Body text that can be read without zooming.
- Form fields that are easy to tap.
- A full-width or clearly visible CTA.
- A close button that is easy to find and use.
- An image that does not push the form off the screen.
- Enough spacing between interactive elements.
You may need to reduce or remove the image on mobile. The offer and form matter more than preserving every desktop design element.
Step 13: Choose When and Where the Popup Appears
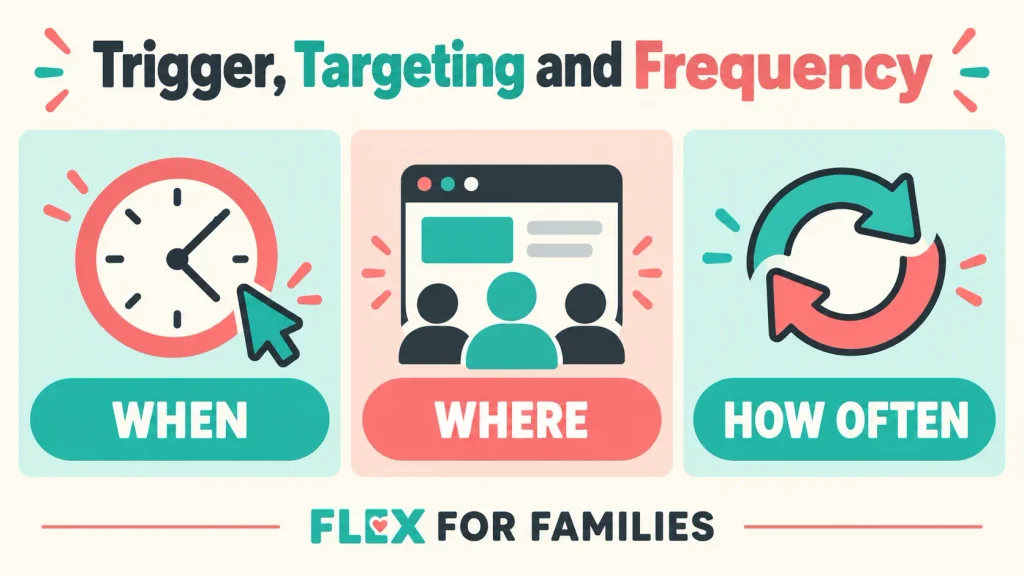
The trigger controls when the popup appears.
The targeting rules control where it appears and which visitors can see it.
These settings serve different purposes.
Poptin’s display-rules documentation covers triggers such as exit intent and page scroll, along with page, device, country, traffic-source and other targeting options.
Choose a Trigger
Common starting options include:
- Page scroll.
- Time delay.
- Exit intent.
- Click-based display.
My main Flex For Families popup uses exit intent or 20% scroll. My smaller bottom-corner campaign appears after 50% scroll.
Those settings give the visitor some opportunity to engage with the page before seeing the offer.
Set the Page Targeting
Decide whether the popup should appear:
- Across the whole website.
- Only on blog posts.
- On a specific topic cluster.
- On one landing page.
- Everywhere except selected pages.
Exclude pages where the offer would be unnecessary or disruptive. A thank-you page is an obvious example because the visitor may have already subscribed.
Set the Display Frequency
Poptin’s current frequency options include once per day, every visit and every session.
Start with a restrained setting. Showing the same popup repeatedly during one visit can frustrate the reader.
The dedicated targeting guide will cover these controls in more detail.
Step 14: Preview the Popup Before Publishing
Use Poptin’s preview options to check the desktop and mobile versions.
Review every visible element:
- Headline.
- Supporting copy.
- Image.
- Form labels.
- Consent wording.
- CTA button.
- Close button.
- Thank-you screen.
Check the spelling and links. Confirm that the colours provide enough contrast and that keyboard users can reach the fields, button and close control.
Poptin states that its forms support keyboard navigation, screen readers, image alt text and relevant ARIA labels. Your design choices still matter, particularly colour contrast, wording and close-button visibility.
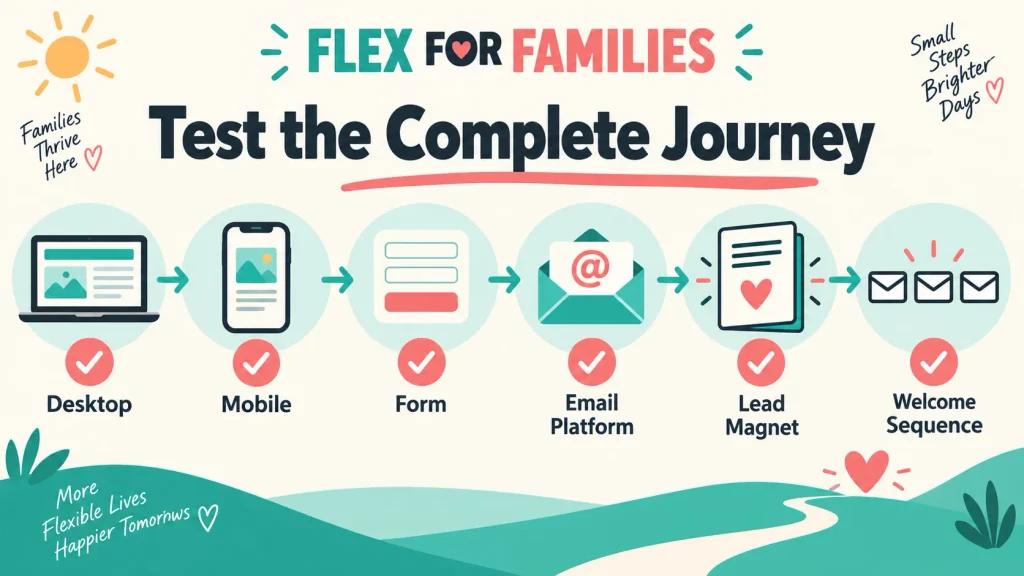
Step 15: Test the Complete Subscriber Journey
This is the most important stage.
Do not stop when the popup accepts your email address.
Use a fresh email address and test the complete journey:
- Open your website in a private browser window.
- Visit a page that should display the popup.
- Activate the trigger naturally.
- Check the desktop layout.
- Repeat the process on a phone.
- Enter a fresh email address.
- Confirm the success message or redirect.
- Check that Poptin recorded the conversion.
- Check that the subscriber reached the correct email platform.
- Confirm the correct form, tag or group was applied.
- Open the delivery email.
- Test the resource link.
- Confirm that the welcome sequence begins.
- Check that the popup does not immediately appear again.
Also visit one page that should be excluded. Confirm that the popup does not appear there.
Repeat the test whenever you change the integration, automation, trigger or destination page.
Step 16: Publish and Monitor the Popup
Once every stage works, activate the popup and test it again on the live website.
Monitor:
- Website visitors.
- Popup views.
- Conversions.
- Conversion rate.
- Successful email-platform submissions.
- Mobile behaviour.
- Delivery and automation problems.
Do not judge the campaign from a handful of views.
My Flex For Families funnel works and sends subscribers into Kit. However, the traffic and conversion sample is still too small for me to claim that one popup design or trigger is proven to convert better.
Collect enough useful data before making major changes. When you do test an improvement, change one material element at a time, such as the headline, offer, trigger or CTA.
Common Poptin Popup Mistakes
Using a Vague Offer
“Join our mailing list” does not explain why the visitor should subscribe.
Give them a useful reason.
Adding Too Much Copy
A popup is not a full landing page. Keep the central offer easy to understand.
Requesting Too Much Information
Only collect the details you genuinely need.
Ignoring the Mobile Design
A popup that looks tidy on a laptop can cover the whole phone screen or hide the CTA.
Displaying It Too Soon
An immediate popup asks for trust before the visitor has read anything. Give them time to engage where the offer allows it.
Hiding the Close Button
Visitors should be able to decline the offer easily.
Connecting the Wrong Email Form
The address can reach your platform without entering the correct delivery automation.
Testing Only the Form
A successful submission does not prove the lead magnet or welcome sequence works.
Showing the Popup Too Often
Use display-frequency controls to avoid repeatedly interrupting the same visitor.
Changing Several Elements Together
If you change the offer, headline, design and trigger at once, you will not know which change affected the result.
Is Creating a Popup With Poptin Difficult?
Creating the visual popup is beginner-friendly because Poptin provides templates and a visual editor.
The part that deserves more attention is the system around it. You need a clear offer, the correct email integration, sensible display rules and a complete test.
Start with one popup and one outcome. You can add more campaigns, targeting rules and tests after the first funnel works reliably.
For an overview of the features, plans and limitations, read my full Poptin Review 2026. You can also read What Is Poptin and How Does It Work? if you want a beginner’s explanation of the platform.
If you are starting your own blog, the free Parent Blogging Starter Kit gives you practical resources for choosing a niche, planning content and organising your available time.
Frequently Asked Questions
Can I Create a Poptin Popup for Free?
Yes. Poptin offers a free plan that can be used to create and test popups on a small website. Check the current visitor, domain and branding limits before publishing because plan allowances can change. Build one working campaign before paying for features you may not need.
Do I Need Coding Skills to Create a Poptin Popup?
No. Poptin provides templates and a visual editor for changing the text, images, form fields, buttons and design. WordPress users can normally connect the service through a plugin. Manual code may still be relevant for unsupported platforms or specialist tracking setups.
Which Poptin Template Should a Beginner Choose?
Choose a simple lightbox or slide-in template with space for one headline, a short explanation, one or two form fields and a clear CTA. Select the template for its structure rather than its demonstration colours. A simple layout is easier to adapt for mobile.
Can I Create Separate Desktop and Mobile Popups?
Yes. Poptin includes separate mobile editing. Once you enable it, changes to the desktop version do not automatically update the mobile version. Check both layouts before publishing and simplify the mobile version if the image or copy pushes the form off the screen.
How Do I Connect a Poptin Popup to My Email Platform?
Open the Email and Integrations section in the popup editor, select your provider and connect the correct form, list, audience or tag. Then submit a fresh test address. Confirm that the subscriber reaches the correct destination and enters the delivery automation.
Why Is My Poptin Popup Not Collecting Subscribers?
Check that the campaign is active, installed on the correct domain and allowed to appear on the test page and device. Review the trigger, frequency and targeting rules. If the form submits but no email arrives, check the email-platform connection, form selection and automation.
How Should I Test a Poptin Popup Before Publishing?
Use a private browser window and a fresh email address. Trigger the popup on desktop and mobile, submit the form, check the success action, confirm the subscriber reaches your email platform, open the delivery email and verify that the correct welcome sequence begins.
Let’s Chat
Have you created a popup with Poptin yet?
What are you using it for, and which part of the setup has caused the most confusion?
Leave a comment below. Your question may help another blogger solve the same problem.